
Saving Documents in the Mail Box
There are two methods for saving documents in the Mail Box: scanning originals from the machine and sending files on a computer from the printer driver. Print settings are saved together with documents that are saved from a printer driver, allowing you to always print documents with the same finishing, as well as saving you the trouble of specifying settings.
 |
We recommend that you delete unwanted files or image data from your Mail Box to make space for storing new documents. |
Scanning from the Machine to Save
1
Set the original. Placing Documents
2
Press <Scan and Store>. <Home> Screen
3
Press <Mail Box>.
4
Select the box to save in.
For information on the items on the screen and instructions on how to use them, see Editing Files in the Mail Box.
5
Press <Scan>.
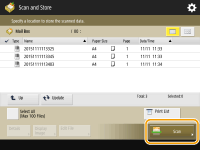 (Items shown on the screen may differ depending on your model and options.) |
6
Specify the scan settings as necessary.
For scan settings, see Setting Screen and Operations for Scanning to Save.
7
Press  (Start).
 (Start).
Originals are scanned and saved as files.
To cancel scanning, press <Cancel> or  (Stop)
  <Yes>.
 (Stop)
  <Yes>.
 When <Press the [Start] key to scan the next original.> is displayed
Place the next original to scan and press  (Start). After scanning all of the originals, press <Start Storing> to save the file.
 (Start). After scanning all of the originals, press <Start Storing> to save the file.
Saving Data on Computers
1
Open a file and display the print screen.
2
Select the machine and click [Preferences] or [Properties].
3
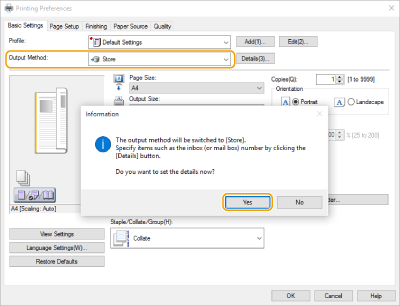
Select [Store] from [Output Method] and click [Yes].
4
Specify the detailed settings for saving and click [OK].
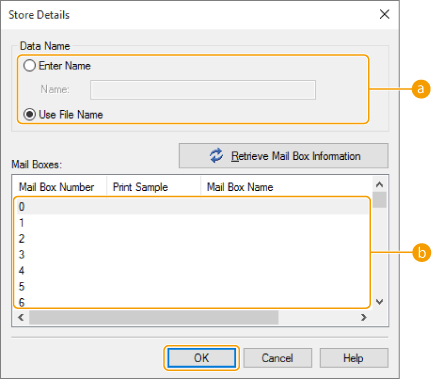
 [Data Name]
To save using the file name of the data on the computer, select [Use File Name]. To change the file name, select [Enter Name] and enter a file name in the [Name] text box.
 [Mail Boxes]
Select the box you want to save in. Clicking while holding down the [CTRL] key on the computer keyboard enables you to select multiple boxes and save the same files in each box.

The box name registered in the machine can be applied to the printer driver. For details, see Help of the printer driver.
5
Specify the print settings as necessary and click [OK].
6
Click [Print] or [OK].
The file is saved in the box selected in step 4.
1
Open a file and display the print screen.
2
Select the machine and specify the print settings.
3
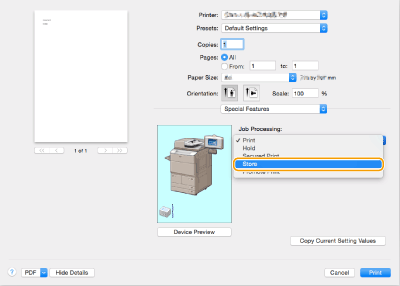
Select [Store] in [Job Processing] of [Special Features] panel.
4
Click [Print].
5
Specify the detailed settings for saving.
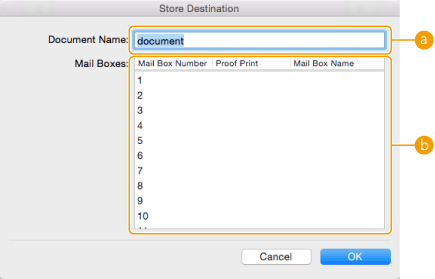
 [Document Name]
Enter the name of a file to save in the box.
 [Box]
[Box]Select the box you want to save in. Clicking while holding down the [COMMAND] key on the computer keyboard enables you to select multiple boxes and save the same files in each box.
6
Click [OK].
The file is saved in the box selected in step 5.

