 (Start). After scanning all of the originals, press <Start Storing> to save the file.
Saving Documents in Other Devices
Follow the procedures below to save scanned documents in the Advanced Box of another Canon multifunction printer or in a Windows server.
1
Set the original. Placing Originals
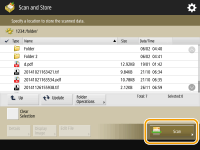
2
Press <Scan and Store>. <Home> Screen
3
Press <Network>.
4
Select the device you want to access.
For information on the items on the screen and instructions on how to use them, see Working with Files and Folders in Other Devices.
5
Display the save location and press <Scan>.
6
Specify the scan settings as necessary.
For scan settings, see Setting Screen and Operations for Scanning to Save.
7
Press (Start).
(Start).Originals are scanned and saved as files.
When canceling scanning, press <Cancel> or  (Stop)
  <Yes>.
(Stop)  When <Press the [Start] key to scan the next original.> is displayed
Place the next original to scan and press (Start). After scanning all of the originals, press <Start Storing> to save the file.
(Start). After scanning all of the originals, press <Start Storing> to save the file.
To check the result of saving, press  (Status Monitor) <Store> <Job Log>. If <NG> is displayed, the file is not saved successfully. Try operating again.
(Status Monitor)