You can register destinations to the Address Book using the operation panel.
You can use the following methods to register e-mail addresses (e-mail, I-Fax) and fax numbers:
Registering Destinations to the Address Book (Operation Panel)
Register destinations by directly entering their information. Register destinations by calling up the TX Job Log. Register destinations by searching for user information managed with an LDAP server. |
Required Preparations |
If you are using an LDAP server, register the LDAP server to be used for searching for destinations to the machine. Registering LDAP Servers |
1
On the operation panel, press [Address Book] in the [Home] screen. [Home] Screen
2
Press [Register Dest.].
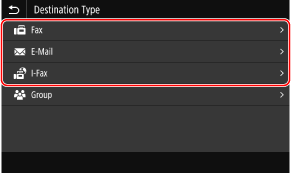
The [Destination Type] screen is displayed.
If the [Address Book PIN] screen is displayed, enter the PIN, and press [Apply].
3
Select the destination type.

When registering group destinations, see the following.
Registering Groups to the Address Book (Operation Panel)
Registering Groups to the Address Book (Operation Panel)
4
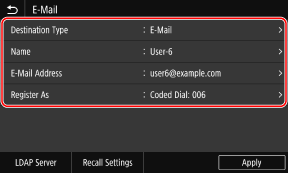
Enter the destination information.

You can register a destination without entering its name, but by entering the name, you can search for it by its initials when specifying the destination.
 When Directly Entering the Destination
Press [Name] and enter the name, and then press [Apply].
For destination information, press [E-Mail Address], [I-Fax Address], or [Fax Number], enter that information, and then press [Apply].
When entering an international destination in [Fax Number], enter the international access number, country code, and fax number in that order. If you are unable to connect, press [Pause] in between the numbers to add a pause. You can change the pause time. [Set Pause Time]
 When Entering the Destination by Calling Up the TX Job Log
Press [Name] and enter the name, and then press [Apply].
For the TX Job Log, press [Recall Settings], and select a destination. The destination is entered in the registration screen of the Address Book.
 When Entering the Destination by Searching an LDAP Server
1 | Press [LDAP Server]. |
2 | Select the LDAP server. |
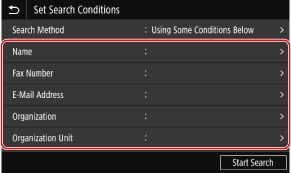
3 | Select the search item, and specify the search string.  Enter the string to search for, and press [Apply]. You can specify multiple search items. |
4 | Select [Search Method], and select the search conditions. To search for users who meet all items specified in Step 3, select [Using All Conditions Below]. To search for users who meet any of the items specified in Step 3, select [Using Some Conditions Below]. |
5 | Press [Start Search]. The users who meet the search conditions are displayed. When the authentication screen is displayed, enter the user name and password of the machine that is registered to the LDAP server, and press [Apply]. |
6 | Select the user to register to the Address Book. The name and destination are entered in the registration screen of the Address Book. |
5
Set the fax sending details, as needed. 

If a fax number was registered in Step 4, set the details when a send error occurs or it takes time to send a fax to that number.
If you registered something other than a fax number, this step is not required. Proceed to Step 6.
If you registered something other than a fax number, this step is not required. Proceed to Step 6.
1 | Press [Fax Number]  [Set Details]. [Set Details]. |
2 | Set the items, and press [Apply]. [ECM TX]*1 When an error occurs for an image being sent, the machine corrects the image so as not to send a distorted image. [TX Speed]*1 If it takes time to start sending a fax, such as when there is a poor phone line connection, the machine lowers the communication start speed. [Long Distance] If a communication error occurs when sending a fax to an international destination, select [International (1)]. If the error does not improve, select [International (2)] and [International (3)] in that order. *1 If this is not set here, the settings that appear when selecting [Menu] in the [Home] screen and then selecting [Function Settings] are applied. [ECM TX] [TX Start Speed] |
6
Press [Register As], and select [Favorites] or [Coded Dial].
When [Coded Dial] is selected, select an unregistered number, or press [Use Numeric Keys] and enter a three-digit Coded Dial number.
7
Press [Apply].
The destination is registered to the Address Book.
 |
Registering a Destination from the TX Job Log of a Scan or Fax JobIn addition to calling up the TX Job Log from the Address Book, you can also register destinations from the TX Job Log of a scan or fax job to the Address Book. Checking the Send and Save Status and Log of Scanned Data Checking the Status and Log for Sent and Received Faxes |