Managing Printer Keys
NOTE |
Keys installed in printers by default cannot be manage in this software. The same keys are managed as different keys if they have a different [Name] and [Usage]. |
Adding a Key
1.
Select the [Data Management] menu > [Certificates].
2.
Select [Keys] from the drop-down list on the top of the [Manage CA Certificates/Keys] page.

3.
Select the file to add in [PKCS#12 File].
4.
Enter the key name to register to the printer in [Name].
5.
In [Password], enter the password for exporting specified when creating the PKCS#12 format file.
6.
In [Usage], select the intended use of the key.
IMPORTANT |
Select at least one intended usage. The intended usages that are registered for a key cannot be changed. If you add a key that was registered without specifying the intended usage, it is necessary to set the intended usage in each printer after adding the key, |
7.
Click [Add].
Displaying the Registered Keys
1.
Select the [Data Management] menu > [Certificates].
2.
Select [Keys] from the drop-down list on the top of the [Manage CA Certificates/Keys] page.
[Verify Key] button
Executes .NET Framework certificate validation on a certificate managed in this software.
List
[Name] | The name set when the key was registered to this software. Click this to display the detailed information for the key. |
[Usage] | The intended usage set when the key was registered to this software. The intended usage of a registered key cannot be changed. To change the intended usage, delete the target key from this software, and register it again. |
[Subject] | The subject information included in the registered key file. |
[Issuer] | The issuer information included in the registered key file. |
[Validity End Date] | The expiration date of the key. |
[Number of Printers with Key Associated] | Displays the number of devices groups and number of printers associated with the key in the format [(<number of device groups>/<number of printers>)]. Click this to display the [Printers Associated with Key] page. |
[Number of Printers with Certificate Installed] | The number of printers with the key installed. Click this to display a list of the installed printers. |
[Verify Key] | The result of performing verification by clicking [Verify Certificate] on the top of the list. If [Invalid] is displayed, place the mouse cursor over it to display the reason that [Invalid] is displayed. The reason that [Invalid] is displayed is in the language set for the operating system of the computer where this software is running. |
Associating Keys and Printers
1.
Click the value in the [Number of Printers with Key Associated] column of the target key from the list.
2.
Select the printers to associate with the key.
Click [Devices] or [Groups], and select the printers or groups to associate.
When [Devices] is clicked, you can apply a filter to filter the printers displayed in the list.
A maximum of 5,000 printers can be selected at once.
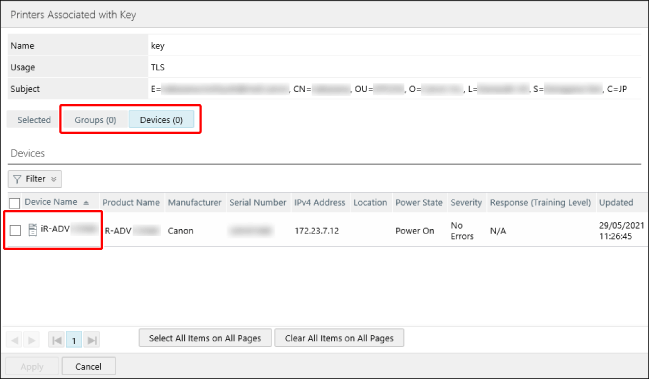
Click [Selected], and confirm that the selected printers and groups are displayed.
3.
Click [Apply].
Deleting a Key
1.
Click [ ] next to the key to delete.
] next to the key to delete.[] is displayed when no printers with the target key installed exist.
] is displayed when no printers with the target key installed exist.NOTE |
A key cannot be deleted if it is associated with a printer in a region that the user does not belong to. |