Addition of an Optional Equipment
Staple Finisher Lite-A has been added to optional equipment.
Overview
Installing "Staple Finisher Lite-A", enables you to use the following finish functions.
Collate
The printouts are collated into sets arranged in page order of the original.
Group
All printouts of the same original page are grouped together into sets.
Offset
Each printout group is shifted in alternating layers.
Staple + Collate
The printouts are collated into sets arranged in page order and stapled (Corner/Double).
Staple + Group
All printouts of the same original page are grouped together into sets and stapled (Corner/Double).
Manual Stapling
You can manually staple printed paper by inserting paper in the slit. As an example of use, you can remove staples bound to the original, copy or scan it, and then staple the original again.
You can manually staple printed paper by inserting paper in the slit. As an example of use, you can remove staples bound to the original, copy or scan it, and then staple the original again.
TIPS |
If you install the "2/3 Hole Puncher Unit-A" or "2/4 Hole Puncher Unit-A" (for the 230 V machine only) in the "Staple Finisher Lite-A", you can punch holes in your printouts. |
 | ||
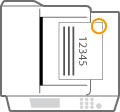
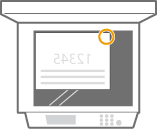
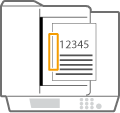
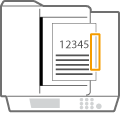
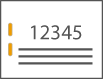
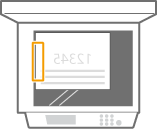
 Tray A
The prints are output to this tray. You can specify functions for which the tray is used by configuring <Output Tray Settings>.
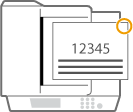
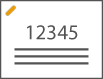
 Staple Button
Press this button when you manually staple paper (Manual Stapling). You can also staple paper without pressing the button. You can specify the time period for the paper to be stapled after inserting the paper. <Adjust Action>  <Time Until Stapling Starts in Stapler Mode>.
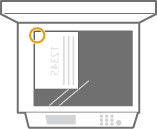
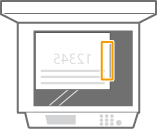
 Front cover
Open to remove jammed paper, clear a staple jam in the stapler unit or replace the staple cartridge. If the "2/3 Hole Puncher Unit-A" or "2/4 Hole Puncher Unit-A" (for the 230 V machine only) is installed, open to discard punch waste.
 Punch waste tray (2/4 Hole Puncher Unit-A/2/3 Hole Puncher Unit-A (for the 230 V machine only))
Pull out to discard punch waste. Emptying the Punch Waste
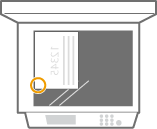
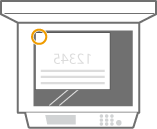
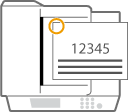
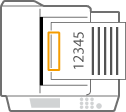
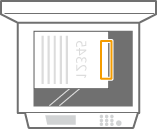
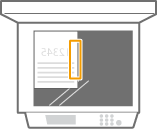
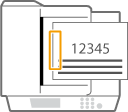
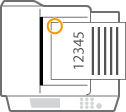
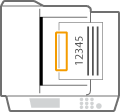
 Slit
Slit
Insert paper to manually staple the paper. You can specify the time period for the paper to be stapled after inserting the paper.
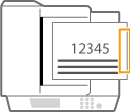
 Tray B
The prints are output to this tray. You can specify functions for which the tray is used by configuring <Output Tray Settings>.
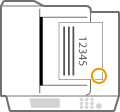
Selecting the Staple Position
To finish with the stapler, you need to select the staple position paying attention to the orientation of original document.
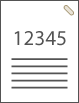
 Stapling at One Location in a Corner of the Paper (Corner)
Refer to the following figures to select the staple position.
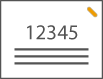
Stapling at the top right of paper in portrait orientation
When Placing LTR-, A4-, A5-size Originals
Feeder | Platen glass | ||
 | 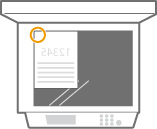 |
select <Top Right>
When Placing 11" x 17"-, LGL-, A3-size Originals
Feeder | Platen glass | ||
 | 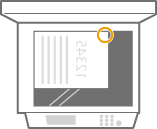 |
select <Top Left>
Stapling at the top left of paper in portrait orientation
When Placing LTR-, A4-, A5-size Originals
Feeder | Platen glass | ||
 |  |
select <Top Left>
When Placing 11" x 17"-, LGL-, A3-size Originals
Feeder | Platen glass | ||
 |  |
select <Bottom Left>
Stapling at the top right of paper in landscape orientation
When Placing LTR-, A4-, A5-size Originals
Feeder | Platen glass | ||
 |  |
select <Bottom Right>
When Placing 11" x 17"-, LGL-, A3-size Originals
Feeder | Platen glass | ||
 |  |
select <Top Right>
Stapling at the top left of paper in landscape orientation
When Placing LTR-, A4-, A5-size Originals
Feeder | Platen glass | ||
 |  |
select <Top Right>
When Placing 11" x 17"-, LGL-, A3-size Originals
Feeder | Platen glass | ||
 |  |
select <Top Left>
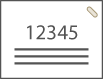
Stapling at Two Locations in a Margin Area of the Paper (Double)
Refer to the following figures to select the staple position.
Stapling in the top margin area of paper in portrait orientation
When Placing 11" x 17"-, LGL-, A3-size Originals
Feeder | Platen glass | ||
 |  |
select <Left>
Stapling in the left margin area of paper in portrait orientation

When Placing LTR-, A4-, A5-size Originals
Feeder | Platen glass | ||
 |  |
select <Left>
Stapling in the right margin area of paper in portrait orientation

When Placing LTR-, A4-, A5-size Originals
Feeder | Platen glass | ||
 |  |
select <Right>
Stapling at the left margin area of paper in landscape orientation
When Placing 11" x 17"-, LGL-, A3-size Originals
Feeder | Platen glass | ||
 |  |
select <Left>
Stapling in the right margin area of paper in landscape orientation

Feeder | Platen glass | ||
 |  |
select <Right>
Binding the Paper by Crimping without Using Staples (Corner)
Refer to the following figures to select the crimp position when crimping the paper without using staples.
Stapling at the top right of paper in portrait orientation
When Placing LTR-, A4-, A5-size Originals
Feeder | Platen glass | ||
| |
select <Top Right>
When Placing 11" x 17"-, LGL-, A3-size Originals
Feeder | Platen glass | ||
 |  |
select <Top Left>
Stapling at the top left of paper in portrait orientation

When Placing LTR-, A4-, A5-size Originals
Feeder | Platen glass | ||
| |
select <Top Left>
When Placing 11" x 17"-, LGL-, A3-size Originals
Feeder | Platen glass | ||
| |
select <Bottom Left>
Stapling at the top right of paper in landscape orientation
When Placing LTR-, A4-, A5-size Originals
Feeder | Platen glass | ||
| |
select <Bottom Right>
When Placing 11" x 17"-, LGL-, A3-size Originals
Feeder | Platen glass | ||
| |
select <Top Right>
Stapling at the top left of paper in landscape orientation
When Placing LTR-, A4-, A5-size Originals
Feeder | Platen glass | ||
| |
select <Top Right>
When Placing 11" x 17"-, LGL-, A3-size Originals
Feeder | Platen glass | ||
| |
select <Top Left>
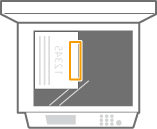
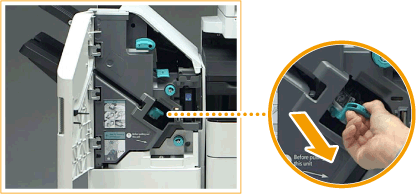
Manual Stapling
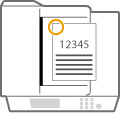
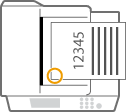
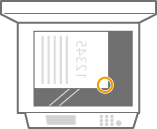
1 | Place the desired bundle of paper into the slit in the staple finisher or booklet finisher. Insert the corner of the paper bundle where you want it stapled straight into the slit, with the front side of the paper facing down. When the paper bundle is sensed, the staple button starts to blink and automatic stapling is performed. 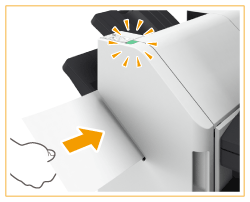  You can set the time in seconds to elapse before stapling is executed. You can perform stapling without waiting for the specified stapling start time to come. While holding the paper bundle with one of your hands, use the other hand to press the staple button. 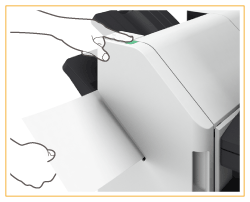 |
2 | Pull out the paper bundle. Wait for the staple button to turn off, and then pull out the paper bundle. |
 |
You cannot perform manual stapling while outputting of printed paper continues. |
Making Punch Holes
Refer to the following figures to place the original so that punch holes are made at the desired positions.
Making punch holes in the left margin area of paper in portrait orientation

When Placing LTR-, A4-, A5-size Originals
Feeder | Platen glass | ||
| |
Making punch holes in the top margin area of paper in portrait orientation
Feeder | Platen glass | ||
| |
Making punch holes in the left margin area of paper in landscape orientation
Feeder | Platen glass | ||
| |
Making punch holes in the top margin area of paper in landscape orientation

When Placing LTR-, A4-, A5-size Originals
Feeder | Platen glass | ||
 |  |
 |
The maximum number of bindable sheets may not be possible, depending on the paper type. In this case, change the paper type, or reduce the number of sheets to bind. Collate and groupIf you select <Offset> in combination with the collate or group function, each printout group is shifted. Once an output tray has reached its stacking limit, subsequent prints are automatically delivered to the next available tray. If all of the available trays have reached their stacking limits, printing stops. Remove all of the output paper from the trays to resume printing. StaplersWhen you are using the Staple mode, do not remove the stack of paper from the output tray during the job. Remove the stack of paper when the job has been completed. If the <Load staples into the stapler unit.> message appears, almost all of the staples have been used. To proceed, replace the staple cartridge. If a tray reaches the lowest position limit, printing stops temporarily. Remove all of the output paper from the tray to resume printing. |
Loading Staples
When the staples in the finisher have run out, an icon prompting you to replenish the staples is displayed on the bottom right of the screen. Press the icon, and follow the instructions on the screen to replace the staple case.
 |
Copies and prints may be output to optional equipment while you are replacing the staple. Take care when handling the optional equipment installed to the machine. |
Staple Cases for Replacement
Make sure to use the dedicated replacement staple case for this machine. Also note that the product number of the staple case to use differs according to the finisher.
Staples
Finisher name | Genuine Canon staple case |
Staple Finisher Lite-A |  Staple Cartridge-X1 |
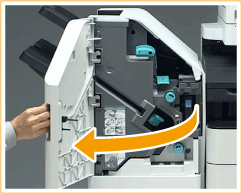
Replacing the Staple Case in the Stapler Unit
1
Open the front cover of the finisher.
2
Pull out the staple cartridge.
Hold the green tab on the staple cartridge and pull it straight out.
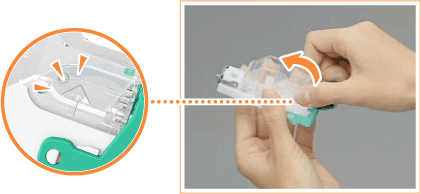
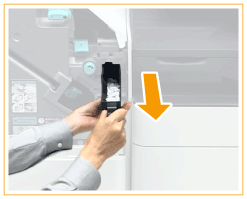
3
Remove the empty staple case from the staple cartridge.
Pinch the arrow marks on the staple case, and remove it in the direction of the arrow.
4
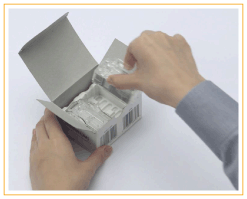
Remove the new staple case from its box.
5
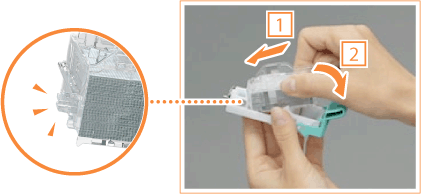
Load the new staple case to the staple cartridge.
Insert the tab on the end of the staple case into the staple cartridge, then lower the staple case to attach it.
6
Hold the green tab on the staple cartridge and push it in as far as it will go.

7
Close the front cover of the finisher.
Emptying the Punch Waste
When the punch waste in the finisher is full, an icon is displayed on the bottom right of the screen. Press the icon and follow the instructions on the screen to empty the punch waste.
|
Copies and prints may be output to optional equipment while you are emptying the punch waste. Take care when handling the optional equipment installed to the machine. |
Discarding Punch Waste
1
Open the front cover of the finisher.
2
Pull out the punch waste tray.
Hold the handle, and gently pull out the tray towards yourself.
After pulling out the punch waste tray half way, place your hand underneath it and pull it out all the way.
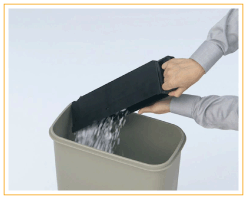
3
Empty the punch waste.
4
Return the punch waste tray to its original position.

Push the punch waste tray in as far as it will go.
5
Close the front cover of the finisher.
Clearing Paper Jams
This section describes the method for clearing paper jams in a finisher. Check the paper jam location on the screen, and follow the procedure in the reference indicated below to remove the paper.
|
Confirm before handlingRemove any paper loaded in a tray. Close any covers that are open. |
Paper Jams in the Staple Finisher
1
Open the cover of the buffer pass unit.
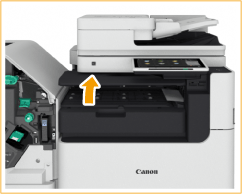
2
Check whether paper is jammed.
If paper is jammed, gently pull it out in the direction of the arrow.
3
Close the cover of the buffer pass unit.
4
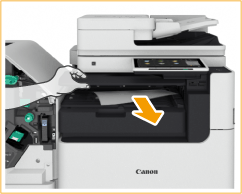
Check whether paper is jammed in the finisher.
 | Open the front cover of the finisher. |
 | Lift up the output tray paper supporter of the main tray. 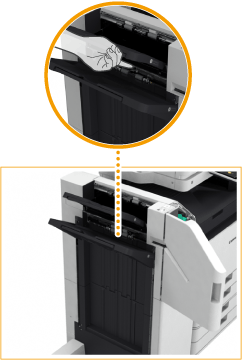 |
 | Turn the green knob to feed the jammed paper to the main tray side. 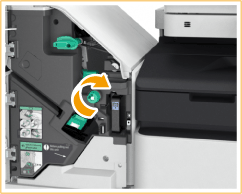 |
 | If paper comes out of the outlet of the main tray, gently pull the paper out in the direction of the arrow. 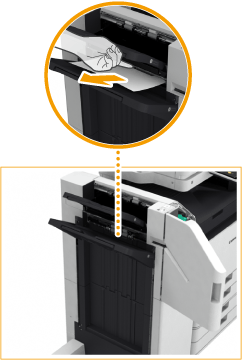 |
5
Check whether paper is jammed in the delivery unit.
| Open the escape delivery guide (  ). ).If paper is jammed, gently pull it out in the direction of the arrow. 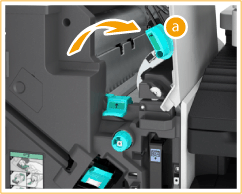 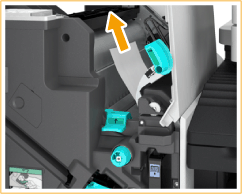 |
| Lift up the first flapper (  ). ).If paper is jammed, gently pull it out in the direction of the arrow. 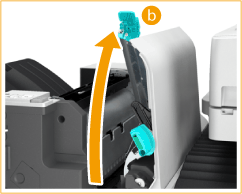 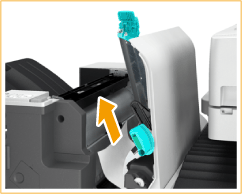 |
| Return the first flapper ( ) to its original position. |
| Lower the escape delivery guide ( ). |
6
Close the front cover of the finisher.
Continue following the instructions on the screen to proceed with the interrupted operation or continue clearing paper jams.
Clearing Staple Jams
If a staple jam occurs, a message, the location of the staple jam, and the procedure for clearing it are displayed on the screen. Check the staple jam location on the screen, and follow the procedure in the reference indicated below to remove the staple.
 |
Copies and prints may be output to optional equipment while you are clearing staple jams. Take care when handling optional equipment that is installed. |
|
Confirm before handlingWhen clearing staple jams, confirm that the covers and paper drawers of the machine and optional equipment are closed. |
Staple Jams in the Staple Finisher
1
Open the front cover of the finisher.
2
Pull out the staple cartridge.
Hold the green tab on the staple cartridge and pull it straight out.
3
Remove any jammed staples from the staple cartridge.
| Lift up the knob on the staple cartridge. 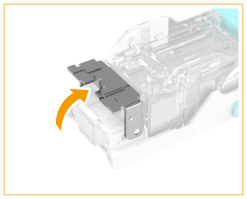 |
| Remove all jammed staples and exposed staples. 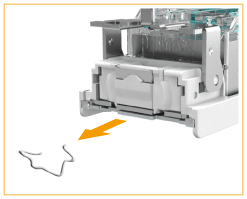 |
| Return the knob on the staple cartridge to its original position. |
4
Hold the green tab on the staple cartridge and push it in as far as it will go.
5
Close the front cover of the finisher.
The finisher may automatically perform dry stapling to perform staple repositioning.
Specifications
Paper Sizes | 120 V machine: Paper available for the Main Unit. For details, see "Available Paper" 230 V machine: Paper available for the Main Unit. For details, see "Available Paper" |
Paper Weight | 14 lb bond to 110 lb cover (52 g/m2 to 300 g/m2) |
Paper Types | Paper available for the Main Unit. For details, see "Available Paper" |
Capacity Per Tray*2 | Upper Tray (Tray A)No Collating/Collate/Group mode: LTR, STMT, STMTR, EXEC, A4, B5, A5, A5R, A6R, and 16K: 250 sheets (or 1 7/8" (47 mm) in height) 12 5/8" x 17 11/16" (320 mm x 450 mm (SRA3))*3, 12" x 18" (305 mm x 457 mm)*3, 11" x 17", LGL, LTRR, A3, B4, A4R, B5R, 8K, and 16KR: 125 sheets (or 1" (24 mm) in height) No Collating/Collate/Group mode with different paper sizes: Combination of LTR, A4, and B5: 250 sheets (or 1 7/8" (47 mm) in height) All other combinations: 125 sheets (or 1" (24 mm) in height)*4 Collate + Offset, Group + Offset mode: LTR, EXEC, A4, B5, and 16K: 250 sheets (or 1 7/8" (47 mm) in height) 11" x 17", A3, B4, and 8K: 125 sheets (or 1" (24 mm) in height) Lower Tray (Tray B)No Collating/Collate/Group mode: 12 5/8" x 17 11/16" (320 mm x 450 mm (SRA3)), 12" x 18" (305 mm x 457 mm), 11" x 17", LGL, LTR, LTRR, STMT, STMTR, EXEC, A3, B4, A4, A4R, B5, B5R, A5, A5R, 8K, 16K and 16KR: 1,500 sheets (or 8 1/2" (216 mm) in height) A6R: 250 sheets (14 lb bond to 28 lb bond (52 g/m2 to 105 g/m2)) or 50 sheets (29 lb bond to 110 lb cover (106 g/m2 to 300 g/m2)) Envelope: 30 sheets (Monarch) / 100 sheets (excluding Monarch) Z-Fold mode (only for Paper Folding Unit installed): A3, B4, and 11" x 17": 30 sheets A4R, LGL, and LTRR: 10 sheets No Collating/Collate/Group mode with different paper sizes: Combinations including A6R: 250 sheets (14 lb bond to 28 lb bond (52 g/m2 to 105 g/m2)) or 50 sheets (29 lb bond to 110 lb cover (106 g/m2 to 300 g/m2)) All other combinations: 1,500 sheets (or 8 1/2" (216 mm) in height) Collate + Offset and Group + Offset mode: 11" x 17", LGL, LTR, LTRR, EXEC, A3, B4, A4, A4R, B5, 8K and 16K: 1500 sheets (or 8 1/2" (216 mm) in height) Staple (Corner/Double) mode: LTR, EXEC, A4, B5, and 16K: 200 sets/total 1,500 sheets (or 8 1/2" (216 mm) in height)*5 11" x 17", LGL, LTRR, A3, B4, A4R and 8K: 100 sets/total 1,500 sheets (or 8 1/2" (216 mm) in height) |
Staple | Paper Weight14 lb bond to 140 lb index (52 g/m2 to 256 g/m2) Max. Stapling Capacity*6Staple (Corner/Double)*7: LTR, EXEC, A4, B5, and 16K: 50 sheets (14 lb bond to 24 lb bond (52 g/m² to 90 g/m²)) 30 sheets (25 lb bond to 28 lb bond (91 g/m² to 105 g/m²)) 2 sheets (29 lb bond to 140 lb index (106 g/m² to 256 g/m²)) LTRR, A4R: 40 sheets (14 lb bond to 24 lb bond (52 g/m² to 90 g/m²)) 30 sheets (25 lb bond to 28 lb bond (91 g/m² to 105 g/m²)) 2 sheets (29 lb bond to 140 lb index (106 g/m² to 256 g/m²)) 11" x 17", LGL, A3, B4, and 8K: 30 sheets (14 lb bond to 24 lb bond (52 g/m² to 90 g/m²)) 25 sheets (25 lb bond to 28 lb bond (91 g/m² to 105 g/m²)) 2 sheets (29 lb bond to 140 lb index (106 g/m² to 256 g/m²)) Manual Staple: All sizes:50 sheets |
Punch (When the puncher unit is attached) | Paper SizesWhen the 2/3 Hole Puncher Unit-A is attached: Two Holes: 11" x 17", LGL, LTR, LTRR, EXEC, A3, B4, A4, A4R, B5, B5R, A5, 8K, 16K, and 16KR Three Holes: 11" x 17", LTR, EXEC, A3, B4, A4, B5, 8K, and 16K When the 2/4 Hole Puncher Unit-A is attached (for the 230 V machine only): Two Holes: 11" x 17", LGL, LTR, LTRR, EXEC, A3, B4, A4, A4R, B5, B5R, A5, 8K, 16K, and 16KR Four Holes: 11" x 17", LTR, EXEC, A3, A4, 8K, and 16K Paper Weight14 lb bond to 110 lb cover (52 g/m2 to 300 g/m2) Punch Hole120 V machine: Two/Three Holes 230 V machine: Two/Three Holes or Two/Four Holes |
Dimensions (W x D x H) | 21 1/8" (25 1/8"*8) x 24 1/2" x 43 1/8" (45"*8) (537 mm (637 mm*8) x 623 mm x 1,095 mm (1,142 mm*8)) |
Weight | Approximately 70.5 lb (32 kg) |
Installation Space Including the Main Unit (W x D) | 62 3/8" x 28 1/2" (1,584 mm x 722 mm) (when the auxiliary tray and the multi-purpose tray are extended) |
*1 Excluding Thin 2 (two-sided printed) and tab paper
*2 For 21 lb bond (80 g/m2) / 20 lb bond (75 g/m2) / 17 lb bond (64 g/m2) paper only. Capacity varies in other cases.
*3 Thin: 30 sheets
*4 12 5/8" x 17 11/16" (320 mm x 450 mm (SRA3)), 12" x 18" (305 mm x 457 mm): 30 sheets
*5 Thin (14 lb bond to 16 lb bond (52 g/m2 to 63 g/m2)): 1,500 sheets (or 8 1/2" (216 mm) in height)
*6 When the standard staple cartridge is attached. (The maximum stapling capacity may vary, depending on the paper type and weight.)
*7 You can staple up to two sheets for the coated paper (29 lb bond to 140 lb index (106 g/m2 to 256 g/m2)), regardless of the paper size.
*8 When the auxiliary tray is extended.