Paper Jams in the Front Right Cover/Horizontal Pass
This section describes how to clear a paper jam which occurs in the POD Deck-E/Secondary POD Deck-E side. Check the paper jam location on the screen, and follow the procedure below to remove the paper.
The location of the front right cover/horizontal pass is indicated in the following illustration.

 |
When opening and closing each guide or cover, be careful not to get your fingers caught in the gap. |
 |
You can clear a paper jam which occurs when the POD Deck-E/Secondary POD Deck-E is attached, by following the same procedure for clearing a jam paper when only the POD Deck-E is attached. The following illustration indicates the location of the paper jam. Please refer to it to remove the jammed paper. If only the POD Deck-E is attached: 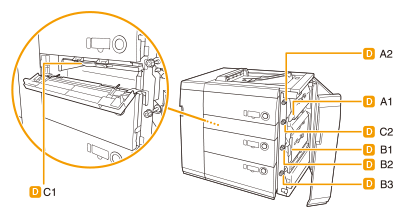 If the POD Deck-E/Secondary POD Deck-E is attached: The labels on the Secondary POD Deck-E side are indicated with Da- (ex: Da-A1), and on the POD Deck-E side are indicated as Db-. 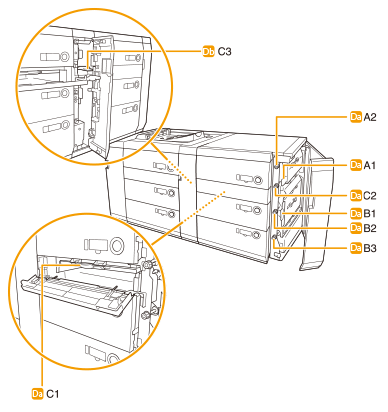 |
1
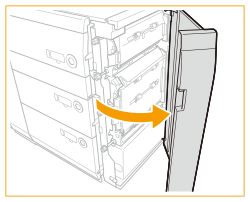
Open the front right cover of the POD Deck.
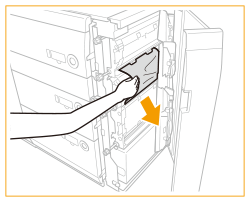
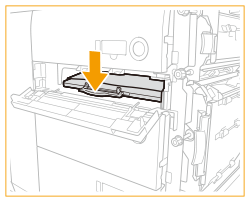
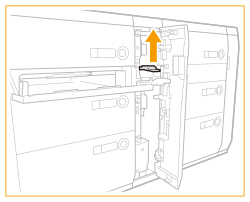
2
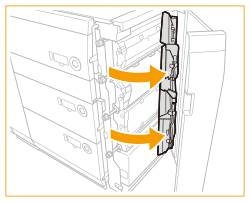
Open the guides (A1 and B1).
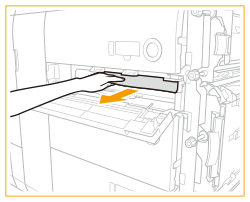
3
Remove any jammed paper.
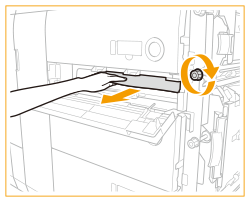
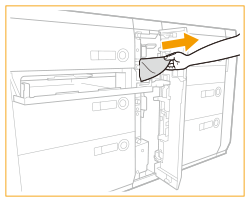
4
Turn the dials (A2, B2, and B3) in the direction of the arrow (clockwise), in the locations where paper jam has occurred.
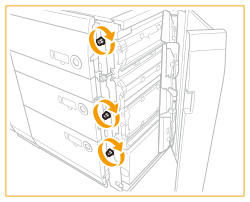
5
Remove any jammed paper.
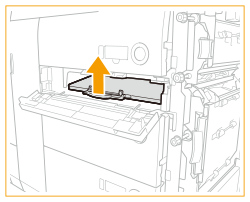
6
Close the guides (A1 and B1).

7
Open the horizontal pass cover.
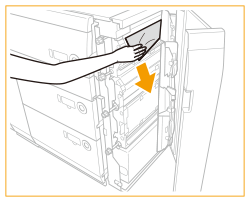
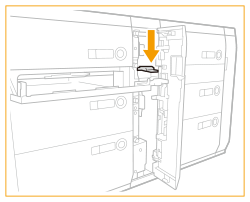
8
Open the guide (C1).
9
Remove any jammed paper.
10
Turn the dial (C2) in the direction of the arrow (clockwise), and remove any jammed paper.
11
Close the guide (C1).
12
Open the guide (C3) (only when the POD Deck-E/Secondary POD Deck-E is attached).
13
Remove any jammed paper (only when the POD Deck-E/Secondary POD Deck-E is attached).
14
Close the guide (C3) (only when the POD Deck-E/Secondary POD Deck-E is attached).
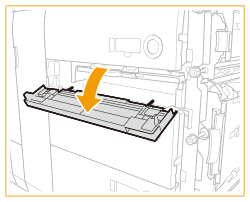
15
Close the horizontal pass cover.

16
Close the front right cover of the POD Deck.
Continue following the instructions on the screen to proceed with the interrupted operation or continue clearing paper jams.