
Adjusting the Image Position Using the Test Page (When Using a Feeder)
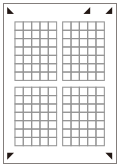
You can adjust the image position easily by simply scanning a test page with the feeder.
 |
 |
Before making adjustments, clean the scanning areas on the platen glass and in the feeder. Cleaning the Feeder Use the following conditions to print out the test page. Accurate adjustment results may not be obtained If the test page is not printed appropriately. Paper size: 100 mm x 148 mm to 297 mm x 762 mm Finish: Uncoated, Recycled, Cotton Type: Normal, Letterhead Basis Weight: 52 to 220 g/m2 If you print the test page on paper of a different size than the designated paper size, the image position may not be adjusted properly. If an edge of the test page is cut incorrectly or folded, or the image is not correctly printed on the test page, the message <Correctly place the test page on the platen glass.> may appear during the scanning process. Adjustment may not be performed correctly with some types of paper, such as textured paper with rough surface or colored paper. If adjustment is not performed correctly when <Use Scanner> is selected, select <Do Not Use Scanner> instead. In the following cases, the test page cannot be scanned properly and the adjustment cannot be performed: The test page is skewed when being scanned The paper size is like EXEC or G-LGL, which can be skewed while scanning because the paper guide cannot be fixed. |
1
Press <Change> for <Adjust Image Position>.
2
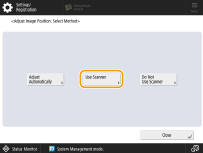
Press <Use Scanner>.
3
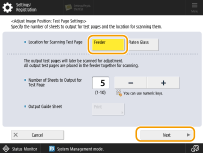
Select <Feeder> in <Location for Scanning Test Page>, set the number of test page copies, and press <Next>.
4
Select the paper source that contains the type of paper to adjust, and click <Start Printing>.
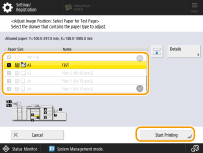
The test page is output.

The larger the number of output test pages, the more accurate the adjustment is.
5
Place the test page in the feeder and press <Start Scanning>.
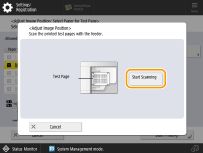

A test page cannot be scanned if paper has been placed in a different orientation or if different-size paper has been placed.
Align well and place the output test pages, align the paper guides closely along the width of the test pages, and press <Start Scanning>. Otherwise, the adjustment may fail. When a long strip original is scanned, support the original with your hands.
6
Adjustment is complete.
 |
If you need to adjust the image position more precisely after adjusting it using the test page, select <Do Not Use Scanner>→<Adjust Image Position> and make necessary adjustments for individual adjustment setting items. |