Cleaning the Feeder
If the following symptoms are observed when using the feeder, remove any adhering graphite powder or dust by wiping the rollers inside the feeder and the original scanning area of the feeder. Originals become dirty Originals frequently jam Printouts appear smudged after scanning, copying, or sending faxes |
1
Turn OFF the power and remove the power cord from the outlet. Turning OFF the Machine
Turning OFF the machine deletes any data waiting to be printed.
2
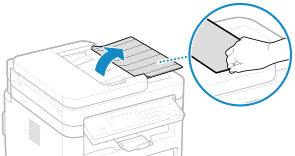
Open the original supply tray.
3
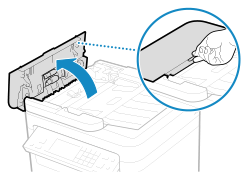
Open the feeder cover.
MF269dw II / MF269dw VP II | MF267dw II / MF264dw II | ||
 |  |
4
Wipe the rollers ( ) inside the feeder and surrounding areas.
) inside the feeder and surrounding areas.MF269dw II / MF269dw VP II | MF267dw II / MF264dw II | ||
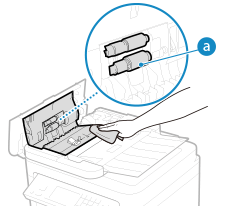 | 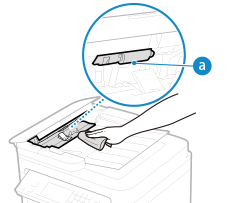 |
Wipe with a cloth soaked in water and wrung out. Next, wipe with a soft, dry cloth.
5
Close the feeder cover and original supply tray.
6
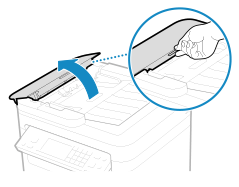
Open the feeder.
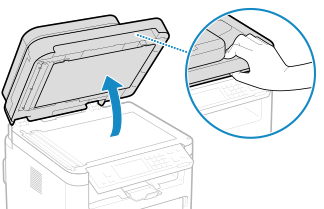
7
Wipe the feeder original scanning area.
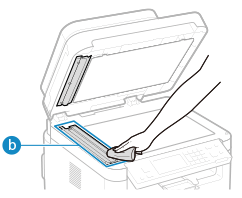
Wipe with a cloth soaked in water and wrung out. Next, wipe with a soft, dry cloth.
When wiping the transparent plastic part ( ), take care not to bend the plastic.
), take care not to bend the plastic. If the problem persists
Remove the transparent plastic part () and wipe it.
) and wipe it.1 | Hold the tabs (  ) at both ends of the transparent plastic part, and remove the plastic part by gently lifting the rearward end first. ) at both ends of the transparent plastic part, and remove the plastic part by gently lifting the rearward end first.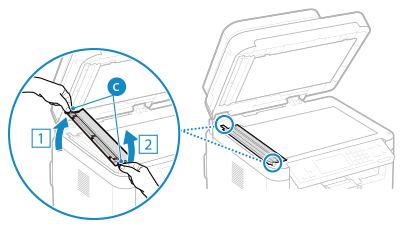 The plastic part is rather damageable. When removing it, be careful not to bend it. |
2 | Wipe the original scanning area (  ). ).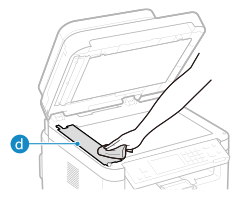 |
3 | Wipe the back side of the transparent plastic part. 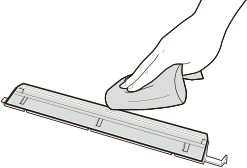 |
4 | Allow the parts to fully dry. |
5 | Place the transparent plastic part back into position. Make sure of the proper orientation, then hold the tabs and place the plastic part back into position by gently lowering the frontward end first. |
8
Allow the parts to fully dry.
9
Gently close the feeder.
10
Plug the power cord into the outlet, and turn ON the machine. Turning ON the Machine