Sending Faxes from a Computer (PC Faxing)
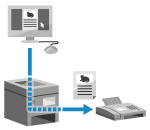
 | You can send a document as a fax from a computer using a fax driver. As it is easy to send a document, be sure to thoroughly check the item you are sending beforehand. Securely Sending PC Faxes |
This section describes the general procedure for this operation. Check the manual of the application you are using for detailed operations on how to use it.
Required Preparations |
Install the fax driver to the computer and configure the settings according to your usage environment and purpose. Preparing to Send Faxes from a Computer |
When Using Windows
1
Open the document you are sending on your computer.
2
In the application used to open the document, select the command to print.
3
Select the fax driver of the machine, and click [Print].
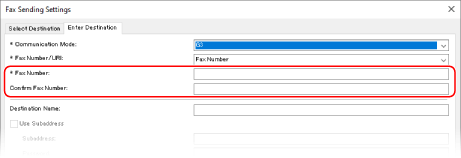
The [Fax Sending Settings] screen of the fax driver appears.
4
Specify a destination.
This section describes how to enter a fax number. You can specify a destination registered to the Address Book from the [Select Destination] tab.
If an outside line number is required, enter this number before the fax number. If the outside line number has been set in advance, you do not need to enter it here. Step 2: Configuring the Settings for Secure Sending
 When Entering One Fax Number
On the [Enter Destination] tab, enter a fax number. When [Confirm Fax Number] can be entered, enter the same fax number.

 When Entering Multiple Fax Numbers
1 | In [Select Destination] tab, click [Add Destination]. The [Add Destination] screen is displayed. |
2 | Enter the destination name and fax number, and click [Add Next Destination]. When [Confirm Fax Number] can be entered, enter the same fax number. |
3 | Repeat Step 2, and after entering all destinations, click [OK]. |
5
Configure the cover sheet, the setting for saving the TX Job Log, and other fax setting, as needed.
To configure the cover sheet details, click [Cover Sheet].
To save the TX Job Log to the computer, select the [Store Sent Fax Information and Image] checkbox.
For more information about the other fax settings, click [Help] on the [Fax Sending Settings] screen to display help.
6
Click [Send].
A screen confirming the send destination is displayed.
7
Check that the destination is correct, and click [OK].
The fax is sent via the machine.
Use [Status Monitor] on the operation panel to view the sending status and log. Checking the Status and Log for Sent and Received Faxes
When sending a fax with the [Store Sent Fax Information and Image] checkbox selected, you can view the log also from the [Sent Fax Information and Image] tab of the fax driver.
When Using macOS
1
Open the document you are sending on your computer.
2
In the application used to open the document, click [Print].
The printing dialog box appears.
3
In [Printer], select the fax driver of the machine.
4
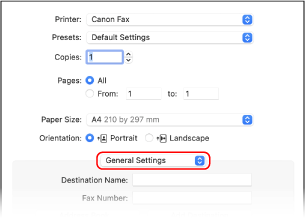
From the print options pop-up menu, select [General Settings].

If print options are not displayed, click [Show Details] in the printing dialog box.
5
Enter the fax number, and click [Add Destination].
To specify multiple destinations, repeat this step. You can specify a destination registered to the Address Book from [Address Book].
If an outside line number is required, enter this number before the fax number.
6
Configure the cover sheet and other fax settings, as needed.
To set the cover sheet details, select [Cover Sheet] from the pop-up menu of the print option.
For more information about the other fax settings, click [ ] in the printing dialog box to display help.
7
Click [Print].
The fax is sent via the machine.
Use [Status Monitor] on the operation panel to view the sending status and log. Checking the Status and Log for Sent and Received Faxes