
A Message Appears
If a message appears on the control panel, select the message from the list below, and check how to troubleshoot the problem.
|
If the problem persists even after trying the troubleshooting methods, contact your dealer or service representative. |
Amount in cart. cannot be displ. correctly.
The remaining amount cannot be displayed correctly due to incorrect installation of the toner cartridge, a damaged toner cartridge, or the use of a non-Canon toner cartridge.
Reinstall the Toner Cartridge.
For optimum print quality, using Canon genuine toner cartridges is recommended. List of Consumables
If the message still appears after repeatedly reinstalling the toner cartridge, contact your dealer or service representative.
Cannot print RX data.
Received data cannot be printed for some reason.
Do the Cause and Solution Appear on the Control Panel?
If so, follow the instructions on the screen.
Is the Front Cover, the Cover on the Left Side of the Main Unit, or another cover Open on the Machine?
Close the covers if they are open.
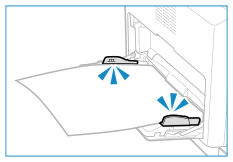
Is Paper Loaded?
Load paper if not loaded. Loading Paper
Is Paper Jammed?
If so, remove any jammed paper. Paper Jams
Has the Toner Cartridge Reached the End of Their Lifetime?
Check the remaining amount in the toner cartridge, and replace any of the toner cartridge, as needed.
Checking the Remaining Amount of Consumables
Replacing the Toner Cartridges
Checking the Remaining Amount of Consumables
Replacing the Toner Cartridges
Cannot print. A non-Canon or counterfeit cartridge may be in use.
Printing cannot be performed due to the use of a toner cartridge whose print quality cannot be guaranteed.
Replace with a New Toner Cartridge.
For optimum print quality, using Canon genuine toner cartridges is recommended. List of Consumables
Cart. end of lifetime. Rplcmt. recommended.
The toner cartridge has reached the end of their lifetime.
It Is Recommended to Replace with a New Toner Cartridge
Press [Display Recovery Steps] and replace the toner cartridge while following the instructions on the screen.
Replacing the Toner Cartridges
Replacing the Toner Cartridges
 |
Cartridge Comm. Error Cannot print. A non-Canon or counterfeit cartridge may be in use.
Printing cannot be performed due to incorrect installation of the toner cartridge, a damaged toner cartridge, or the use of a toner cartridge whose print quality cannot be guaranteed.
Reinstall the Toner Cartridge. Or, Replace with a New Toner Cartridge.
For optimum print quality, using Canon genuine toner cartridges is recommended. List of Consumables
If the message still appears after repeatedly reinstalling the toner cartridges, contact your dealer or service representative.
Cartridge Comm. Error Problems resulting from the use of non-Canon cartridges are not covered by the warranty.
Printing cannot be performed due to incorrect installation of the toner cartridge, a damaged toner cartridge, or the use of a non-Canon toner cartridge, resulting in a communication error.
Reinstall the Toner Cartridge.
For optimum print quality, using Canon genuine toner cartridges is recommended. List of Consumables
If the message still appears after repeatedly reinstalling the toner cartridges, contact your dealer or service representative.
Could not perform cleaning.
Cleaning could not be performed because a paper jam occurred while cleaning the fixing unit.
Is Paper Jammed?
If so, remove any jammed paper. Paper Jams
End of Cart. Lifetime
The toner cartridges have reached the end of their lifetime.
It Is Recommended to Replace with New Toner Cartridges.
Press [Display Recovery Steps] and replace the toner cartridges while following the instructions on the screen. Replacing the Toner Cartridges
Insert the drum unit.
The drum unit is not installed correctly.
Reinstall the Drum Unit.
If the message still appears after repeatedly reinstalling the drum unit, contact your dealer or service representative.
Insert the toner cartridge.
The toner cartridge is not installed correctly.
Reinstall the Toner Cartridge.
If the message still appears after repeatedly reinstalling the toner cartridge, contact your dealer or service representative.
Low Cartridge Level
It is nearing the time to replace the toner cartridges.
Prepare New Toner Cartridges, and Replace the Old Ones, as Needed.
When printing large printing jobs, it is recommended to press [Display Recovery Steps] and replace the toner cartridges while following the instructions on the screen. Replacing the Toner Cartridges
Memory is full. [Memory is full.] Is Displayed on the Control Panel, and the Operation Cannot Be Performed.
Scanning cannot be performed due to insufficient available memory. If there is data waiting to be printed, wait until the processing is completed.
When Scanning, Change the Data Size to a Small File Format.
Paper jammed.
Paper jammed in the machine during printing.
Remove the Jammed Paper, and If Printing Does Not Resume Automatically, Try Printing Again.
Prepare the toner cartridge.
It is nearing the time to replace the toner cartridge.
Prepare a New Toner Cartridge, and Replace the Old Ones, as Needed.
When printing a large number of pages, press  [Error Information/Notification] [Replace Toner Cartridge] [Display Recovery Steps] and replace toner cartridges following the instructions on the screen.
Replacing the Toner Cartridges
Replacing the Toner Cartridges
Replace the toner cartridge.
Cannot print because the toner has run out.
Replace with a New Toner Cartridge.
When printing a large number of pages, press [Error Information/Notification] [Replace Toner Cartridge] [Display Recovery Steps] and replace toner cartridges following the instructions on the screen.
Replacing the Toner Cartridges
Replacing the Toner Cartridges
Size/Settings Mismatch
The size of the paper loaded in the machine does not match that set on the control panel or printer driver.
Match the Size of the Loaded Paper with the Paper Size Setting.
When Using the Loaded Paper
Change the paper size setting on the control panel to match the size of the loaded paper.
Setting the Paper Size and Type for the Paper Drawer
Setting the Paper Size and Type for the Multi-purpose Tray
Setting the Paper Size and Type for the Paper Drawer
Setting the Paper Size and Type for the Multi-purpose Tray
When printing from a computer, change the paper size setting on the printer driver to match the size of the loaded paper. Printing from a Computer
When Reloading Paper
Load paper of the size set on the control panel or printer driver. Loading Paper
Check that the paper guides are aligned with the markings.
Paper drawer | Multi-purpose Tray | ||
 |  |
The memory is full. Scanning will be canceled. Do you want to print?
Reading of the original cannot be performed due to insufficient available memory. Alternatively, all the pages could not be read when sorting and copying.
Divide the Original Before Copying.
Print up to the pages that were read or cancel the job, and then divide the original before copying.
Turn the main power OFF and ON. If the problem persists, change the drum unit.
The drum unit have reached the end of their lifetime.
Change to a new drum unit.