Paper Jams in the Feeder
Remove the original jammed inside or at the rear side of the feeder. If the original tears, be sure to remove the parts so that no pieces remain.
1
Remove any originals from the original supply tray.
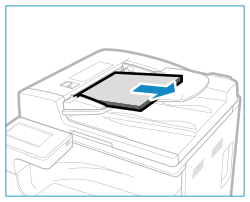
2
Check whether an original is jammed in the feeder cover.
1 | Pull the lever to open the feeder cover. 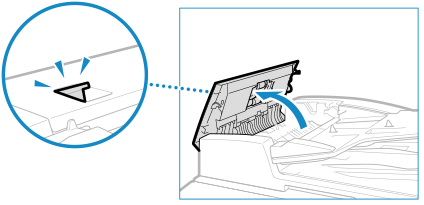 |
2 | If an original is jammed, gently pull it out in the direction of the arrow. 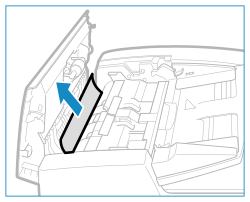 |
3
Check whether an original is jammed in the original output tray.
1 | Turn the green knob counterclockwise. 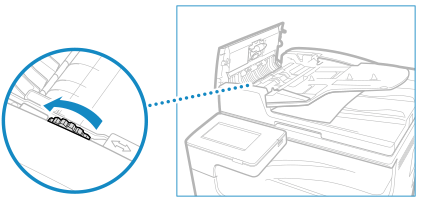 |
2 | If an original is jammed, gently pull it out in the direction of the arrow. 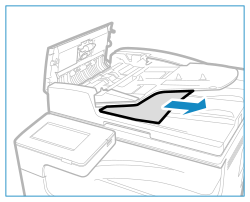 |
4
Check whether an original is jammed inside the inner cover of the feeder.
1 | Open the inner cover of the feeder. 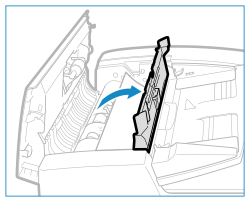 |
2 | If an original is jammed, gently pull it out in the direction of the arrow. 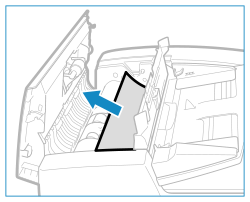 |
3 | Close the inner cover of the feeder. |
5
After removing all jammed originals, close the feeder cover.
6
Lift up the feeder, and check whether there is a jammed original.
1 | Lift up the feeder, and check the position indicated by  . .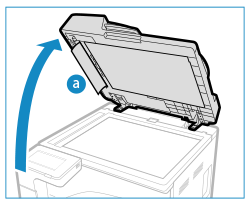 |
2 | If an original is jammed, gently pull it out in the direction of the arrow. 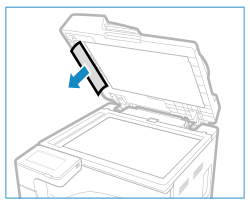 |
7
Close the feeder gently and place the original in the feeder again.
The message [Paper jammed.] disappears, and you can scan the original.
Jobs in which an original jammed are canceled automatically. The job does not resume even if you place the original again, so execute the job again.
Jobs in which an original jammed are canceled automatically. The job does not resume even if you place the original again, so execute the job again.
 |
If Paper Jams Occur RepeatedlyCheck the status of the machine and original. Paper Jams That Occur Repeatedly |