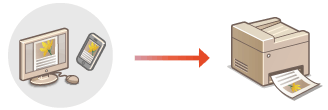
Printing with AirPrint
You can print from an iPad, iPhone, iPod touch, or Mac without using a printer driver.

System Requirements
One of the following Apple devices is required to print with AirPrint.
iPad (all models)
iPhone (3GS or later)
iPod touch (3rd generation or later)
Mac (Mac OS X 10.7 or later)*
* OS X 10.9 or later when using a USB connection |
Network Environment
One of the following environments is required.
An environment where an Apple device and the machine are connected to the same LAN
An environment where an Apple device and the machine are connected directly
An environment where a Mac is connected to the machine via USB
Printing from an iPad, iPhone, or iPod touch
1
Make sure that the machine is turned ON and connected to the Apple device.
For how to make sure of this, see Setting up the Network Environment.
For information on the Direct Connection, see Connecting Directly.
2
From the application on your Apple device, tap  to display the menu options.
3
Tap [Print].
4
Select this machine from [Printer].
The printers connected to the network are displayed here. Select this machine in this step.

The screen for selecting the machine in [Printer] is not displayed for applications that do not support AirPrint. In this case, printing cannot be performed.
5
Specify the print settings as necessary.

The available settings and paper sizes differ depending on the application you are using.
6
Tap [Print].
Printing starts.

Checking the print status
During printing, press the Home button of the Apple device twice  tap [Print].
 tap [Print].
 |
You can specify whether to display an error screen on the control panel if printing cannot be performed as expected due to a problem with the print data. For details, see <Display Errors for AirPrint>. When the machine is configured not to print data sent from a computer straight away, the AirPrint data is also put on hold on the machine. In this case, you need to operate the machine to perform printing. Printing Documents Retained in the Machine (Forced Hold Printing) |
Printing from a Mac
1
Make sure that the machine is turned ON and connected to the Mac.
For how to make sure of this, see Setting up the Network Environment.
2
From your Mac, add the machine in [System Preferences]  [Printers & Scanners].
 [Printers & Scanners].
If the machine has already been added for scanning or sending faxes, this operation is not required.
3
Open a document in an application and display the print dialog box.
How to display the print dialog box differs for each application. For more information, see the instruction manual for the application you are using.
4
Select the machine in the print dialog box.
The printers added to the Mac are displayed. Select the machine in this step.
5
Specify the print settings as necessary.

The available settings and paper sizes differ depending on the application you are using.
6
Click [Print].
Printing starts.
 |
You can specify whether to display an error screen on the control panel if printing cannot be performed as expected due to a problem with the print data. For details, see <Display Errors for AirPrint>. When the machine is configured not to print data sent from a computer straight away, the AirPrint data is also put on hold on the machine. In this case, you need to operate the machine to perform printing. Printing Documents Retained in the Machine (Forced Hold Printing) |