
Staple Jams in the Staple Finisher-AC/Booklet Finisher-AC
 |
Check before clearing staple jamsIf a paper jam occurs at the same time as a staple jam, remove the jammed paper before removing the jammed staples. Before clearing the staple jam, remove all output paper from the booklet tray. |
Stapler Unit
1
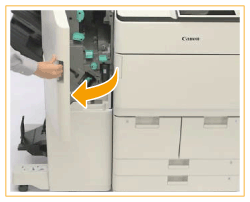
Open the front cover of the finisher.
2
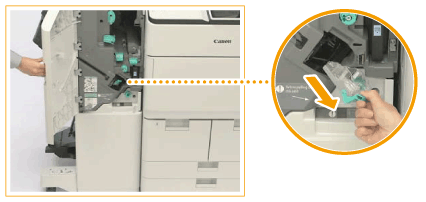
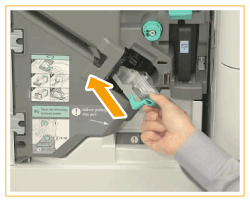
Pull out the staple case from the stapler unit.
Hold the green tab of the staple case, and pull it out straight toward you.
3
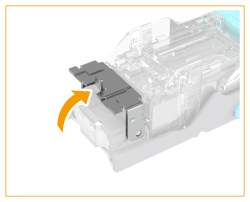
Push up the bracket on the staple case.
4
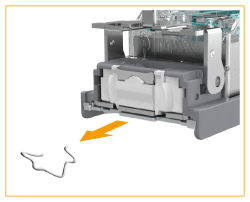
Remove all the jammed and protruding staples from the staple case.
5
Return the bracket on the staple case to its original position.
6
Hold the green tab, and push the staple case back into the stapler unit until it is securely in place.
7
Close the front cover of the finisher.
Saddle Stitch Unit
1
Open the front cover of the finisher.

2
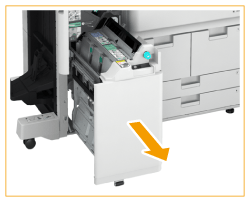
Pull out the saddle stitcher unit.
3
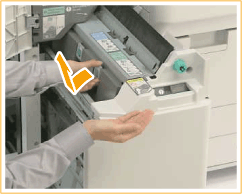
Pull the lever on the two staple cases toward you to remove them.
4
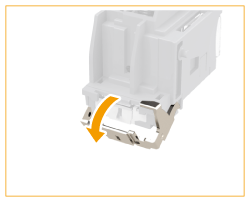
Lower the bracket on the staple case.
5
Remove all the jammed and protruding staples from the staple case.

6
Return the bracket on the staple case to its original position.
7
Insert the two staple cases into the saddle stitcher unit.
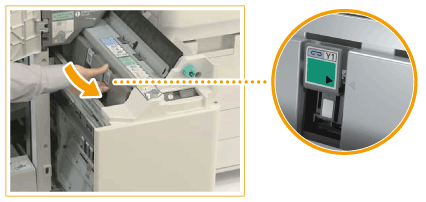
Make sure that the staple cases are firmly inserted.
8
Push the saddle stitcher unit back into the machine, and close the front cover of the finisher.
 |
After clearing the staple jam, some sets of printouts may not be properly stapled. Check the output paper. |