Basic Operation of the Touch Panel Display
Even though functions and settings are different, the operation methods for buttons displayed on the screen and the procedure to select items are the same. This section describes the operation methods for buttons frequently displayed on the screen as well as how to select items.
Selecting a Setting Status
The setting status, such as copy ratio, copy paper, and number of copies, are displayed. When you want to change a setting, select the desired setting item.
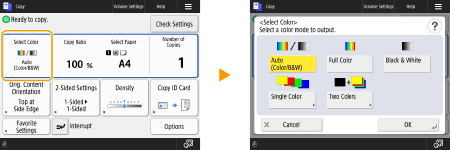
Selecting a Button
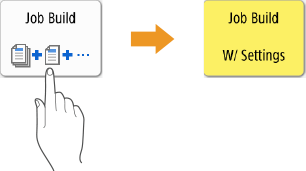
When you press a button, the button color may change or a check mark may be added to indicate that it has been selected.

Press the function setting button to display the setting status in the lower section of a button and the color is changed.
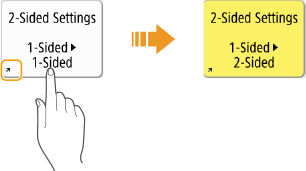
Press a button in which  is located in the lower-left to display the setting screen. When the setting is made, the setting status is displayed in the lower section of the button and the color is changed.
 is located in the lower-left to display the setting screen. When the setting is made, the setting status is displayed in the lower section of the button and the color is changed.
When a button is displayed in a lighter color, you cannot select that button. Such displays appear depending on login status or because its related function cannot be used as another function has been set.

Selecting an Item from Drop-down List
Press a button in which  is located in the right to display the drop-down list. Press the item on a list to select an item.
 is located in the right to display the drop-down list. Press the item on a list to select an item.
Adjusting a Value to Increase or Decrease
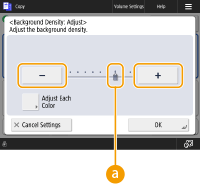
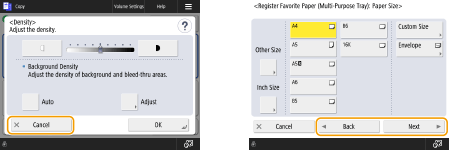
Press the <-> or <+> buttons to decrease or increase values, such as when adjusting the density. Each time you press the button, the slider ( ) moves to increase or decrease the numerical value. By holding down the button, you can change the value quickly.
 ) moves to increase or decrease the numerical value. By holding down the button, you can change the value quickly.
Applying/Canceling Settings
Press <OK> to apply settings and press <Cancel Settings> to discard the changes and restore the previous settings.
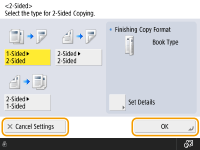
In addition, buttons such as <Cancel> which cancels the setting and returns to the previous screen, <Next> which applies the setting to proceed to the next screen, <Back> which returns to the previous setting screen and <Close> which closes the screen currently open are displayed.
Switching Pages
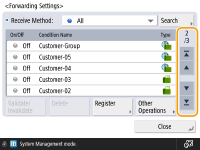
When a list display is two pages or more, press  /
/ or
or  /
/ to switch the page. Press
  to jump to the first page, press
  to jump to the last page.
 /
/ or
or  /
/ to switch the page. Press
  to jump to the first page, press
  to jump to the last page.
Changing the Display Order in the List
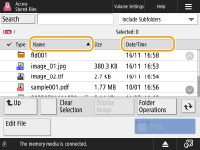
When there are multiple jobs/files in a list, you can press <Name> or <Date/Time> to sort the list of items. When  is displayed, items are displayed in ascending order, or when
  is displayed, items are displayed in descending order.
 is displayed, items are displayed in ascending order, or when
  is displayed, items are displayed in descending order.

Sorting conditions differ depending on the function you are using.
If you log in with personal authentication management, the sorting condition that was last used is retained. List of Items That Can Be Personalized
Using Help
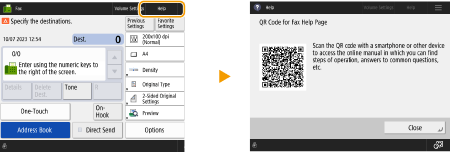
By pressing <Help>, a QR code is displayed. By scanning this QR code with a mobile device such as smartphone or tablet, you can access the User's Guide page for this machine.
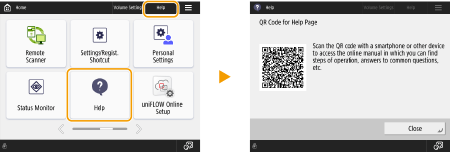
When pressing <Help> on the basic screen of Fax or Scan, a QR code is displayed to access the Fax or Scan pages of the User's Guide.
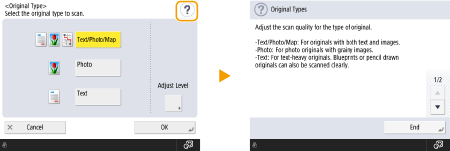
Depending on the displayed function,  may be displayed on the top right of the display. By pressing
  , you can confirm the description of the function or how to use the function.
 may be displayed on the top right of the display. By pressing
  , you can confirm the description of the function or how to use the function.
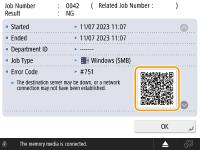
When a QR code is displayed on a Details window of an error log, scanning the QR code with a mobile device such as smartphone or tablet allows you to access a page of the User's Guide for this machine, which tells you how to manage the error.
 |
Operate in the same manner as with a smartphone (flick/drag-and-drop)On some screens, you can switch the page or scroll by flicking your finger up/down or left/right on the screen as you would with a smartphone. 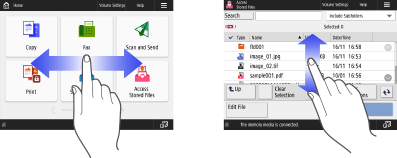  You can also disable flick operations. <Use Flick Function> Flick operations and drag-and-drop operations cannot be used when <Invert Screen Colors> is set to <On>. <Invert Screen Colors> On screens with movable buttons, the buttons can be dragged and dropped to move them. 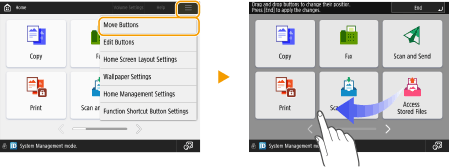 Flick and scroll exceeding a listOn some screens, flicking toward the outside of a list still scrolls the list. 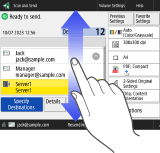 |