 .
.9A7Y-0F1
Connecting to a Wired LAN
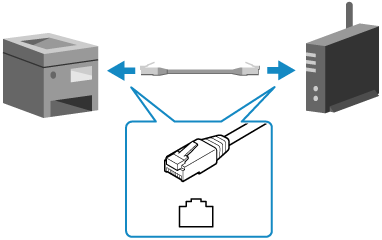
Connect the printer to a computer via a router. Use an Ethernet cable to connect the printer to the router.
To connect to a wired LAN, the printer’s network settings must be configured for using a wired LAN.
Black and White Touch Panel Model / Black and White 5 Lines LCD Model 
On black and white touch panel model, you do not need to press  .
.
 .
.1
On the control panel, press [Menu] in the [Home] screen 
 .
.

 .
.2
Press [Preferences] 

 [Network]

 [Select Wired/Wireless LAN(Wi-Fi)]
 .
.


 [Network]

 [Select Wired/Wireless LAN(Wi-Fi)]
 .
.If the login screen is displayed, enter the System Manager ID and PIN, and then press  , or press [Log In]
 .
.
For information on the System Manager ID and PIN, see the "User's Guide" for the respective model at the online manual site.
https://oip.manual.canon/
 , or press [Log In]
 .
.For information on the System Manager ID and PIN, see the "User's Guide" for the respective model at the online manual site.
https://oip.manual.canon/
3
Select [Wired LAN], and press  .
.
 .
.The message [Settings applied.] appears.
4
Connect an Ethernet cable to the printer and router.
Example:

Insert the connector all the way into the port until it clicks into place.
5
Wait a few minutes.
By default, the IP address is set automatically.
To use a specific IP address, set the address manually.
Setting IPv4 Addresses
To use a specific IP address, set the address manually.
Setting IPv4 Addresses
Color Touch Panel Model 
1
On the control panel, press [Menu] in the [Home] screen  [Preferences]
  [Network].
 [Preferences]
  [Network].
The [Network] screen is displayed.
If the login screen is displayed, enter the System Manager ID and PIN, and then press [Log In].
For information on the System Manager ID and PIN, see the "User's Guide" for the respective model at the online manual site.
https://oip.manual.canon/
For information on the System Manager ID and PIN, see the "User's Guide" for the respective model at the online manual site.
https://oip.manual.canon/
2
Press [Select Wired/Wireless LAN(Wi-Fi)].
3
Select [Wired LAN].
The message [Settings configured.] appears.
4
Connect an Ethernet cable to the printer and router.
Example:

Insert the connector all the way into the port until it clicks into place.
5
Wait a few minutes.
By default, the IP address is set automatically.
To use a specific IP address, set the address manually.
Setting IPv4 Addresses
To use a specific IP address, set the address manually.
Setting IPv4 Addresses
 |
When Switching Between Wired and Wireless LANYou must uninstall the currently installed drivers and then re-install them. For information on uninstalling and installing drivers, see the driver manuals at the online manual site. https://oip.manual.canon/ |