Printing Registered Documents (Print Template)
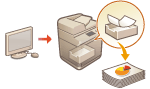 | You can print images and documents registered in advance. By registering templates of frequently used documents, you can easily print them when required. |
Registering/Editing Documents
1
Start the Remote UI. Starting the Remote UI
2
Click [Settings/Registration] on the portal page. Remote UI Screen
3
Click [Printer]  [Print Template].
4
Click [Add Button].
To change the settings in a button, click the button name.
To delete a button, click [Delete].
5
Enter the button information, and configure the required settings.
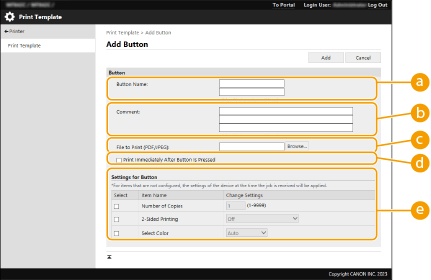
 [Button Name:]
Enter the name of the button to display on the <Home> screen.
 [Comment:]
Enter a description or note, as required.
 [File to Print (PDF/JPEG):]
Specify whether to print PDF or JPEG files.
 [Print Immediately After Button Is Pressed]
Select this to immediately execute jobs after the button is pressed. The  mark is displayed for buttons with this set.
 [Settings for Button]
Configure the settings related to printing, such as the number of copies and two-sided printing.

If settings are not configured, printing is performed according to <Custom Settings> in <Printer>.
6
Click [Add].
 Files for Printing |
A maximum of five documents can be registered. Documents with a maximum size of 48 MB can be registered. The minimum guaranteed storage space for registering documents is 4 GB, including the space for hold print and secure print jobs. |
Printing Documents
1
Press the button for a registered document on the <Home> screen.

If [Print Immediately After Button Is Pressed] is set, printing starts immediately.
2
Press <Start Printing>.
Printing starts.
PDF files with a password set or that require password entry to print cannot be printed.
To cancel a job that is printing, press <Cancel Printing>.