Loading Paper in High Capacity Cassette Feeding Unit-F (Option)
You can only load A4 or letter size paper in High Capacity Cassette Feeding Unit-F.
When using paper with a logo, be careful of the orientation of the loaded paper and which side is face up. Orientation for Loading Paper with a Logo
When using paper with a logo, be careful of the orientation of the loaded paper and which side is face up. Orientation for Loading Paper with a Logo
IMPORTANT
Do Not Load Printed Paper
Loading printed paper in High Capacity Cassette Feeding Unit-F may result in a malfunction. When printing on the back side of printed paper (Manual 2-sided Printing), be sure to load the paper in the multi-purpose tray. Loading Paper in the Multi-purpose Tray
1
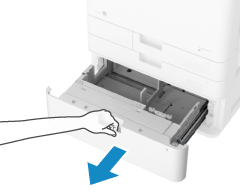
Pull the paper drawer toward you until it stops.
2
Fan the paper and align the edges.
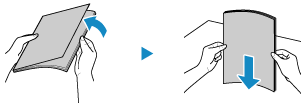
Fan the paper in small batches, and align the edges by tapping the paper on a flat surface a few times.
3
Load the paper on the right side of the paper drawer with the print side face up.
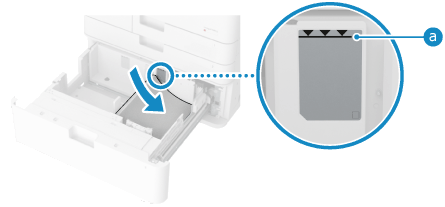
Load the paper with the edge of the paper against the right side of the paper drawer.
Make sure the loaded paper does not exceed the load limit line ( ). If it exceeds the load limit line, there may be misfeeds or a paper jam.
 ). If it exceeds the load limit line, there may be misfeeds or a paper jam.
4
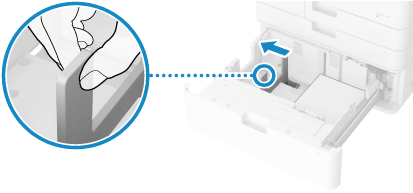
Move the paper guide to the left edge.
5
Load the paper on the left side of the paper drawer with the print side face up.
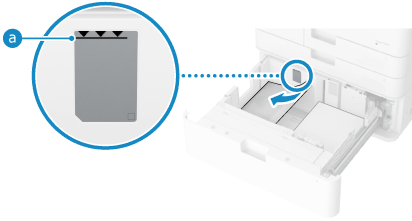
Load the paper with the edge of the paper against the left side of the paper drawer.
Make sure the loaded paper does not exceed the load limit line ( ). If it exceeds the load limit line, there may be misfeeds or a paper jam.
 ). If it exceeds the load limit line, there may be misfeeds or a paper jam.
6
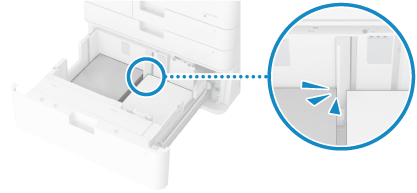
Check that paper loaded on the left side is loaded correctly.
7
Push the paper drawer gently into the machine.
8
Set the paper type, as needed. Setting the Paper Size and Type for the Paper Drawer
The paper size is detected automatically.
* If the detected paper size does not match the loaded paper, the paper may not be loaded correctly. Reload the paper.
By default, the paper type is set to Plain 1 or Plain 2. When paper of a different type is loaded, change the paper type setting.
NOTE
If a problem occurs during printing, you may be able to solve it by turning the paper over and reloading it.