Paper Jams Inside the Main Unit (When the Inner Finisher Is Installed)
Remove paper jammed inside the main unit or inner finisher when the inner finisher is installed. Follow the instructions on the control panel to check the location of the paper jam and remove the jammed paper.
If the paper tears, be sure to remove all parts so that no pieces remain.
If you cannot remove the paper, do not try to remove it forcibly. Check the control panel and remove the jammed paper at another location.
If the paper tears, be sure to remove all parts so that no pieces remain.
If you cannot remove the paper, do not try to remove it forcibly. Check the control panel and remove the jammed paper at another location.
* If you are using Long paper, see the following:
If Long Paper Is Jammed
If Long Paper Is Jammed
Required Preparations
If the optional paper deck unit is installed, press the release lever and pull the paper deck unit away from the main unit.
Close the cover and paper drawer if they are open.
1
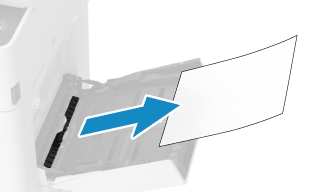
Remove any paper loaded in the multi-purpose tray.
2
If paper is jammed inside the multi-purpose tray, gently pull it out in the direction of the arrow.
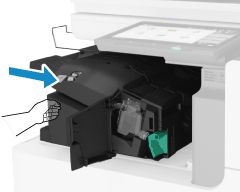
3
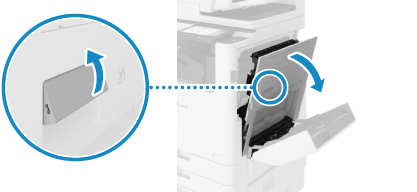
Pull the lever and open the right cover of the main unit.
4
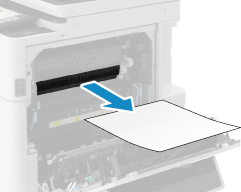
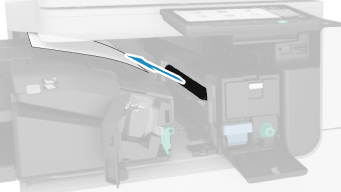
If paper is jammed inside the output unit, gently pull it out in the direction of the arrow.
5
Open the left cover of the inner finisher.
6
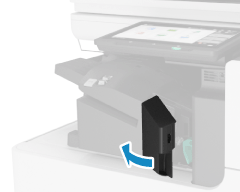
Hold the green lever and slide the inner finisher to the left.

7
Check whether paper is jammed inside the inner finisher.
1
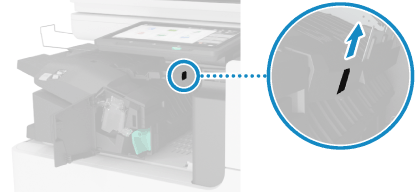
Lift the green guide.
2
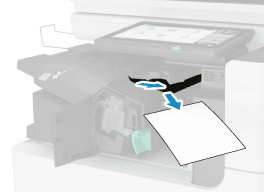
If paper is jammed, gently pull it out in the direction of the arrow.
3
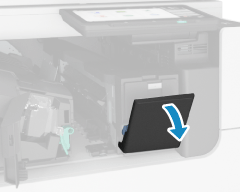
Lower the green guide.
When the Puncher Unit Is Installed
Check for paper jammed inside the puncher unit.
1
Open the front cover of the puncher unit.
2
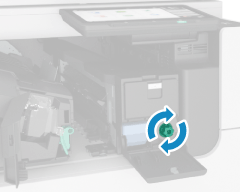
Turn the green knob.
3
If the paper was ejected, gently pull it out in the direction of the arrow.
4
Close the front cover of the puncher unit.
8
Slide the inner finisher to the right and push it in.
Be careful not to get your fingers caught in the gaps when pushing in the inner finisher.
9
Close the left cover of the inner finisher.
10
Gently close the right cover of the main unit until you hear a click.
When the paper jam is cleared, the screen indicating a paper jam disappears, and printing resumes automatically.
If a screen indicating a paper jam at a different location appears, continue following the instructions on the screen to remove the jammed paper.
If a screen indicating a paper jam at a different location appears, continue following the instructions on the screen to remove the jammed paper.
NOTE
If Paper Jams Occur Repeatedly
Check the status of the machine and paper. Paper Jams That Occur Repeatedly