Paper Jams in the Drawer, Output Tray, Inside the Machine, and in the Rear Side
Use the procedure below to check the drawer, output tray, inside the machine, and rear side, and to remove any jammed paper. If the paper tears, ensure that no pieces are left behind.
1
Lift the control panel.
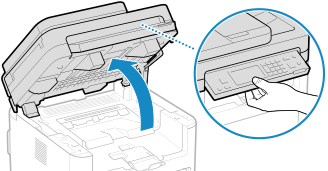
If the feeder is not closed completely, you cannot raise the control panel. If you try to raise it by force, the machine may be damaged.
2
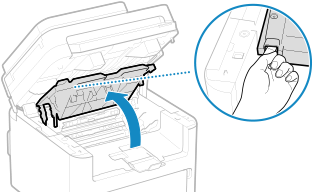
Open the toner cover.
3
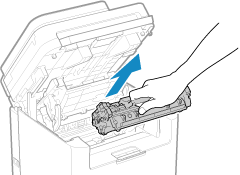
Gently remove the toner cartridge.
4
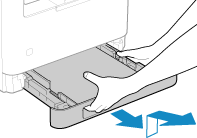
Pull out the drawer, and remove it while lifting the front side.
5
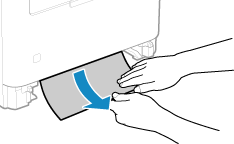
Gently pull out the paper.
6
Load the drawer into the machine.
7
Check whether paper is jammed inside the paper exit guide.
1 | Pull out the paper exit guide.  |
2 | Gently pull out the paper. 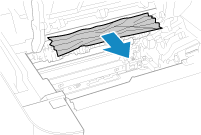 |
3 | Close the paper exit guide. |
8
Gently pull out the jammed paper inside the machine.

Hold both edges of the paper, pull the leading edge of the paper down, and then pull it out.
9
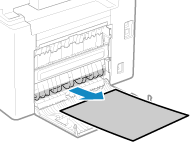
Open the rear cover.

10
Gently pull out the paper.
11
Close the rear cover.
12
Insert the toner cartridge.
13
Close the toner cover, and lower the control panel.
The message [Paper jammed.] disappears, and printing resumes automatically.
If printing does not resume automatically, try printing again.
If printing does not resume automatically, try printing again.
 |
If Paper Jams Occur RepeatedlyCheck the status of the machine and paper. Paper Jams That Occur Repeatedly |