Configure this setting using Remote UI from a computer. You cannot use the control panel to configure the settings.
Administrator privileges are required.
Registering the Machine to Microsoft Entra ID
Register the machine to the cloud-based authentication and management service, Microsoft Entra ID, and set the members or groups that will use the machine.
Step 1: Registering the Machine to Microsoft Entra ID
1
Log in to Remote UI in System Manager Mode. Starting Remote UI
2
On the Portal page of Remote UI, click [Settings/Registration]. Portal Page of Remote UI
3
Click [Network Settings]  [Universal Print Settings].
The [Universal Print Settings] screen is displayed.
4
Click [Edit] in [Basic Settings].
5
Select the [Use Universal Print] checkbox, and enter the printer name.
For the printer name, enter a name to identify the machine, using single-byte alphanumeric characters.
To verify the certificate sent from the server, select the [Verify Server Certificate] checkbox.
To add a Common Name (CN) to the verification items, select the [Add CN to Verification Items] checkbox as well.
To add a Common Name (CN) to the verification items, select the [Add CN to Verification Items] checkbox as well.
Note that you may need to change [Application ID], [Microsoft Entra ID Authentication URL], or [Microsoft Entra ID Registration URL] depending on your cloud environment.
If you change [Application ID], [Microsoft Entra ID Authentication URL], or [Microsoft Entra ID Registration URL] by mistake, manually set the initial values shown below.
[Application ID]: f9fc375c-c7ba-4e5c-b213-23affd792cc1
[Microsoft Entra ID Authentication URL]: https://login.microsoftonline.com/organizations/oauth2/v2.0
[Microsoft Entra ID Registration URL]: https://register.print.microsoft.com/api/v1.0/register
6
Click [OK].
The [Universal Print Settings] screen is displayed.
7
Click [Register] in [Registration Status].
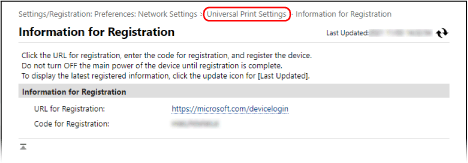
The [Information for Registration] screen is displayed.
8
Wait several seconds, and then click [ ].
].
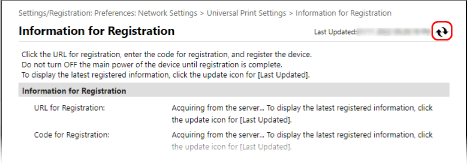
9
Click the link displayed in [URL for Registration].
10
Register the machine according to the instructions on the screen.
11
Click [Universal Print Settings] at the top of the Remote UI screen.
The [Universal Print Settings] screen is displayed.
12
Wait a few minutes, and then click [].
When registration is complete, [Registered] is displayed in [Registration Status].
13
Log out from Remote UI.
 |
Canceling the RegistrationClick [Unregister] on the [Universal Print Settings] screen |
Step 2: Specifying the Members and Groups to Use the Machine
1
Display the Universal Print management screen of Microsoft Entra ID in a Web browser on a computer.
2
Select the machine, and click [Share Printer].
To change the name of the machine displayed on the computer, change [Printer Share Name].
3
Click [Members] [Add].
4
From the list, select the members and groups who will use the printer.