
Basic Windows Operations
|
Depending on the computer that you use, the operation may differ. |
Displaying Shared Printers in the Print Server
1
Right-click [ ]
]  select [File Explorer].
] select [File Explorer].2
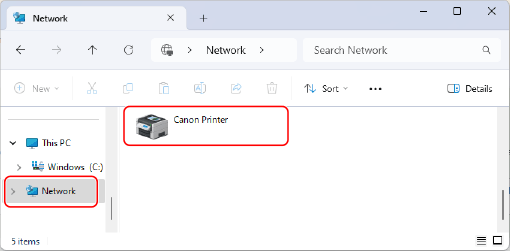
Select the print server from [Network].
To view computers on the network, you may need to turn on network discovery or search the network for computers.
The shared printer is displayed.
Checking the LPR/RAW Printer Port
1
Click [] (Start) [ ] (Settings) [Bluetooth & devices] [Printers & Scanners].
] (Start) [] (Settings) [Bluetooth & devices] [Printers & Scanners].The [Printers & Scanners] screen is displayed.
2
Click the printer driver of the machine [Printer properties].
[Printer properties].3
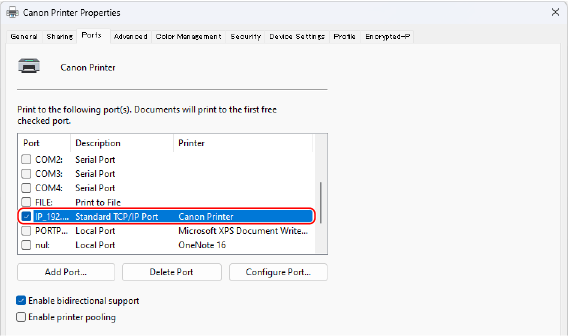
On the [Ports] tab, view the port being used.
Registering Application on Microsoft Entra ID
1
Login to Microsoft Entra admin center.
2
Click applications on the navigation menu.
3
Click where you can register an application on the navigation menu.
4
Click where you can start registering a new application.
5
Enter the name of the application.
You can enter any name you want. (Example: Canon "Printer name" Login)
6
Select the type of the account.
7
Click where you can finish your registration.
A client ID for the application is issued.
Copy the client ID on a text editor to store it.
8
Issue a secret or register a certificate.
 Issuing a Secret
1 | Click where you can manage a certificate and a secret on the navigation menu. |
2 | Click where you can manage a new client secret. |
3 | In the dialog for adding a client secret, enter the description and the valid period of the new client secret and click where you can complete adding the new client secret. |
A secret ID and a secret value are issued. Copy the secret value on a text editor to store it. The secret ID is not used. | |
 The client secret value will not be displayed again. If you have not stored the client secret value, issue a new client secret. |
Registering a Certificate
If you want to register a certificate, it is necessary to export the certificate of the machine beforehand. Specifying the domain of Microsoft Entra ID
1 | Click where you can manage a certificate and a secret on the navigation menu. |
2 | Click where you can upload a certificate. |
3 | Select a certificate file and click where you can start adding the certificate. |
After uploading is complete, copy the thumbprint value to a text editor to store it. |
9
On the navigation menu, click where you can add permissions for a registered application to access API.
10
Click where you can add access permissions.
11
Select Microsoft Graph from listed API names from which you can request access permissions.
12
Select Delegated permissions among the access permission types and assign the following access permissions.
User.Read.All
Group.Read.All
GroupMember.Read.All
13
Select Application permissions among the access permission types and assign the following access permissions.
User.Read.All
Group.Read.All
GroupMember.Read.All
|
Access permissions are used when you cannot login to the machine due to an error of multi-factor authentication. Access permissions are not needed depending on used functions or environments. |
14
Click where you can grant admin consent and select Yes.
Admin consent is assigned to access permissions that are selected under Delegated permission or Application permissions.