
Replacing the Toner Cartridge
When toner starts running low or has run out, a message is displayed prompting you to prepare a new toner cartridge or perform toner cartridge replacement. Prepare a new toner cartridge or perform toner cartridge replacement according to the displayed message.
Cautions When Replacing the Toner Cartridge
|
Do not touch the contacts (  ) inside the machine. Doing so may result in damage to the machine. ) inside the machine. Doing so may result in damage to the machine.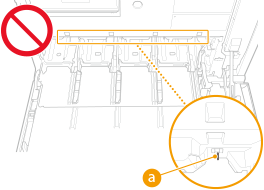 |
 |
Do not replace toner cartridges until the message prompting you to do so appears. Be sure to hold the toner cartridge using the handle. 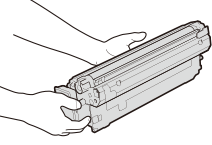 To avoid scratching the surface ( ) of the drum inside the machine or exposing it to light. Do not touch the electrical contacts ( ) or the toner memory ( ) or the toner memory ( ). ).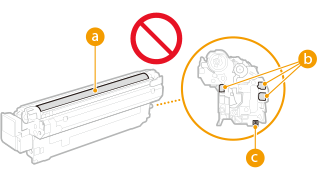 |
 |
For details about each message, see Countermeasures for Each Message. For information on the product numbers for toner cartridges, see Consumables. You can check the current amount of toner remaining. Checking the Remaining Toner Level |
Procedure for Replacing the Toner Cartridge
When replacing toner cartridges, follow the instructions shown in the video along with those written below.
1
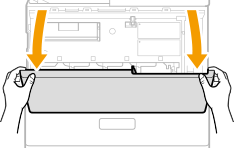
Open the front cover.
Open the cover while holding both sides.
2
Pull out the toner cartridge.
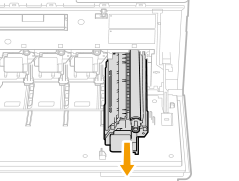

Be careful not to touch the lead edge of the toner cartridge or bump or otherwise impact the toner cartridge. Toner may leak.
Prepare a piece of paper or cloth that can get dirty, and temporarily place the removed toner cartridge on it.
3
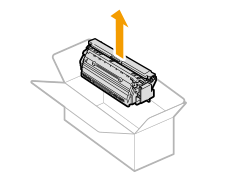
Remove the replacement toner cartridge from the protective case.
4
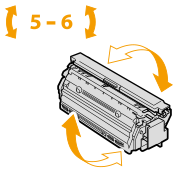
Hold the toner cartridge on both sides and shake the toner cartridge about five or six times to evenly distribute the toner.
5
Remove the protective cover.
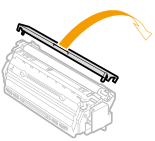
Do not touch the green part of the toner cartridge.
6
Install the toner cartridge.
Check that the toner cartridge color matches the color displayed on the slot of the main unit.
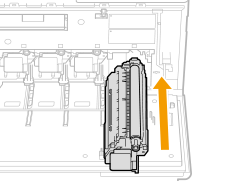
Be careful that the drum portion does not get hit against the mouth of the slot.
7
Close the front cover.