Desktop Editor Screen Layout
The Desktop Editor screen consists of a "[File] menu", "ribbon", "windows", and "bars". The screen structure differs according to the selected ribbon tab.
|
NOTE
|
|
You can resize the Desktop Editor screen by dragging the edges of the Desktop Editor screen.
For information on the screen transition of Desktop Editor, see the following.
|
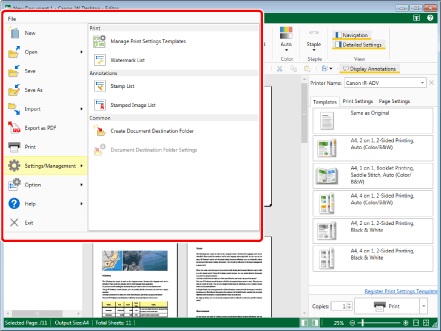
[File] menu
The [File] menu contains the functions relating to Desktop Editor, such as saving and printing documents, and items regarding the configuration of all of Desktop.
Ribbon
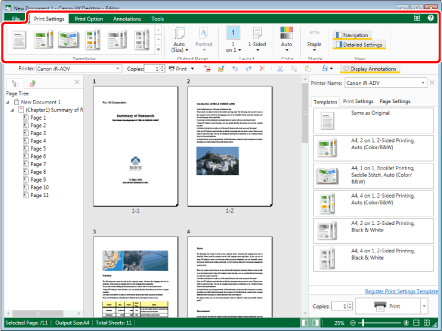
The ribbon includes tabs of commands for performing operations such as configuring the print settings, adding annotations or digital stamps, and calling the Mail Merge Print Settings Mode/various edit modes.
Commands are grouped by function and located on tabs. You can switch the displayed commands by clicking the tabs.
The following tabs are displayed on the ribbon of Desktop Editor by default.
[Print Settings]
[Print Option]
[Annotations]
[Tools]
|
NOTE
|
|
You can hide or display the ribbon by clicking
If you click
When you use a wheel mouse, you can switch the tabs displayed on the ribbon by rolling the wheel while above the ribbon.
Ribbons can be customized. For more information, see the following.
|
Windows
Areas of the Desktop Editor screen mainly used for displaying content are called "windows".
This section describes the "windows" of Desktop Editor.
|
NOTE
|
|
You can move the boundary between the Navigation Window and the Work Window by dragging it.
|
Navigation Window
The following tabs are displayed on the Navigation Window. The tabs displayed on the Navigation Window vary depending on the selected ribbon tab.
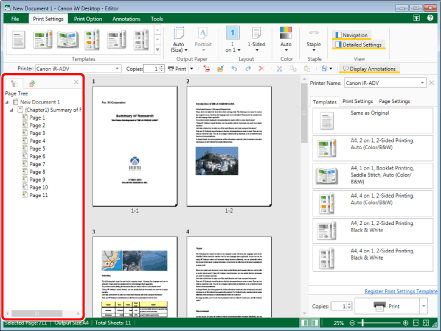
If the [Print Settings]/[Print Option] tab is selected on the ribbon
[Page Tree] tab: Displays the page tree of the document. You can expand and collapse the chapters displayed on the tab.
[Original Documents] tab: Displays the documents that existed before being converted into an IWB document (original documents). You can export original documents displayed on the tab.
If the [Annotations] tab is selected on the ribbon
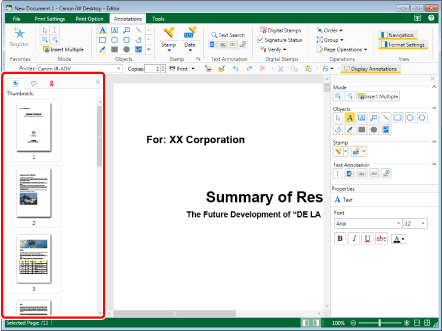
[Thumbnails] tab: Displays the document page thumbnails. Clicking page thumbnails enables you to select pages to be displayed or edited.
[Annotation List] tab: Displays a list of the annotations added to the document.
[Signature List] tab: Displays a list of the signatures of the digital stamps added to the document.
|
NOTE
|
|
If you select the [Tools] tab on the ribbon, the content of the ribbon tab selected before switching to the [Tools] tab is displayed in the Navigation Window.
You can change the content displayed on the Navigation Window with the tabs. You can also switch between displaying/hiding the Navigation Window. For more information, see the following.
|
Work Window
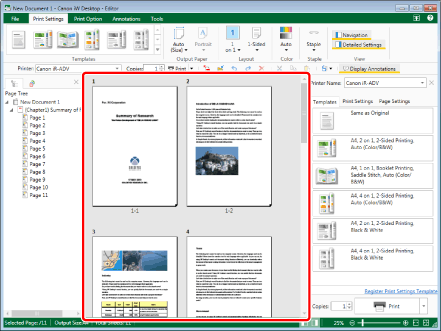
The Work Window is an area for displaying document previews and editing documents.
|
NOTE
|
|
You can move the displayed page by sliding the scroll bar of the Work Window.
For information on changing the magnification factor of the Work Window, see the following.
|
Details Window
The area displayed on the right side of the Desktop Editor screen is called the Details Window. The following types of Details Window exist.
Detailed Window of Print Settings: Displayed for the Print Mode.
Annotation Format Window: Displayed for the Annotations Mode.
The information displayed on the Details Window varies depending on the selected ribbon tab and the mode that is running.
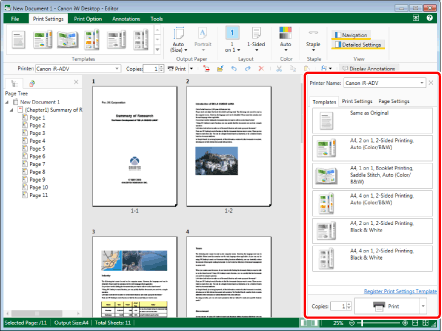
If the [Print Settings]/[Print Option] tab is selected on the ribbon (Print Mode)
You can select the printer/fax driver to use for printing/sending a document via fax, and then print/send a document via fax. The following tabs are displayed.
[Templates] tab: You can select a print settings template. You can also register the print settings specified in the document you are editing as a new print settings template.
[Print Settings] tab: You can configure print settings.
[Page Settings] tab: You can configure header/footer and watermark settings.
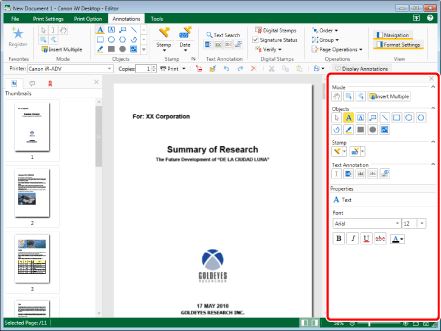
If the [Annotations] tab is selected on the ribbon (Annotations Mode)
The Details Window displays the annotation buttons and annotation properties. Click  to display the annotation buttons by type. Click
  to hide the annotation buttons.
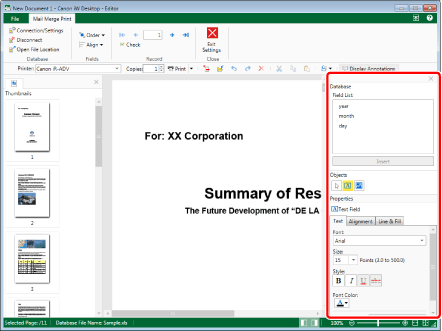
When using the Mail Merge Print Settings Mode
The Details Window displays a list of the records that have been read and the properties of the Mail Merge field.
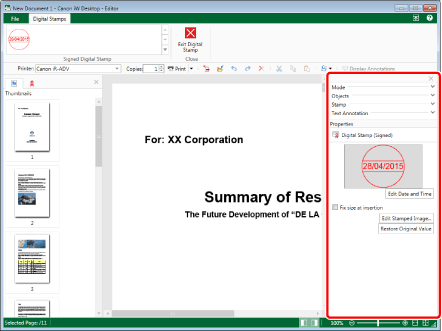
When using the Digital Stamps Mode
The digital stamp properties are displayed on the Details Window.
|
NOTE
|
|
If you select the [Tools] tab of the ribbon, the content of the ribbon tab selected before switching to the [Tools] tab is displayed in the Details Window.
You cannot click the annotation buttons displayed on the Details Window while the Digital Stamps Mode is running.
The Details Window is not displayed while the following modes are running.
Specify Area Not to Edit Mode
Edit Original Pages Mode
Redaction Mode
You can switch between displaying/hiding the Details Window. For more information, see the following.
|
Bars
This section describes the "bars" of Desktop Editor.
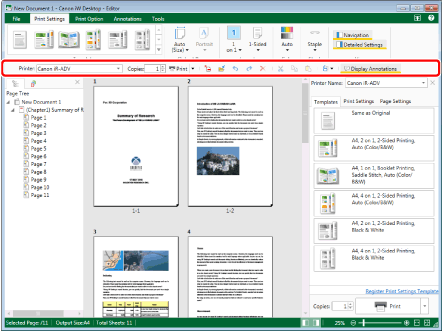
Toolbar
The toolbar enables you to set frequently used ribbon commands on the toolbar.
|
NOTE
|
|
For information on the ribbon commands that can be set as buttons on the toolbar, see the following.
The toolbar can be customized. For more information, see the following.
|
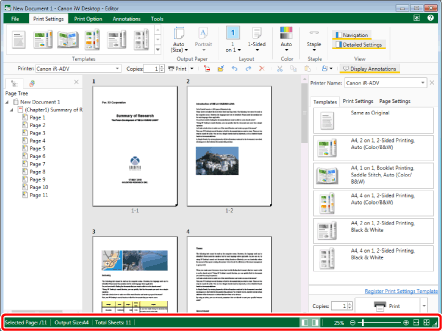
Status Bar
The status bar displays the total number of document pages, page number of the currently selected page, output paper sizes, and the number of sheets to be printed. It also enables you to perform the following operations.
Changing the magnification factor of the Work Window
Displaying/hiding the Navigation Window
Displaying/hiding the Details Window
|
NOTE
|
|
For information on changing the magnification factor of the Work Window, see the following.
For information on displaying/hiding the Navigation Window of Desktop Editor, see the following.
For information on displaying/hiding the Details Window, see the following.
|