Specifying an Area in Which Editing Cannot Be Performed
By specifying an area in which editing cannot be performed in a document, you can fix objects within that area or delete them and reduce the margins. You can also not specify an area in which editing cannot be performed.
When reducing the margins in a document that has headers/footers attached, by setting areas where editing cannot be performed, you can reduce the margins of the document efficiently.
You can specify areas not for editing in the Specify Area Not to Edit Mode of Desktop Editor.
|
NOTE
|
|
Areas where editing cannot be performed cannot be set by page. They are set by document.
Setting areas where editing cannot be performed cannot be undone or redone.
If an object is only partially within an area in which editing cannot be performed, that object is not assumed to be within that area.
If the area in which editing cannot be performed contains only a page number, this function might be unable to correctly identify the area as one in which editing cannot be performed.
In the following cases, this function might identify two similar areas in which editing cannot be performed differently.
When the page sizes are different
When the number of image objects are different
When the number of text objects differ by 3 or more
When a text object is not included (and a text object was included in the area where editing cannot be performed when the object was set)
When the function did not determine that the upper or lower portion of the area is one in which editing cannot be performed
Even if an area is set so that editing cannot be performed, when the specified area does not contain any objects, the setting is automatically changed to [Do Not Specify an Area].
If there are no objects in the top or bottom 1/4 of the page, the area not to edit cannot be selected.
|
Settings for the Area Not to Edit
This section describes the settings for the area not to edit.
|
IMPORTANT
|
|
If an object is only partially within an area in which editing cannot be performed, that object is processed as follows.
[Delete Specified Area] is specified for an area in which editing cannot be performed: the object is deleted
[Fix Specified Area] is specified for an area in which editing cannot be performed: the object is fixed
|
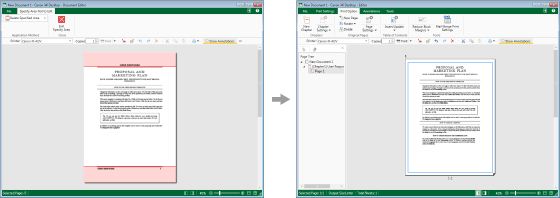
When deleting an area
By setting the area in which editing cannot be performed to [Delete Specified Area], objects within the area are deleted and the margins are reduced.
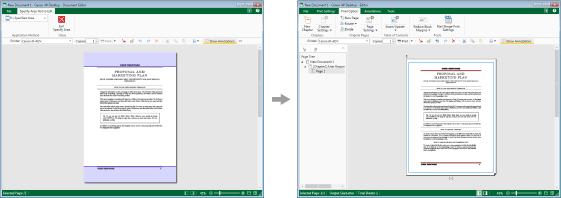
When fixing an area
By setting the area in which editing cannot be performed to [Fix Specified Area], objects within the area specified are fixed. When margins are reduced, only objects outside of the specified area are affected when reducing the margins.
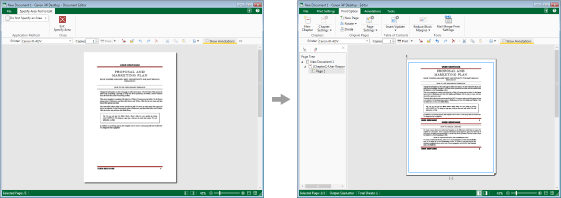
When no area is specified
By setting the area in which editing cannot be performed to [Do Not Specify an Area], all objects within the area in which margins are to be reduced are affected when reducing the margins.
Settings Flow
This section describes the flow of settings for the area not to edit.
|
NOTE
|
|
For information on the screen transition of Desktop Editor, see the following.
|
1.
Click  for
for  (Reduce Block Margins) on the ribbon and select [Specify Area Not to Edit].
 for
for  (Reduce Block Margins) on the ribbon and select [Specify Area Not to Edit].
Or, click  (Specify Area Not to Edit) on the ribbon.
 (Specify Area Not to Edit) on the ribbon.
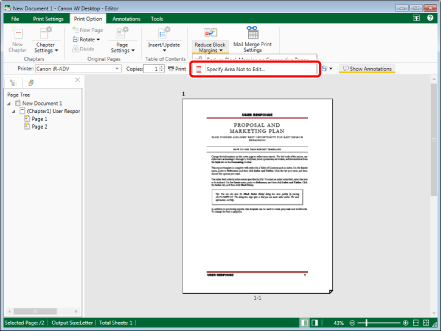
The Specify Area Not to Edit Mode starts, and the [Specify Area Not to Edit] tab is displayed on the ribbon.
|
NOTE
|
|
If commands are not displayed on the ribbon of Desktop Editor, see the following to display them.
This operation can also be performed with the tool buttons on the toolbar. If tool buttons are not displayed on the toolbar of Desktop Editor, see the following to display them.
If an area where editing cannot be performed is already set, a confirmation message is displayed.
If you click [Yes], the Specify Area Not to Edit Mode starts.
If you click [No], the Specify Area Not to Edit Mode does not start.
While the Specify Area Not to Edit Mode is running, tabs other than the [Specify Area Not to Edit] tab are not displayed on the ribbon.
|
2.
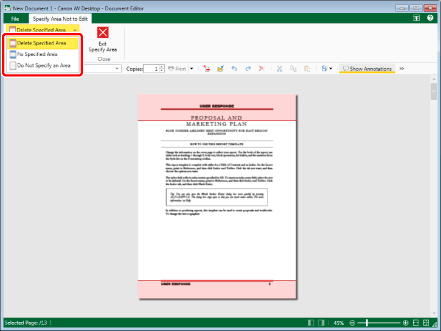
Click  (Delete Specified Area) on the ribbon, and select the method for applying the specified area.
 (Delete Specified Area) on the ribbon, and select the method for applying the specified area.
|
[Delete Specified Area]
|
When reducing margins, the margins are reduced after deleting this specified area.
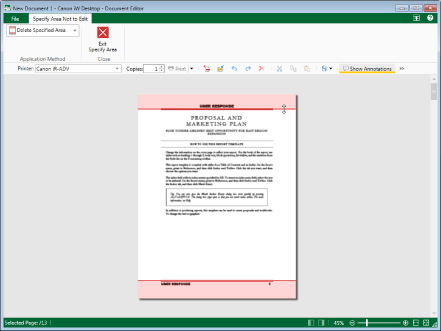
The specified area is highlighted in light red.
|
|
[Fix Specified Area]
|
When reducing margins, the margins are reduced while retaining this specified area.
The specified area is highlighted in light blue.
|
|
[Do Not Specify an Area]
|
Does not specify an area in which editing cannot be performed.
Does not display highlights.
|
|
NOTE
|
|
Margins are not reduced for the following pages. Because of this, even if [Delete Specified Area] is selected, areas within the specified area in which editing cannot be performed are not deleted. In these cases, delete the objects you wish to delete manually.
Pages with annotations attached
Pages with digital stamps attached
Table of contents pages created with Desktop Editor
Pages with Mail Merge fields attached
For information on deleting objects, see the following.
|
3.
Drag the highlighted area to adjust the area in which editing cannot be performed.
|
NOTE
|
|
You cannot adjust the area in which editing cannot be performed so that it exceeds the top or bottom 1/4 of the page.
|
4.
Click  (Exit Specify Area) on the ribbon.
 (Exit Specify Area) on the ribbon.
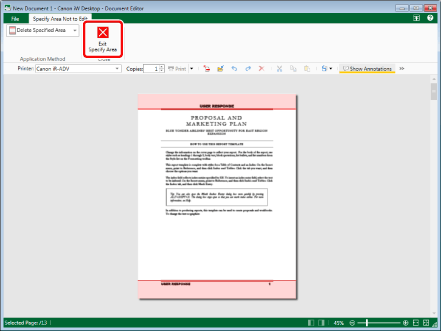
A confirmation message is displayed.
5.
Click [Yes].
The areas that cannot be edited are set.
The [Specify Area Not to Edit] tab is closed, and the Specify Area Not to Edit Mode is exited.
|
NOTE
|
|
In pages that contain the same objects that are within a specified area in which editing cannot be performed are displayed, the area in which editing cannot be performed is colored grey.
Pages that contain greatly differing objects within the area in which editing cannot be performed are not treated as an area not to edit.
|