
Installing after Downloading from the Canon Website
Install the MF Drivers or MF Toolbox after downloading the latest version from the Canon website.
|
If you are connecting the machine and a computer via a USB cable, install the software before connecting the USB cable. A USB cable is not included with the machine. Prepare one separately. |
 |
If an older version is already installed, a screen similar to the following appears when installing the new version, and installation is canceled. Uninstall the older version before installing the new version. Uninstalling 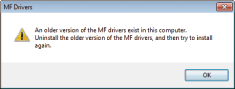 |
Installing the MF Drivers
1
Log on to the computer with an administrator account.
2
Download the drivers from the Canon website (http://www.canon.com/).
For more information about how to download the drivers, see the driver download page for your machine.
3
Unzip the downloaded file.
4
If you are making a wired or wireless LAN connection, connect the machine to the computer.
Before starting installation of the drivers, configure network settings. For more information about how to configure network settings, see "Getting Started".
5
If you are making a USB connection, turn OFF the printer.
6
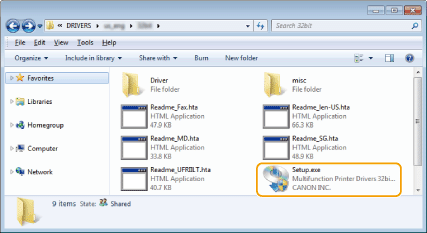
Open the folder where the drivers are stored.
32-bit operating system
[us_eng] or [uk_eng] [32bit] folders of the downloaded file
[us_eng] or [uk_eng]
64-bit operating system
[us_eng] or [uk_eng] [x64] folders of the downloaded file
[us_eng] or [uk_eng]

If you do not know whether to specify the 32-bit version or the 64-bit version for Windows Vista/7/8/Server 2008/Server 2008 R2/Server 2012/Server 2012 R2, see Checking the Bit Architecture.
7
Double-click "Setup.exe".
8
Click [Next].
9
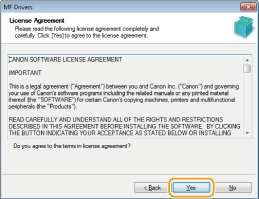
Read the License Agreement, and click [Yes] to agree.
10
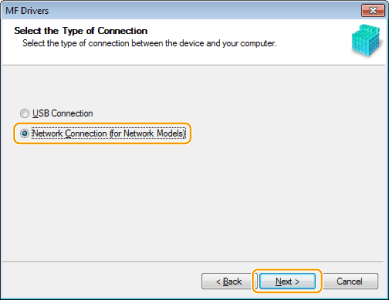
Select the connection method with the computer.
USB Connection
Select [USB Connection], and click [Next].
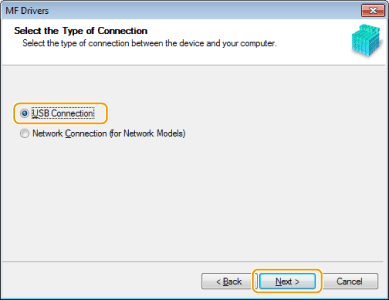
 | Installation of the drivers starts. Proceed to step 17. |
Wired/Wireless LAN Connection
Select [Network Connection], and click [Next].
When the following screen appears, click [Yes].
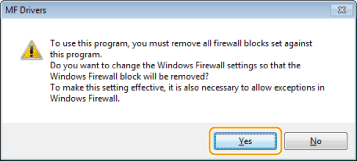
In Server 2003/Server 2008/Server 2008 R2/Server 2012/Server 2012 R2, this screen is not displayed. Proceed to the following procedure.
11
Select the machine, and click [Next].
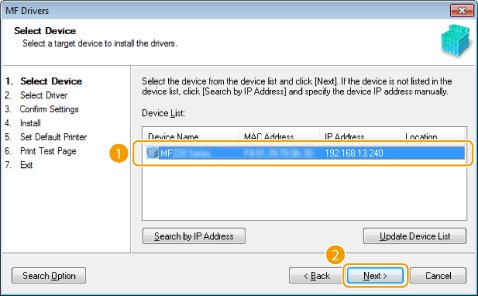
If no machines are displayed in [Device List]
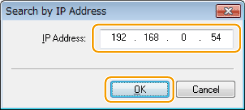
Check the computer and machine connection and IP address settings (Viewing Network Settings (e-Manual)), and click [Update Device List]. If the machine is still not displayed at all, click [Search by IP Address] enter the IP address set on the machine [OK].
12
Select the drivers to install, and click [Next].
If you did not select [Printer], proceed to step 14.
If you did not select either [Printer] or [Fax], proceed to step 15.
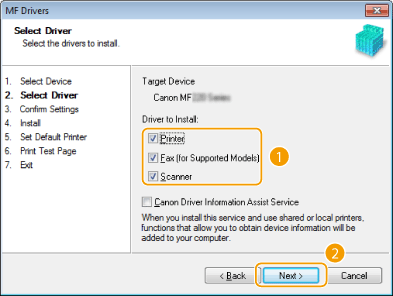
To obtain device information for using a print server
Select the [Canon Driver Information Assist Service] check box.
13
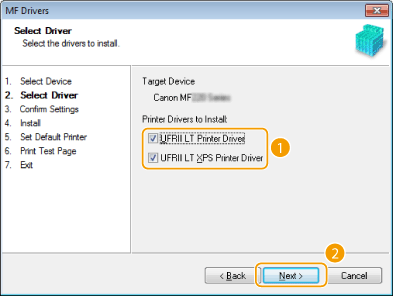
Select the printer drivers to install, and click [Next].
14
Specify details for each driver.
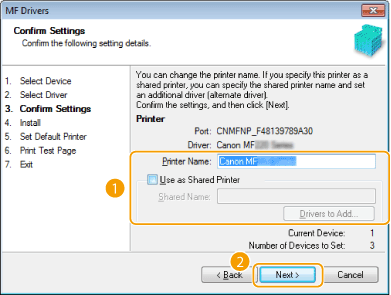
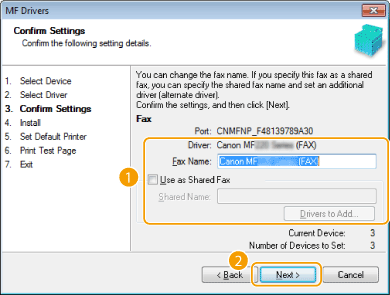
[Printer Name]/[Fax Name]
Change the name as necessary.
Change the name as necessary.
[Use as Shared Printer]/[Use as Shared Fax]
Select the check box if you want to share the machine (using the computer where you are performing the installation as a print server). Setting Up Print Server (e-Manual)
Select the check box if you want to share the machine (using the computer where you are performing the installation as a print server). Setting Up Print Server (e-Manual)
[Shared Name]
Change the shared name as necessary.
Change the shared name as necessary.
[Drivers to Add]
If you have selected the [Use as Shared Printer]/[Use as Shared Fax] check box, install additional drivers as necessary.
Select the operating system, and click [OK] to install additional drivers.
If you have selected the [Use as Shared Printer]/[Use as Shared Fax] check box, install additional drivers as necessary.
Select the operating system, and click [OK] to install additional drivers.
15
Check the displayed information, and click [Start].
| Installation of the drivers starts. |
16
Configure the machine normally used and make a test print.
To configure the machine as the machine normally used, select the driver, and click [Next].
To print a test page, select the driver, and click [Next].
17
Click [Restart].
Installing the MF Toolbox
1
Log on to the computer with an administrator account.
2
Download the MF Toolbox from the Canon website (http://www.canon.com/).
For more information about how to download the MF Toolbox, see the driver download page for your machine.
3
Unzip the downloaded file.
4
Open the folder where the MF Toolbox is stored.
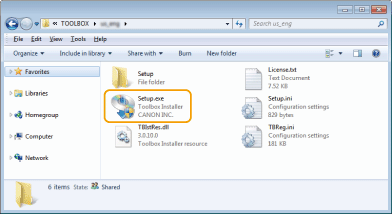
5
Double-click "Setup.exe".
6
Click [Next].
7
Read the License Agreement, and click [Yes] to agree.

8
Specify the folder to install to, and click [Next].
9
Specify the folder for adding an icon, and click [Next].
10
Click [Start].
11
Click [Exit].
Checking the Results of the Installation
You can check whether the MF Drivers are installed correctly or not by whether the icons appear.
Printer driver | |
 | When the printer driver is installed correctly, an icon for the installed printer appears in the printer folder (Displaying the Printer Folder). |
Fax driver | |
 | When the fax driver is installed correctly, an icon for the installed fax appears in the printer folder (Displaying the Printer Folder). |
Scanner driver (network connection) | |
 | When the scanner driver is installed correctly, an icon for the installed scanner appears in the [Scanners and Cameras] or [Scanners and Cameras Properties] folder. |
Scanner driver (USB connection) | |
 | When the scanner driver is installed correctly, an icon for the installed scanner appears in the [Scanners and Cameras] or [Scanners and Cameras Properties] folder. |
MF Toolbox | |
 | When MF Toolbox is installed correctly, an MF Toolbox icon appears on the desktop. |
Network Scan Utility | |
 | When Network Scan Utility is installed correctly, a Network Scan Utility icon appears in the taskbar. |
|
If the icon is not displayedUninstall the drivers (Uninstalling the MF Drivers) and repeat the installation from the beginning. |