Setting IPv6 DNS
|
Before specifying the DNS settings, see "Attention (DNS Settings)."
|
DNS (Domain Name Service) is a service used for associating a host name (a name of a computer or a printer on a TCP/IP network) with an IP address.
1
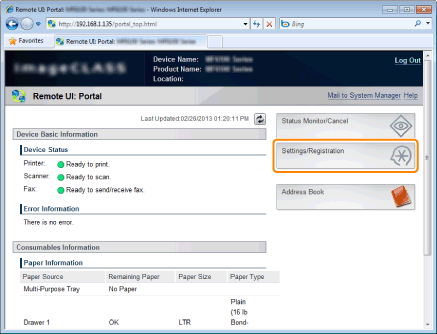
Start the Remote UI and log on in system manager mode.
2
Click [Settings/Registration].
3
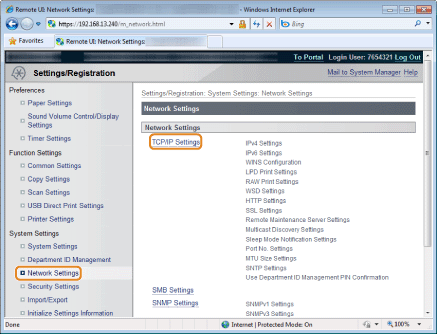
Click [Network Settings] -> [TCP/IP Settings].
4
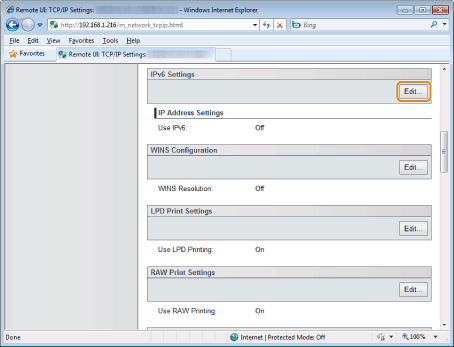
Click [Edit] in [IPv6 Settings].
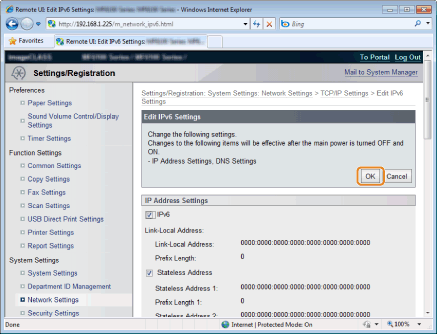
5
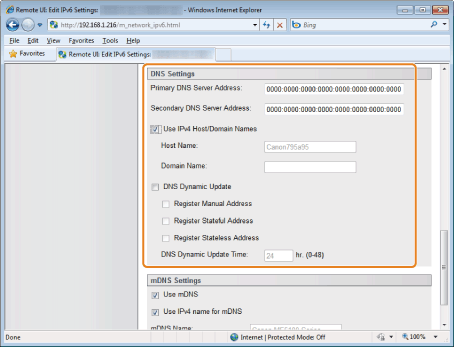
Specify DNS settings.
|
[Primary DNS Server Address]
|
Enter the IP address of the primary DNS server.
|
||||||||
|
[Secondary DNS Server Address]
|
Enter the IP address of the secondary DNS server.
|
||||||||
|
[Use IPv4 Host/Domain Names]
|
Select the check box to use the same name as IPv4.
|
||||||||
|
[Host Name]
|
Enter the host name to be added to the DNS server. Up to 47 characters can be entered.
|
||||||||
|
[Domain Name]
|
Enter the name of the domain to which the machine belongs. Up to 47 characters can be entered.
* For example, "example.com" |
||||||||
|
[DNS Dynamic Update]
|
Select this check box to use DNS Dynamic Update.
Once the check box is selected, you do not need to refresh the IP address of the machine or specify [Host Name] and [Domain Name] for LPR printing.
|
6
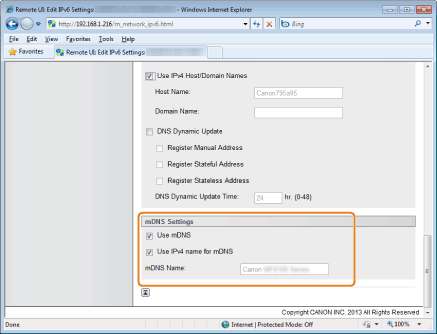
Specify mDNS settings.
Proceed to Step 7 when not using mDNS.
|
[Use mDNS]
|
Select the check box to use the mDNS.
|
|
[Use IPv4 name for mDNS]
|
Select the check box to use the same name as IPv4.
|
|
[mDNS Name]
|
Enter the mDNS name when the [Use IPv4 name for mDNS] check box is not selected.
|
Click [OK].