Restricting the Users Who Can Monitor/Change the Settings Using the SNMP Protocol
You can restrict the users who can specify and browse the settings using the SNMP protocol using a Web browser (Remote UI).
1
Start the Remote UI, and then log in as Administrator.
2
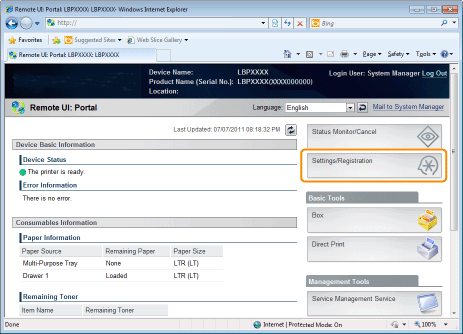
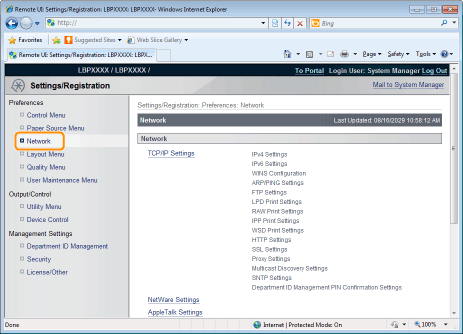
Click [Settings/Registration].
3
Select [Network] from the [Preferences] menu.
4
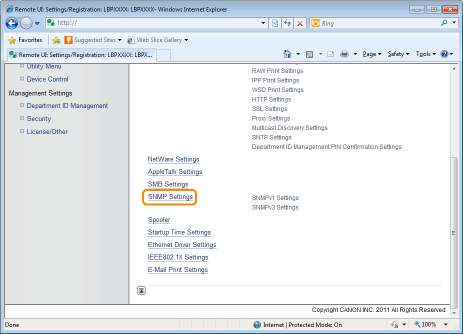
Click [SNMP Settings].
5
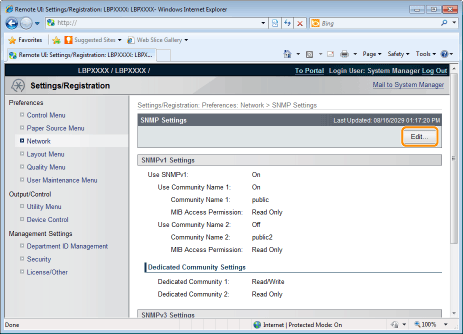
Click [Edit...].
6
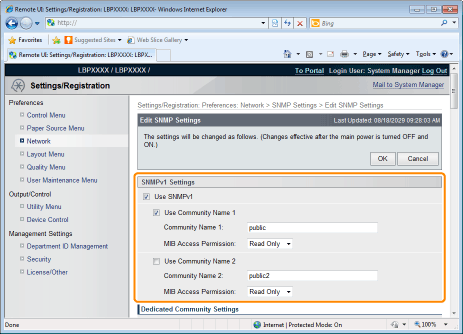
Specify the settings for SNMP.
Configuring the SNMP Protocol
|
(1)
|
Configure the SNMP v. 1 protocol.
When using SNMPv1 protocol
|
a.
|
Select the [Use SNMPv1] check box.
|
|
b.
|
When using Community Name 1, select the check box for [Use Community Name 1], and set the following items.
Set the SNMP Community Name in [Community Name 1]. Up to 32 characters can be entered. The default setting is [public].
Using [MIB Access Permission], select whether to operate the SNMPv1 agent in one of [Read/Write] or [Read Only] modes.
|
|
c.
|
When using Community Name 2, select the check box for [Use Community Name 2], and set the following items.
Set the SNMP Community Name in Community Name 2. Up to 32 characters can be entered. The default setting is [public2].
Using [MIB Access Permission], select whether to operate the SNMPv1 agent in one of [Read/Write] or [Read Only] modes.
|
When you are not using SNMPv1 protocol
Clear the [Use SNMPv1] check box.
|
IMPORTANT
|
When the [Use SNMPv1] check box is cleared
The following problems may occur.
|
*
|
You may not be able to use some functions of Canon utility software or to use the software properly due to an error occurring.
|
|
*
|
You may not be able to specify or browse each option for this printer from utility software that uses the SNMP v. 1 protocol to obtain information.
|
If you clear the [Use SNMPv1] check box, set it after consulting with the network administrator.
|
|
|
(2)
|
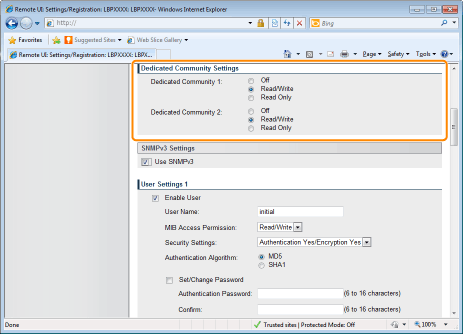
Set a dedicated community.
|
a.
|
In the [Dedicated Community 1] settings, select from [Off], [Read/Write] or [Read Only].
|
|
b.
|
In the [Dedicated Community 2] settings, select from [Off], [Read/Write] or [Read Only].
|
|
|
(3)
|
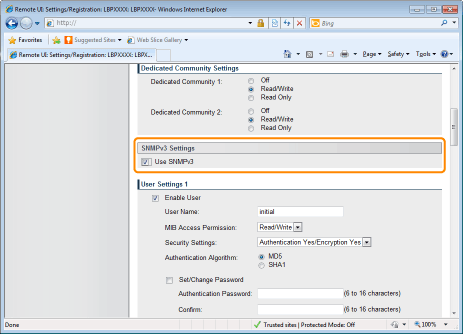
Configure the SNMP v. 3 protocol.
When using SNMPv3 protocol
|
a.
|
Select the [Use SNMPv3] check box.
|
|
b.
|
When setting user information used by SNMPv3 protocol, set user information using [User Settings 1] to [User Settings 5].
|
|
c.
|
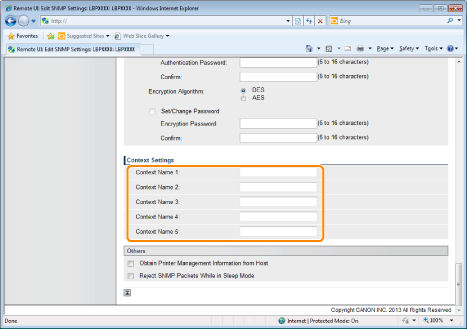
When setting context information used by SNMPv3 protocol, set context information using [Context Settings].
|
When you are not using SNMPv3 protocol
Clear the [Use SNMPv3] check box.
|
|
(4)
|
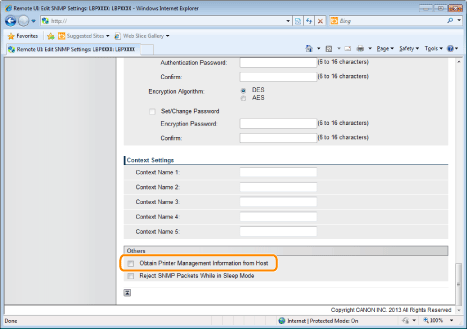
Specify [Obtain Printer Management Information from Host] as needed.
If the [Obtain Printer Management Information from Host] check box is selected, when the printer driver is installed in Windows Vista/7/Server 2008, port monitoring by SNMP is activated automatically.
|
NOTE
|
The port monitoring function by SNMP
The port monitoring function by SNMP is a function of Standard TCP/IP Port, and it periodically obtains printer management information such as information about print applications and ports, using SNMP.
|
|
|
(5)
|
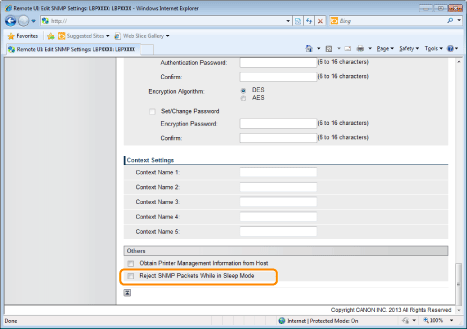
Make a setting for rejecting to receive SNMP packets while in sleep mode, as necessary.
If you select the check box for [Reject SNMP Packets While in Sleep Mode], you may be unable to access the printer from Canon software (iW Series) or applications using the SNMP protocol.
|
|
(6)
|
|
Specifying User Information to Be Used in the SNMP v. 3 Protocol
|
(1)
|
Specify the user information to be used in the SNMP v. 3 protocol.
If You Want to Register/Edit User Information
|
1.
|
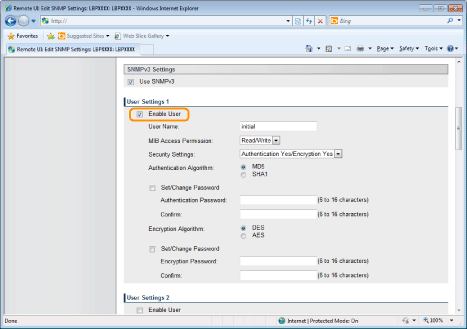
Select the [Enable User] check box under [User Settings 1].
|
|
2.
|
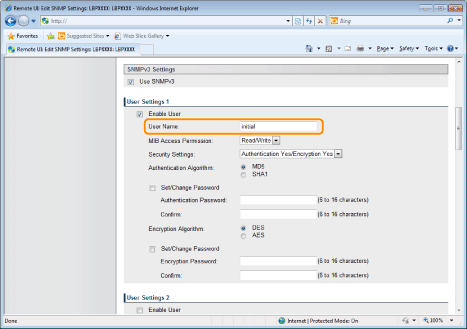
In [User Name], enter the user name to be used in the SNMP v. 3 protocol. Up to 32 alphanumeric characters can be entered.
|
|
3.
|
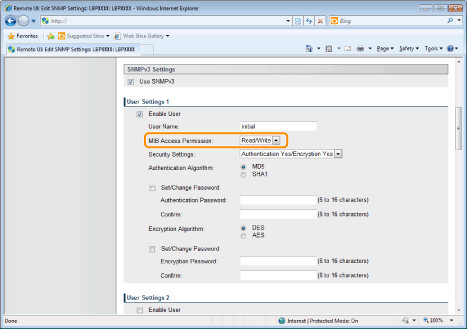
For [MIB Access Permission], select in which mode the SNMP v. 3 agent can operate, [Read/Write] or [Read Only].
|
|
4.
|
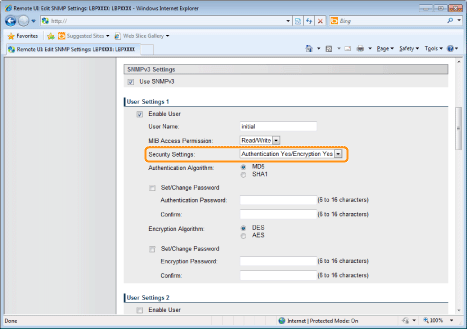
Under [Security Settings], select from [Authentication Yes/Encryption Yes], [Authentication Yes/Encryption No] or [Authentication No/Encryption No] for the security used by SNMPv3.
|
|
5.
|
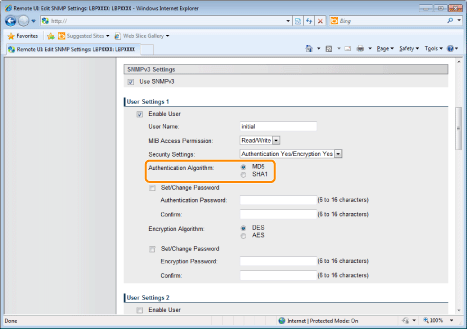
If [Authentication Yes/Encryption Yes] or [Authentication Yes/Encryption No] is set for [Security Settings], select [MD5] or [SHA1] for [Authentication Algorithm] as the authentication algorithm used by SNMPv3.
|
|
6.
|
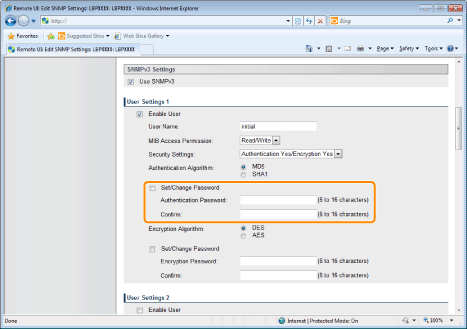
When [Authentication Yes/Encryption Yes] is set using [Security Settings], set an authentication password.
|
[Authentication Password]:
|
Enter the password to be used for the authentication function of the authentication algorithm. 6 to 16 alphanumeric characters can be entered.
|
|
[Confirm]:
|
To confirm the password, enter the entered [Authentication Password] again.
|
|
|
If the SSL encrypted communication function is not used, this item cannot be set by the Remote UI. Either enable the SSL encrypted communication function, or set from the control panel using the following procedure.
|
a.
|
Press [  ] (  Settings), select [Network] → [SNMP v. 3 Settings], and then set [SNMP v. 3] to [On]. |
|
b.
|
Set each password using [Auth. Password] from [User Settings 1] to [User Settings 5].
|
For details on the SSL encrypted communication function, see " Setting Keys and Certificates." |
|
|
7.
|
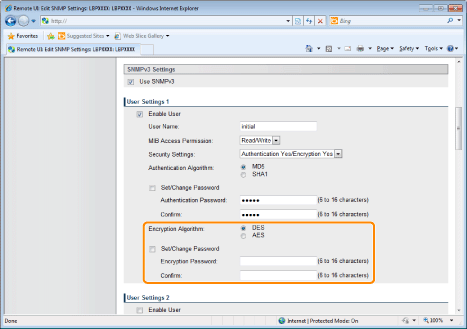
If [Security Settings] are set to [Authentication Yes/Encryption Yes], set an encrypted password.
Set [Encryption Algorithm] to [DES] or [AES].
|
[Encryption Password]:
|
Enter the password to be used for the encryption function of the encryption algorithm. 6 to 16 alphanumeric characters can be entered.
|
|
[Confirm]:
|
To confirm the password, enter the entered [Encryption Password] again.
|
|
|
If the SSL encrypted communication function is not used, this item cannot be set by the Remote UI. Either enable the SSL encrypted communication function, or set from the control panel using the following procedure.
|
a.
|
Press [  ] (  Settings), select [Network] → [SNMP v. 3 Settings], and then set [SNMP v. 3] to [On]. |
|
b.
|
Set each password using [Auth. Password] from [User Settings 1] to [User Settings 5].
|
For details on the SSL encrypted communication function, see " Setting Keys and Certificates." |
|
|
8.
|
Set [User Settings 2] to [User Settings 5] using the same procedure as needed.
|
If You Want to Change the Status (Valid/Invalid) of User Information
To enable registered user information, select the [Enable User] check box at the top of the targeted user information.
To disable registered user information, clear the [Enable User] check box at the top of the targeted user information.
|
|
(2)
|
|
Specifying Context Information to Be Used in the SNMP v. 3 Protocol
|
(1)
|
Specify the context information to be used in the SNMP v. 3 protocol.
If You Want to Register Context Information
|
1.
|
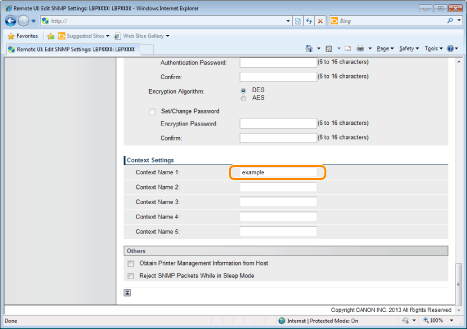
Enter the context names used by the SNMPv3 protocol in [Context Name 1] to [Context Name 5] under [Context Settings]. Up to 32 characters can be entered.
|
If You Want to Erase Context Information
|
1.
|
Delete the context names that are entered in [Context Name 1] to [Context Name 5] under [Context Settings] that you want to delete.
|
|
|
(2)
|
|
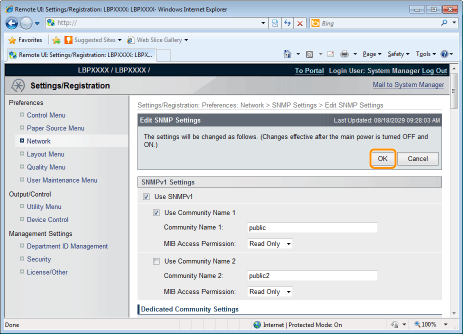
Click [OK].
8
Perform a hard reset or restart the printer.
|
→
|
After performing a hard reset or restarting the printer, the settings are effective.
|
|
NOTE
|
To perform a hard reset
You can perform a hard reset using the following procedure.
|
1.
|
Click [Settings/Registration].
|
|
2.
|
Select [Device Control] from the [Output/Control] menu.
|
|
3.
|
Select [Hard Reset], and then click [Execute].
|
|

 ] (
] ( Settings), select [Network] → [SNMP v. 3 Settings], and then set [SNMP v. 3] to [On].