Configuring the Protocol Settings

This section describes the procedure for specifying the settings using the Remote UI.
In the Remote UI, you can specify the settings by accessing the printer from a Web browser via a network.
Before specifying the settings, see "Attention (Protocol Settings)."
NOTE
When specifying the settings using software other than the Remote UI
You can also specify the settings using the following software.
You can specify the settings by accessing the FTP server of the printer using Command Prompt.
You can specify the settings using the Canon software, NetSpot Device Installer, in the supplied CD-ROM.
If you want to configure the settings such as the DNS server settings, use the Remote UI or FTP Client.
The specifiable options vary depending on the software. See "Network Setting Items" and use software appropriate to the network environment you are using or options that you want to specify.
1
Start the Remote UI, and then log in as Administrator.
2
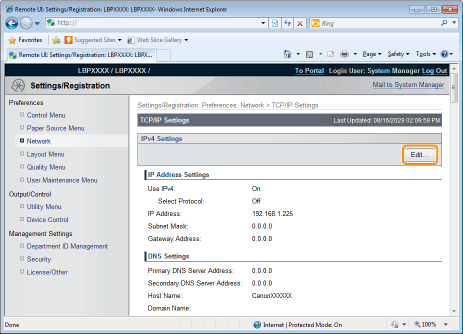
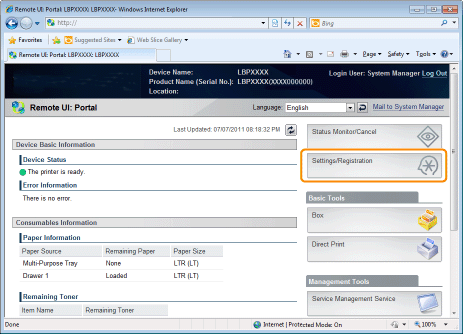
Click [Settings/Registration].
3
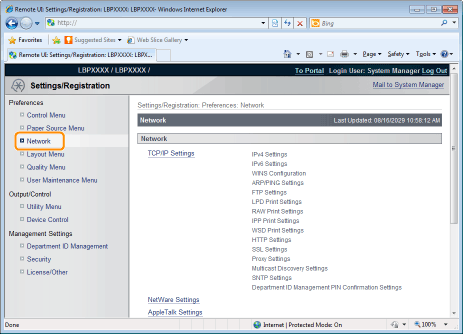
Select [Network] from the [Preferences] menu.
4
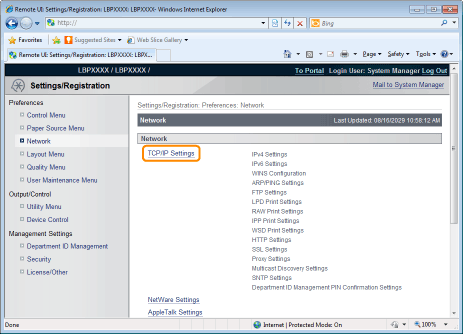
Click [TCP/IP Settings].
5
Configure the protocol settings.

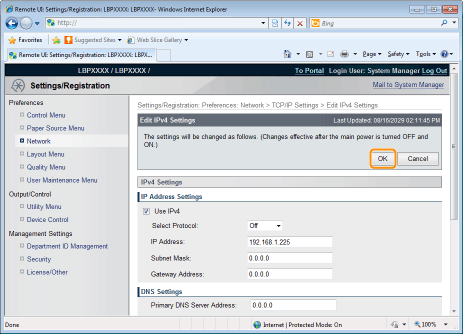
IP Address Settings

(1)
Click [Edit...] in [IPv4 Settings].
(2)
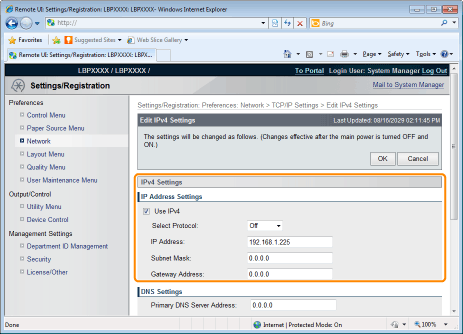
Set the IP address.
[Use IPv4]
When the check box is selected, use IPv4.
[Select Protocol]
Select the protocol used from [Off], [DHCP], [RARP] or [BOOTP].
When [Off] is selected using [Select Protocol], set the following items.
[IP Address]
Enter the printer's IP address.
[Subnet Mask]
Enter the subnet mask used by the TCP/IP network.
[Gateway Address]
Enter the gateway address used by the TCP/IP network.
(3)
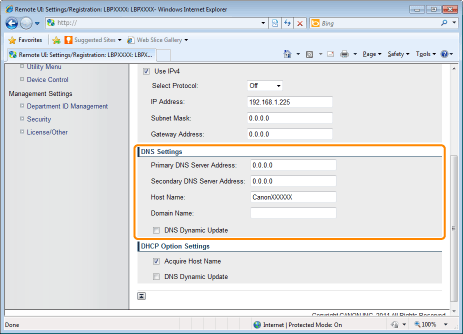
Set DNS.
[Primary DNS Server Address]
Enter the IP address of the primary DNS server.
[Secondary DNS Server Address]
Enter the IP address of the secondary DNS server.
[Host Name]
Enter the host name to be added to the DNS server. Up to 47 characters can be entered.
[Domain Name]
Enter the name of the domain to which the printer belongs. Up to 47 characters can be entered.
Entry example: "example.com"
[DNS Dynamic Update]
Select the check box when using the DNS Dynamic Update function. When you are not using the DNS Dynamic Update Function, clear the check box.
Using the DNS Dynamic Update function, by registering the [Host Name] and [Domain Name] to the DNS server, the printer's IP address can be used without being fixed.
(4)
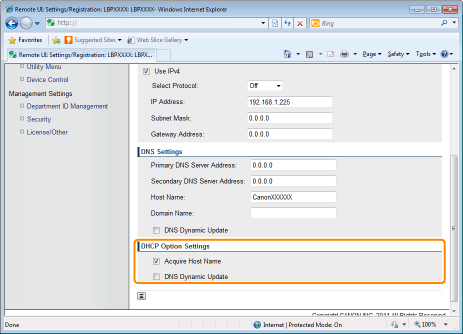
Set DHCP option settings.
[Acquire Host Name]
When obtaining the host name using DHCP, select the [Acquire Host Name] check box.
[DNS Dynamic Update]
When updating the host name using DHCP, select the [DNS Dynamic Update] check box.
(5)
Click [OK].
Proceed to Step 6 if you do not specify the settings for the other options.

WINS Settings

(1)
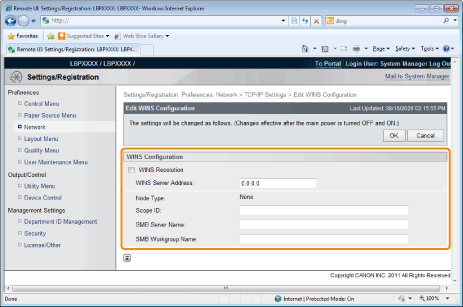
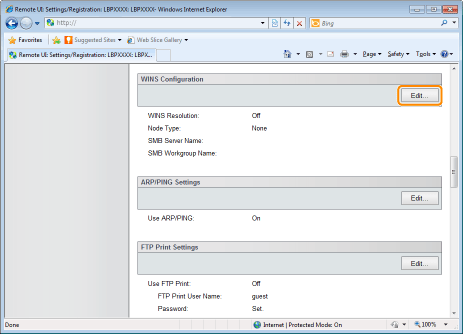
Click [Edit...] in [WINS Configuration].
(2)
Set WINS.
When Using WINS Resolution
Select the [WINS Resolution] check box, and set the following items.
[WINS Server Address]
Enter the IP address of the WINS server.
When using the IP address settings specified by DHCP, if you obtain the WINS server IP address from the DHCP server, the IP address obtained from the DHCP server is overwritten.
[Scope ID]
Enter [Scope ID] as needed. You can enter up to 63 characters.
The scope ID is an identifier to determine the range available for printers and computers. The scope ID is browsed regardless of the WINS resolution settings.
When a scope ID is not specified for the computer in your network environment, leave the [Scope ID] field blank.
Set the following items when registering printers on the WINS server.
[SMB Server Name]
Enter the name of the WINS server. You can enter up to 15 characters. (spaces cannot be entered between the characters)
Set the server name that was set here using the SMB function.
[SMB Workgroup Name]
Enter the workgroup name. You can enter up to 15 characters.(spaces cannot be entered between the characters)
Set the workgroup name that was set here using the SMB function.
When not Using WINS Resolution
Clear the [WINS Resolution] check box.
(3)
Click [OK].
Proceed to Step 6 if you do not specify the settings for the other options.

ARP/PING Settings

Select whether to use the ARP/PING function.
(1)
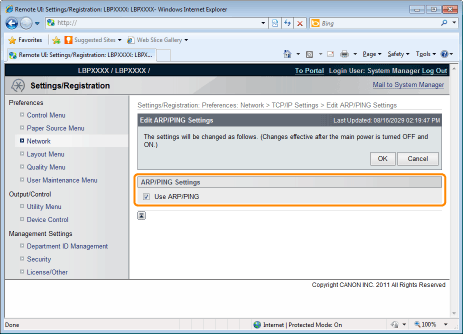
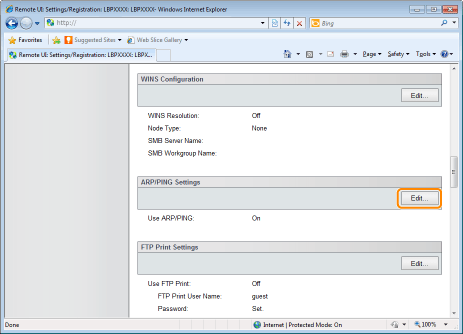
Click [Edit...] in [ARP/PING Settings].
(2)
Set ARP/PING.
[Use ARP/PING]
When the check box is selected, you can change the IP address settings from the client using the ARP/PING command.
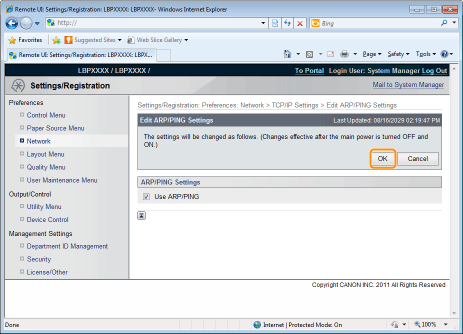
(3)
Click [OK].
IMPORTANT
When the [Use ARP/PING] check box is cleared
You cannot set the IP address using the ARP/PING command.
Proceed to Step 6 if you do not specify the settings for the other options.

FTP Settings

(1)
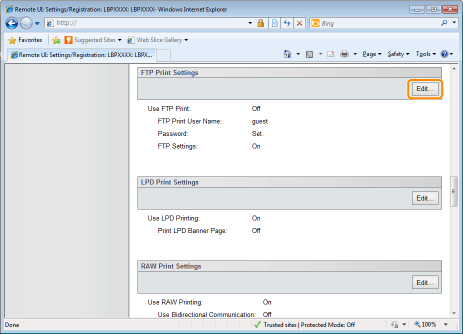
Click [Edit...] in [FTP Print Settings].
(2)
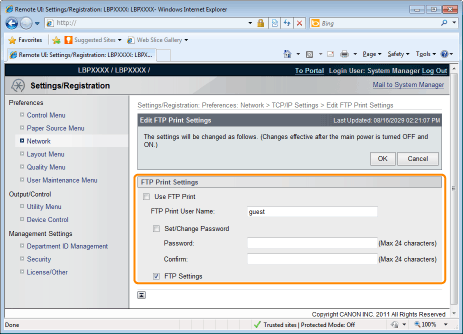
Set FTP print.
[Use FTP Print]
When the check box is selected, you can access the printer's FTP server using the FTP client and print files.
[FTP Print User Name]
Enter the user name for logging in to the FTP server. Up to 24 alphanumeric characters can be entered.
You cannot set "root."
[Set/Change Password]
Select the check box when setting/changing the password.
[Password]
Enter the password for logging in to the FTP server. Up to 24 alphanumeric characters can be entered.
[Confirm]
To confirm the password, enter the entered [Password] again.
[FTP Settings]
When the check box is selected, changing settings from the FTP client is allowed.
(3)
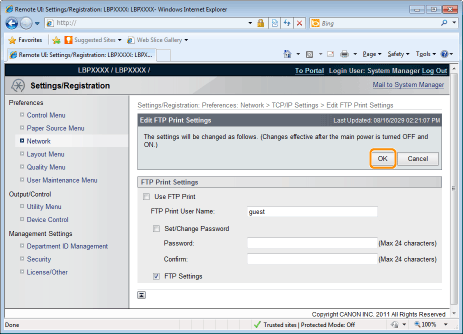
Click [OK].
Proceed to Step 6 if you do not specify the settings for the other options.

LPD Settings

(1)
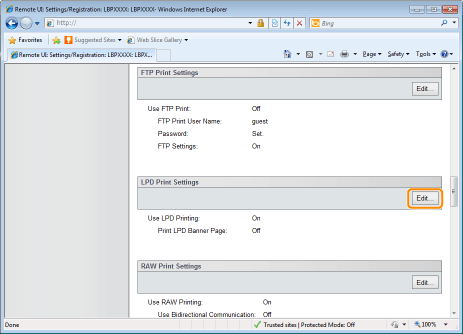
Click [Edit...] in [LPD Print Settings].
(2)
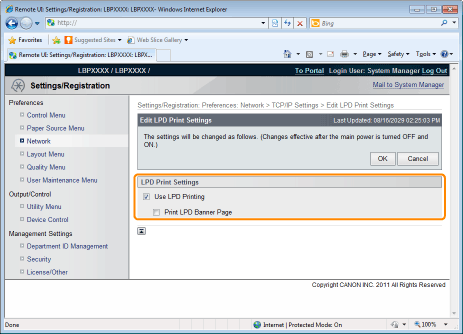
Set LPD print.
[Use LPD Printing]
When the check box is selected, the LPD print function is enabled.
[Print LPD Banner Page]
When the check box is selected, whenever it prints using LPD applications, a banner page is printed simultaneously.
Banner page printing is set for each job. If the [Print LPD Banner Page] check box is selected, a banner page is printed simultaneously for jobs that are set to print banners. Banner pages are not printed for jobs that are set not to print banner pages.
If you are not printing pages, clear the [Print LPD Banner Page] check box. If the [Print LPD Banner Page] check box is cleared, it will not always print banner pages.
(3)
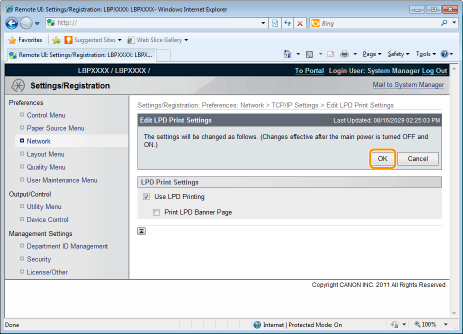
Click [OK].
Proceed to Step 6 if you do not specify the settings for the other options.

RAW Settings

Normally, you do not need to change the settings for this option.
(1)
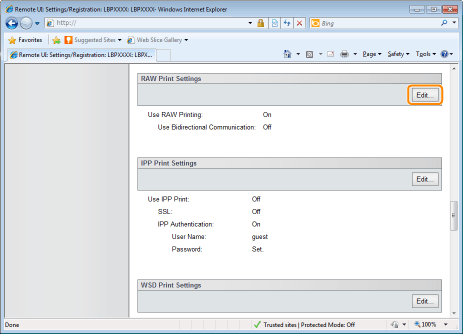
Click [Edit...] in [RAW Print Settings].
(2)
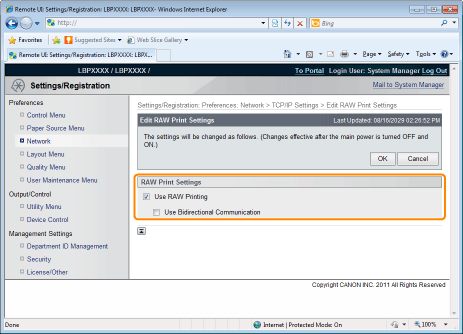
Set RAW printing.
[Use RAW Printing]
When the check box is selected, the RAW printing function is enabled.
[Use Bidirectional Communication]
When the check box is selected, bidirectional communication is performed.
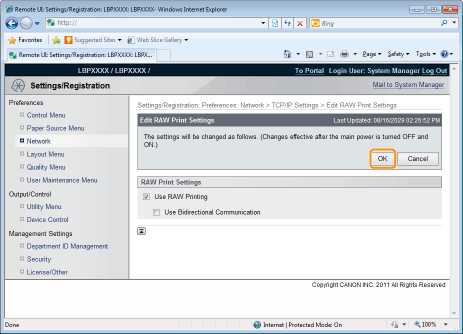
(3)
Click [OK].
Proceed to Step 6 if you do not specify the settings for the other options.

IPP/IPPS Settings

(1)
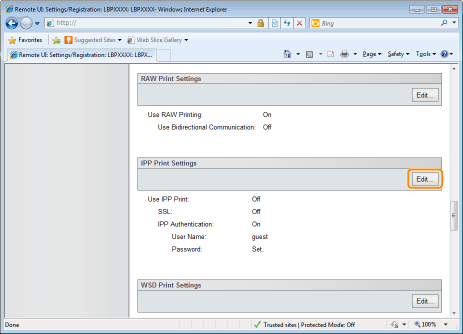
Click [Edit...] in [IPP Print Settings].
(2)
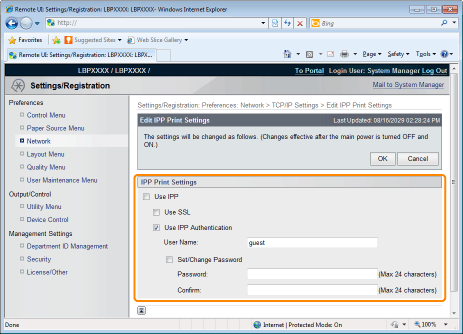
Set IPP print.
To Use IPP/IPPS Printing
Select the [Use IPP] check box, and set the following items.
[Use SSL]
When the check box is selected, you can use IPPS (encryption of IPP communication data using SSL).
You can only use IPPS when the SSL encrypted communication function is enabled.
You cannot select the [Use SSL] check box if a key and certificate have been created but the use key is not registered.
See "Selecting Keys and Certificates" for more information about SSL encrypted communication functions and key registration procedures.
[Use IPP Authentication]
When the check box is selected, use the IPP print user authentication function.
When the [Use IPP Authentication] check box is selected, set the following items.
[User Name]
Enter the user name used for the IPP print user authentication function. Up to 24 characters can be entered.
[Set/Change Password]
Select the check box when setting/changing the password.
[Password]
Enter the password used for the IPP print user authentication function. Up to 24 characters can be entered.
[Confirm]
For confirmation, enter the same [Password] again.
IMPORTANT
When the [Use IPP] check box is selected
The HTTP setting [Use HTTP] turns [On] automatically.
When Not Using IPP/IPPS Printing
Clear the [Use IPP] check box.
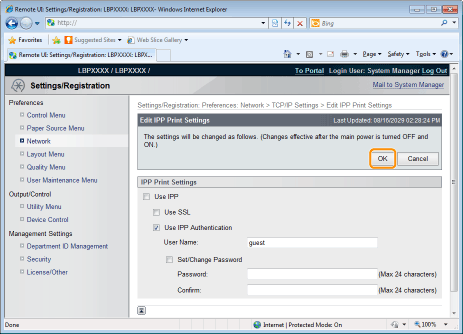
(3)
Click [OK].
Proceed to Step 6 if you do not specify the settings for the other options.

WSD Settings

(1)
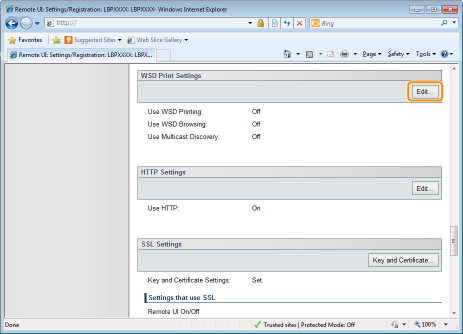
Click [Edit...] in [WSD Print Settings].
(2)
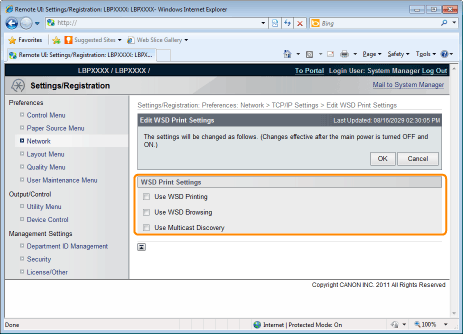
Set WSD printing.
[Use WSD Printing]
Select the check box to use WSD printing.
[Use WSD Browsing]
When the check box is selected, it obtains printer information using WSD reference.
If you select the [Use WSD Printing] check box, the [Use WSD Browsing] check box will always be selected.
You can only clear the [Use WSD Browsing] check box when the [Use WSD Printing] check box is cleared.
[Use Multicast Discovery]
Select the check box to use Multicast Discovery.
(3)
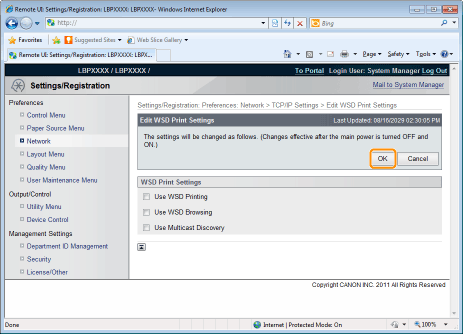
Click [OK].
Proceed to Step 6 if you do not specify the settings for the other options.

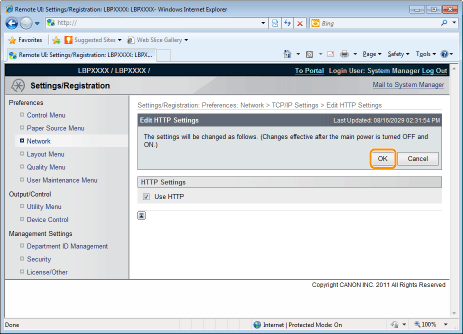
HTTP Settings

Specify whether to use the HTTP function.
(1)
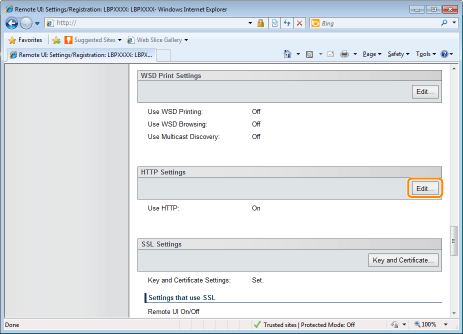
Click [Edit...] in [HTTP Settings].
(2)
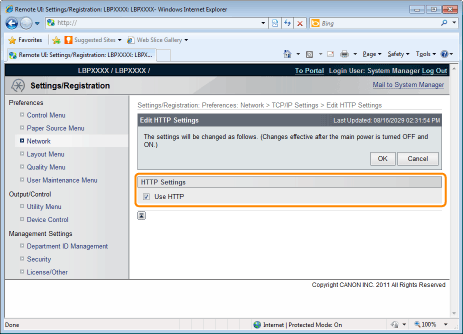
Set HTTP.
[Use HTTP]
When the check box is selected, you can access the printer using HTTP.
IMPORTANT
When the [Use HTTP] check box is cleared
The settings on the functions using HTTP change automatically, as shown below.
[Use IPP Print]
[Off]
[Remote UI]*
[Off]
*
Can only be set from the printer's control panel and the FTP client
If the [Use HTTP] check box is cleared, you will not be able to use IPP print or Remote UI, so consult with the network administrator before you set it.
(3)
Click [OK].
Proceed to Step 6 if you do not specify the settings for the other options.

Setting SSL Keys and Certificates

Check the key used for SSL.
See "Selecting Keys and Certificates" for more information about SSL encrypted communication functions and key registration and selection procedures.

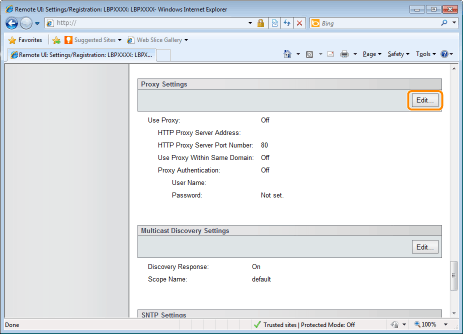
Proxy Settings

(1)
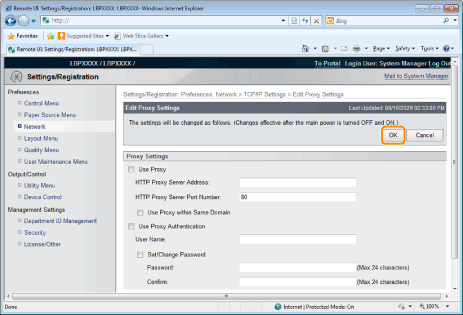
Click [Edit...] in [Proxy Settings].
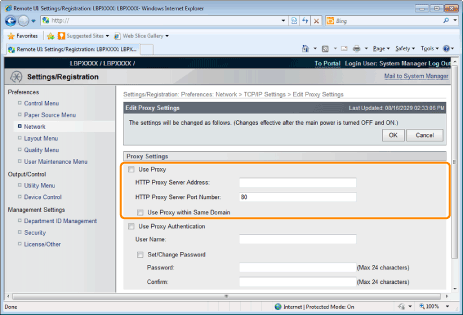
(2)
Set proxy functions.
When using proxy functions
Select the [Use Proxy] check box, and set the following items.
[HTTP Proxy Server Address]
Enter the address of the proxy server used by the proxy functions.
[HTTP Proxy Server Port Number]
Enter the port number of the proxy server used by the proxy functions. You can set it between [0] and [99999].
[Use Proxy within Same Domain]
When the check box is selected, use the proxy function within the same domain.
When not using proxy functions
Clear the [Use Proxy] check box.
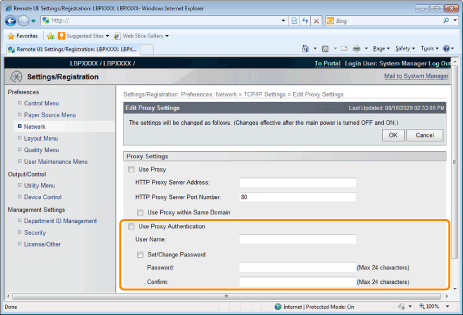
(3)
Set proxy authentication functions.
When using proxy authentication functions
Select the [Use Proxy Authentication] check box, and set the following items.
[User Name]
Enter the user name used for proxy authentication. Up to 24 alphanumeric characters can be entered.
[Set/Change Password]
Select the check box to use a password for proxy authentication. When you are not using a password for proxy authentication, clear the check box.
[Password]
When [Set/Change Password] is selected, enter the password used for proxy authentication. Up to 24 alphanumeric characters can be entered.
[Confirm]
To confirm the password, enter the entered [Password] again.
When not using proxy authentication functions
Clear the [Use Proxy Authentication] check box.
(4)
Click [OK].
Proceed to Step 6 if you do not specify the settings for the other options.

Multicast Discovery Settings

Set whether the printer will respond to device searches over the network using Multicast Discovery.
(1)
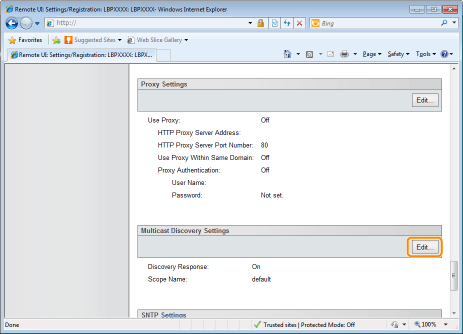
Click [Edit...] in [Multicast Discovery Settings].
(2)
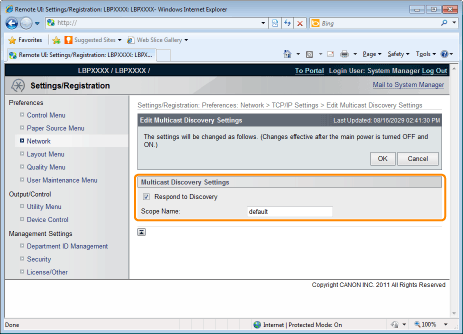
Set Multicast Discovery.
[Respond to Discovery]
Select the check box to allow it to respond to a multicast search request.
[Scope Name]
Enter the scope name used when a specified device is searched from utility software such as NetSpot Device Installer using multicast. Up to 32 characters can be entered.
You cannot use any of the following characters: "(", ")", ",", "!", "<", ">", "=", "~", ";", "+", "*", "\."
(3)
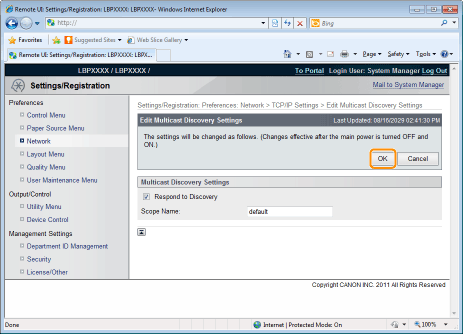
Click [OK].
Proceed to Step 6 if you do not specify the settings for the other options.

SNTP Settings

Set whether to synchronize the printer time with the NTP server.
(1)
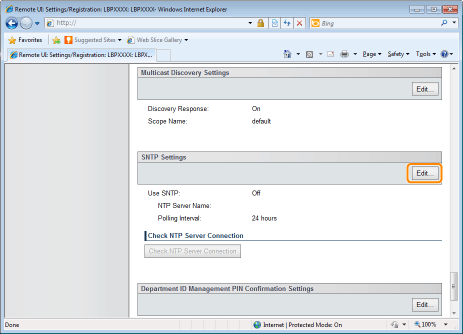
Click [Edit...] in [SNTP Settings].
(2)
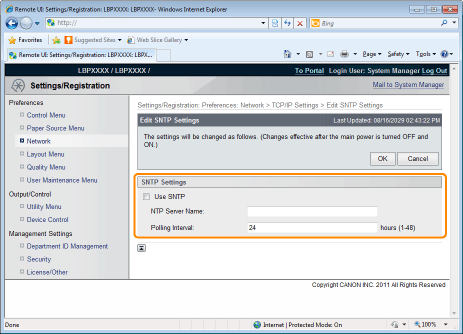
Set SNTP.
When using the SNTP client function to obtain time information from the NTP server
Select the [Use SNTP] check box, and set the following items.
[NTP Server Name]
If DNS is set, enter the server name of the NTP server in [NTP Server Name].
If DNS is not set, enter the IP address of the NTP server in [NTP Server Name].
[Polling Interval]
Set the interval for the printer to poll the NTP server for time information. You can set intervals of [1] to [48] (hours).
NOTE
NTP Server
It is a public time information server on the Internet.
When not Using the SNTP Client Function
Clear the [Use SNTP] check box.
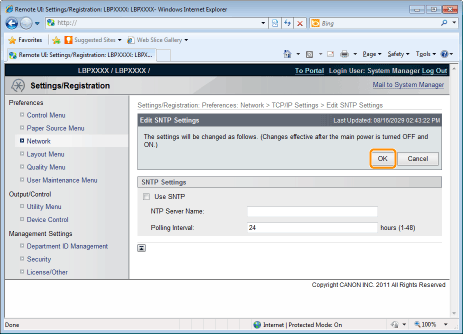
(3)
Click [OK].
Proceed to Step 6 if you do not specify the settings for the other options.

Department ID Management PIN Configuration Settings

Specifies whether the department ID and password should be confirmed before printing using the XPS printer driver.
(1)
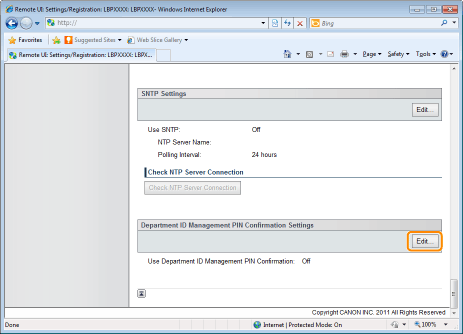
Click [Edit...] in [Department ID Management PIN Confirmation Settings].
(2)
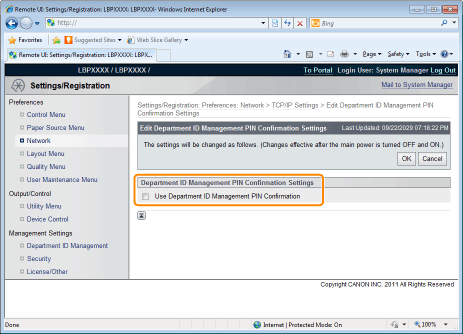
Set the Department ID Management PIN Confirmation function.
IMPORTANT
To use this function, you need to enable Department ID Management in advance.
A key pair to use for encrypted SSL communication is required to confirm Department IDs and passwords. Even if you enable [Use Department ID Management PIN Confirmation], Department IDs and passwords cannot be confirmed if the key pair is corrupted or invalid. In this case, erase the key pair and see "Setting Keys and Certificates" to register a new key pair.
If there is no key pair, you cannot enable [Use Department ID Management PIN Confirmation]. You can use the preinstalled key pair, or generate an original key pair with the printer, to set as the default key. For information on the default key, and instructions on how to generate an original key, see "Setting Keys and Certificates."
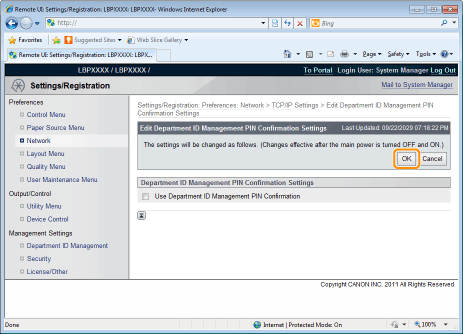
(3)
Click [OK].
Proceed to Step 6 if you do not specify the settings for the other options.
6
Perform a hard reset or restart the printer.
After performing a hard reset or restarting the printer, the settings are effective.
NOTE
To perform a hard reset
You can perform a hard reset using the following procedure.
1.
Click [Settings/Registration].
2.
Select [Device Control] from the [Output/Control] menu.
3.
Select [Hard Reset], and then click [Execute].
051R-08E