Setting a Port and Installing the Printer Driver
The installation procedure varies depending on the operating system. See the appropriate procedure according to your operating system.
Windows Vista, 7, and Server 2008
1
Make sure that the LAN cable is connected properly, and the printer is turned ON.
2
Turn the computer on, and then log on to Windows as a user with administrative rights.
3
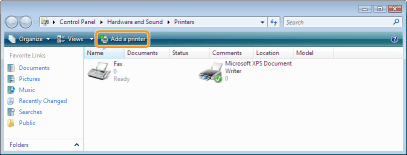
Open the printer folder.
4
Click [Add a printer].
5
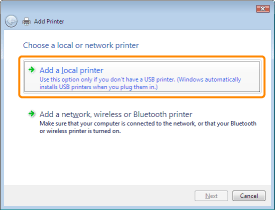
Click [Add a local printer].
6
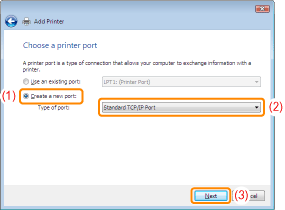
Create a port.
|
(1)
|
Select [Create a new port].
|
|
(2)
|
Select [Standard TCP/IP Port].
|
|
(3)
|
Click [Next].
|
7
Enter the IP address or name of the printer.
|
(1)
|
Select [Autodetect] or [TCP/IP Device].
|
||
|
(2)
|
Enter the IP address or name* of the printer in [Hostname or IP address].
|
||
|
(3)
|
Clear the [Query the printer and automatically select the driver to use] check box.
|
||
|
(4)
|
Click [Next].
|
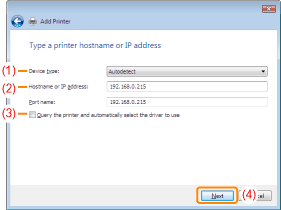
 If you are not sure about the value to be entered in [Hostname or IP address] If you are not sure about the value to be entered in [Hostname or IP address]The value to be entered varies depending on how the IP address of the printer was set.
 If the printer is not detected If the printer is not detectedFollow the on-screen instructions and search again for the printer, or see "Basic Operations/Various Information for Windows" and specify [Device Type].
|
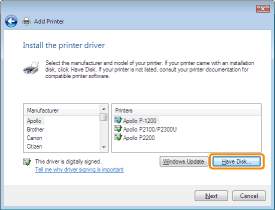
8
Click [Have Disk].
9
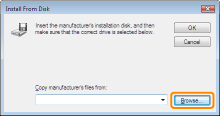
Insert the supplied CD-ROM "LBP6300 User Software" into the CD-ROM drive of your computer, and then click [Browse].
If CD-ROM Setup appears, click [Exit].
10
Open the folder in which the printer driver is included.
For a 32-bit operating system
Open the folders in the supplied CD-ROM: [English] - [32bit] - [Driver].
For a 64-bit operating system
Open the folders in the supplied CD-ROM: [English] - [x64] - [Driver].
 If you are not sure whether you are using a 32-bit operating system or 64-bit operating system If you are not sure whether you are using a 32-bit operating system or 64-bit operating system |
11
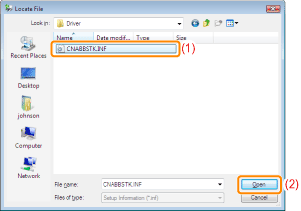
Open the INF file.
|
(1)
|
Select the INF file.
|
|
(2)
|
Click [Open].
|
12
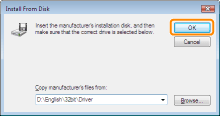
Click [OK].
13
Click [Next].
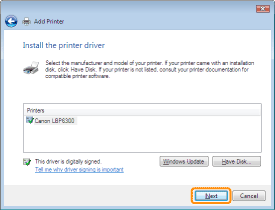
14
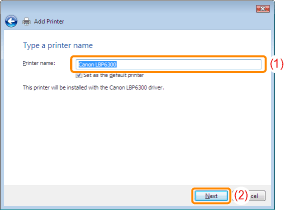
Specify the printer name.
|
(1)
|
Enter a new name if you want to change the printer name.
|
||
|
(2)
|
Click [Next].
|
|
→
|
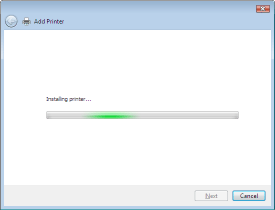
The installation starts. Wait until the following screen disappears.
 |
 If the [User Account Control] dialog box appears If the [User Account Control] dialog box appearsClick [Continue] or [Yes].
|
15
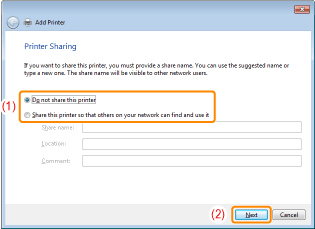
When the following screen appears, select whether or not to share the printer.
|
(1)
|
Select whether or not to share the printer (whether or not to use the computer on which the printer driver is being installed as the print server).
|
||||
|
(2)
|
Click [Next].
|
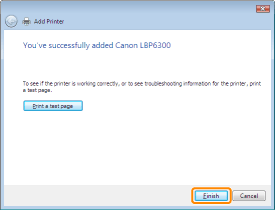
16
Click [Finish].
If you want to print a test page, click [Print a test page].
 |
When [Set as the default printer] is displayed, select whether or not to use the printer as the default printer. (Windows 7 and Server 2008 R2)
|
 |
When the following screen appears, you can remove the CD-ROM.
|
|
When the installation is complete, an icon and folder for this printer will be created.
 "After Installation" "After Installation"
|
Windows 2000, XP, and Server 2003
1
Make sure that the LAN cable is connected properly, and the printer is turned ON.
2
Turn the computer on, and then log on to Windows as a user with administrative rights.
3
Open the printer folder.
4
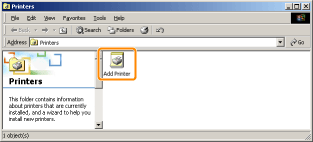
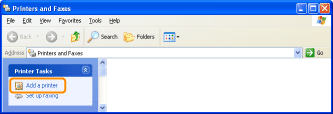
Display [Add Printer Wizard].


Double-click [Add Printer].

Click [Add a printer].
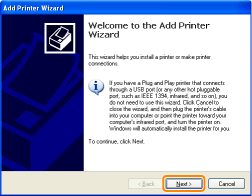
5
Click [Next].
6
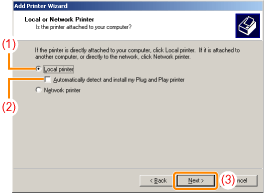
Specify the type of printer to be used.

|
(1)
|
Select [Local printer].
|
|
(2)
|
Clear the [Automatically detect and install my Plug and Play printer] check box.
|
|
(3)
|
Click [Next].
|


|
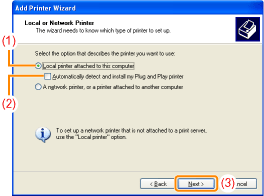
(1)
|
Select [Local printer attached to this computer].
|
|
(2)
|
Clear the [Automatically detect and install my Plug and Play printer] check box.
|
|
(3)
|
Click [Next].
|
7
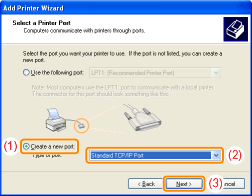
Create a port.
|
(1)
|
Select [Create a new port].
|
|
(2)
|
Select [Standard TCP/IP Port].
|
|
(3)
|
Click [Next].
|
8
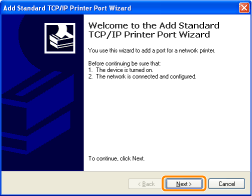
Click [Next].
9
Enter the IP address or name of the printer.
|
(1)
|
Enter the IP address or name* of the printer in [Printer Name or IP Address].
|
||
|
(2)
|
Click [Next].
|
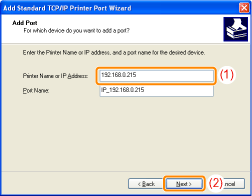
 If you are not sure about the value to be entered in [Printer Name or IP Address] If you are not sure about the value to be entered in [Printer Name or IP Address]The value to be entered varies depending on how the IP address of the printer was set.
 If the printer is not detected If the printer is not detectedFollow the on-screen instructions and search again for the printer, or see "Basic Operations/Various Information for Windows" and specify [Device Type].
|
10
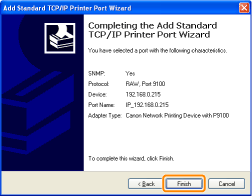
Click [Finish].
11
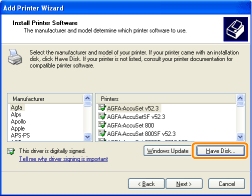
Click [Have Disk].
12
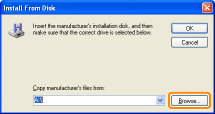
Insert the supplied CD-ROM "LBP6300 User Software" into the CD-ROM drive of your computer, and then click [Browse].
If CD-ROM Setup appears, click [Exit].
13
Open the folder in which the printer driver is included.


 (32-bit operating system)
Open the folders in the supplied CD-ROM: [English] - [32bit] - [Driver].

 (64-bit operating system)
Open the folders in the supplied CD-ROM: [English] - [x64] - [Driver].
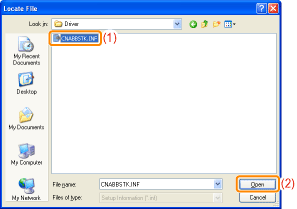
14
Open the INF file.
|
(1)
|
Select the INF file.
|
|
(2)
|
Click [Open].
|
15
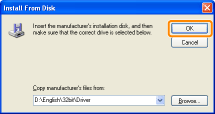
Click [OK].
16
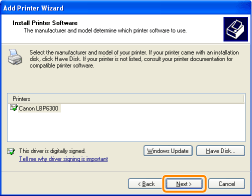
Click [Next].
17
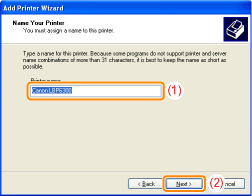
Specify the printer name.
|
(1)
|
Enter a new name if you want to change the printer name.
|
||
|
(2)
|
Click [Next].
|
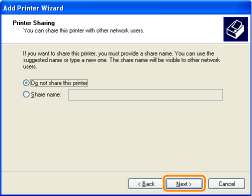
18
Click [Next].
|
NOTE
|
||||||||||
When sharing the printer (When using the computer on which the printer driver is being installed as the print server).
Perform the following procedure.
|
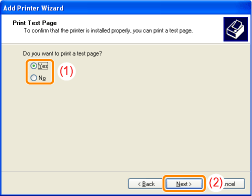
19
Select whether to print a test page.
|
(1)
|
Select whether to print a test page.
|
|
(2)
|
Click [Next].
|
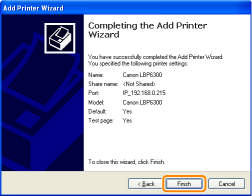
20
Click [Finish].
|
→
|
The installation starts. Wait until the following screen disappears.
 |
|
When the installation is complete, an icon and folder for this printer will be created.
 "After Installation" "After Installation"
|
