Connecting the Printer and Computer
The following are the procedure and precautions when connecting the printer to a computer.
|
NOTE
|
You cannot use a wired LAN and wireless LAN at the same timeWhen using the printer with a wireless LAN connection, do not connect a LAN cable to the printer. This may result in malfunction.
|
USB Connection
|
See "Important Safety Instructions" also.
|
|
IMPORTANT
|
Do not plug or unplug the USB cable while the printer or computer is ONThis may cause the printer to malfunction.
About unidirectional communication equipmentThe printer performs bi-directional communication. Operation of the printer when connected via unidirectional communication equipment is not tested, and as a result, Canon cannot guarantee printer operation if the printer is connected using unidirectional print servers, USB hubs or switching devices.
|
|
NOTE
|
About the USB cableLBP7110Cw comes with a USB cable. When you use LBP7100Cn, have an appropriate USB cable available for the computer you are using.
Use a USB cable with the following symbol.
 |
1
Make sure that the printer and computer are OFF.
2
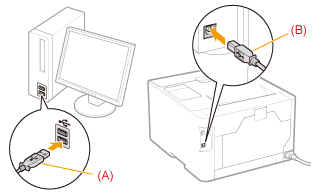
Connect the USB cable.
|
Flat end (A):
|
Connects to a USB port on your computer.
|
|
Square end (B):
|
Connects to the USB connector on this printer.
|
 |
Do not turn the printer ON at this stage even if you want to install the printer driver.
|
Wired LAN Connection
|
See "Attention (Wired LAN Connection)" before connecting the printer to a wired LAN.
|
1
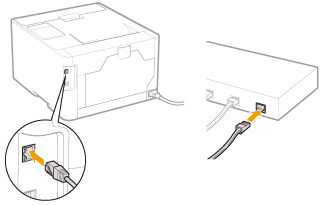
Connect the LAN cable.
2
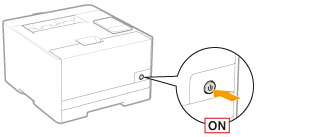
Turn the printer ON.
3
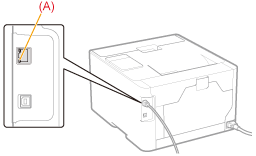
Make sure that the LNK indicator (A) on the network interface is on.
 When the LNK indicator is off When the LNK indicator is off |
Wireless LAN Connection (LBP7110Cw Only)
|
See "Attention (Wireless LAN Connection) (LBP7110Cw Only)" before connecting the printer to a wireless LAN.
|
1
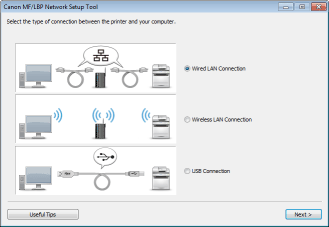
Follow the instructions of "MF/LBP Network Setup Tool" to specify the connection settings.
 |
To directly start "MF/LBP Network Setup Tool," see "Directly Starting the MF/LBP Network Setup Tool."
|
 "
"