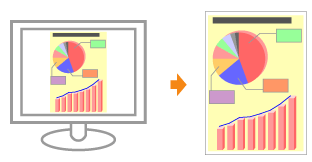
Matching the Color with the Screen
The methods for adjusting the color on the screen (RGB) and in the printer (YMC) are different. Therefore, color in a photo and so on viewed on the screen may not match that of the printout.
Using the color matching function to correct color of a printout, you can adjust the color of the printout to more closely match the color you see on the screen.
You can also correct the colors by adjusting brightness without performing matching.
1
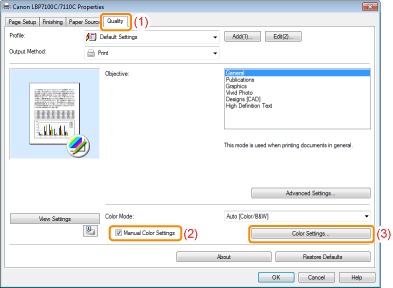
Display the setting screen of the printer driver.
2
Display the [Color Settings] dialog box.
|
(1)
|
Display the [Quality] sheet.
|
|
(2)
|
Select the [Manual Color Settings] check box.
|
|
(3)
|
Click [Color Settings].
|
3
Operation procedure varies depending on the procedure for color correction.
Using the color matching function, you can adjust the color of the printout to more closely match the color you see on the screen.

You can adjust the brightness of the printout results without spoiling the lightest parts and darkest parts of the image data.
Use this option when the printout result is brighter than the original image or when you want to change the brightness of the image.
Using the Matching Function to Correct Color
|
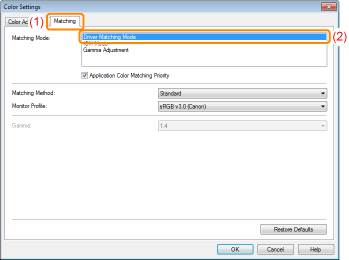
1.
|
Specify the setting for [Matching Mode].
 |
|
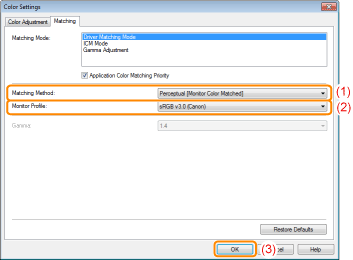
2.
|
Specify the setting for [Matching Method].
 |
|
NOTE
|
About the options for [Monitor Profile]The profiles registered in your computer are displayed.
About [Application Color Matching Priority]If the check box is cleared, you can prioritize the color matching process specified in the printer driver.
If you want to prioritize the color matching in the application, select the check box.
|
|
3.
|
Click [OK].
|

Correcting Color by Adjusting Brightness (Gamma Adjustment)
|
1.
|
Specify the setting for [Matching Mode].
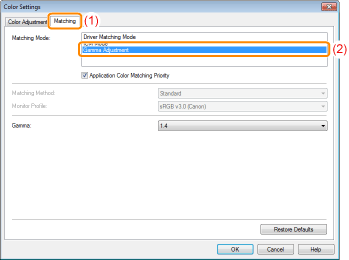 |
|
2.
|
Specify the setting for [Gamma Adjustment].
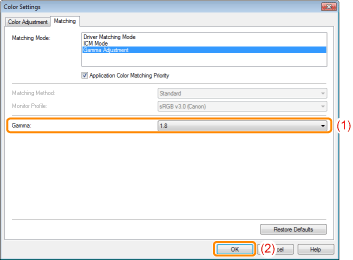 |
|
3.
|
Click [OK].
|