
Clearing Paper Jams
If paper jams, the  (Alarm) indicator flashes, and the message <Paper Jam inside Printer> and paper jam locations are displayed in the Printer Status Window. Clear the jams in the displayed order of jam locations using the procedures described in the sections referred to below. Before starting, carefully read the safety instructions in Important Safety Instructions.
 (Alarm) indicator flashes, and the message <Paper Jam inside Printer> and paper jam locations are displayed in the Printer Status Window. Clear the jams in the displayed order of jam locations using the procedures described in the sections referred to below. Before starting, carefully read the safety instructions in Important Safety Instructions.
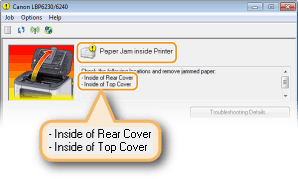
<Inside of Rear Cover>
<Inside of Top Cover>
 |
When removing the jammed paper, do not turn OFF the machineTurning OFF the machine deletes the data that is being printed.
If paper tearsRemove all the paper fragments to prevent them from becoming jammed.
If paper jams repeatedlyTap the paper stack on a flat surface to even the edges of the paper before loading it into the machine.
Check that the paper is appropriate for the machine. Paper
Check that no jammed paper fragments remain in the machine.
If you use paper with a coarse surface, set [Paper Type] to [Rough 1] (16.0 to 23.9 lb Bond [60 to 90 g/m²]) or [Rough 2] (24.0 lb Bond to 60.3 lb Cover [91 to 163 g/m²]). Basic Print Operations
Do not forcibly remove jammed paper from the machineForcibly removing the paper may damage parts in the machine. If you are not able to remove the paper, contact your local authorized Canon dealer or the Canon help line. When a Problem Cannot Be Solved
|
 |
|
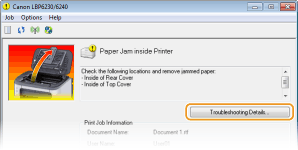
If you click [Troubleshooting Details], you can display the same troubleshooting methods that are described in this manual.
 |
Paper Jams Inside the Rear Cover
If the jammed paper cannot be removed easily, do not forcibly pull it out, but follow the procedure for a different paper jam location indicated by the message.
1
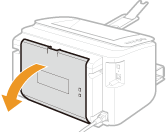
Open the rear cover.
2
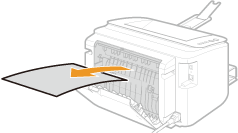
Gently pull out the paper.
3
Close the rear cover.
»
Continue to Paper Jams Inside the Top Cover
Paper Jams Inside the Top Cover
If the jammed paper cannot be removed easily, do not try to pull it out forcibly. Proceed to the next step.
1
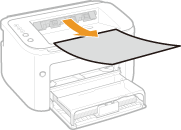
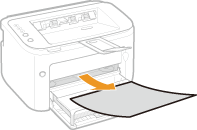
Gently pull out the paper.
|
|
Output tray
 |
|
Manual feed slot
 |
|
|
Multi-purpose tray
Fold the tray cover, and then pull out the paper. If there is paper loaded in the multi-purpose tray, remove it before proceeding to clear paper jams.
 |
||
2
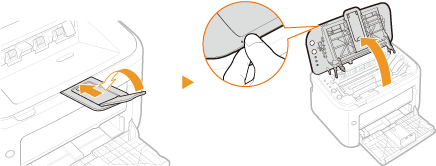
Close the auxiliary tray, and then open the top cover.
3
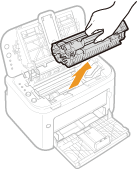
Remove the toner cartridge.
4
Check whether paper is jammed inside the paper output guide.
|
1
|
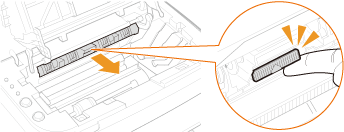
Open the paper output guide.
Press and hold the green button, and then pull the paper output guide toward you.
 |
|
2
|
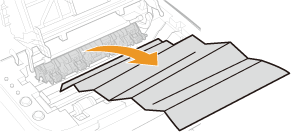
Gently pull out the paper.
 |
|
3
|
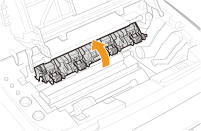
Close the paper output guide.
Make sure that both the left and right sides of the guide are closed firmly.
 |
5
Gently pull out the paper.
Hold both edges of the paper, pull the leading edge of the paper down, and then pull it out.

6
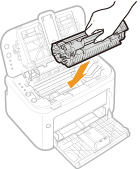
Replace the toner cartridge.
7
Close the top cover.
 |
The paper jam message disappears, and the machine is ready to print.
 |