Turning ON the Power and Configuring Initial Settings
Turn ON the machine, and follow the on-screen instructions to configure the initial settings.
1
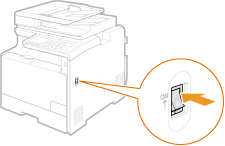
Turn ON the machine.
2
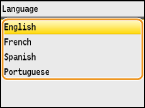
Use  /
/ to select the display language, and press
  .
.
 /
/ to select the display language, and press
  .
.
3
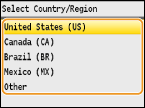
Use  /
/ to select your country or region, and press
  .
.
 /
/ to select your country or region, and press
  .
.
4
Read the reminder messages that are displayed, and press <Next> to continue.

NOTE:
If the <Open the back cover, then remove the protective sheet.> message is shown on the display, remove the packing materials under the rear cover. Removing Packing Materials
5
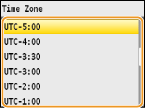
Use  /
/ to select your UTC time zone, and press
  .
.
 /
/ to select your UTC time zone, and press
  .
.
NOTE:
UTC
UTC
Coordinated Universal Time (UTC) is the primary time standard by which the world regulates clocks and time. The correct UTC time zone setting is required for Internet communications.
6
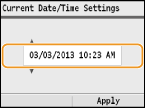
Enter the date and time, and press <Apply>.
Use  /
/ to change the numbers and switch between <AM> and <PM>.
 /
/ to change the numbers and switch between <AM> and <PM>.
Use  /
/ to move the cursor.
 /
/ to move the cursor.
7
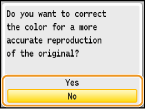
Use  /
/ to select whether or not to perform color correction, and press
  .
.
 /
/ to select whether or not to perform color correction, and press
  .
.When color correction is performed, you can make copies and prints that more closely reproduce the colors and density of the original document. The time it takes to apply color correction is approximately 2 to 4 minutes. Color correction can be performed later.
 Performing color correction
|
1
|
Check that the size and type of paper displayed on the screen is loaded in the machine, and press
 . .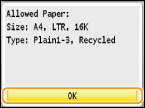 |
|
2
|
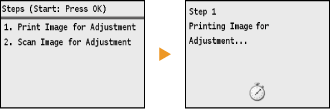
Confirm the procedure, and press
 . .An adjustment image is printed.
 |
|
3
|
Open the feeder after the screen displayed during printing disappears.
|
|
4
|
Place the adjustment image on the platen glass with the print side face down.
Place the adjustment image so that the black stripe is toward the back side of the machine.
 |
|
5
|
Gently close the feeder.
|
|
6
|
Press
 (Color). (Color).The machine starts scanning the adjustment image.
|
|
7
|
Open the feeder and remove the adjustment image.
|
|
8
|
Gently close the feeder.
|
|
NOTE
|
If the <Correction failed.> message is displayedDid you load plain or recycled A4 or Letter size paper into the drawer?
Did you place the adjustment image with the print side face down, with the black stripe toward the back side of the machine?
Has a paper jam occurred?
If you want to perform color correction againFollow the on-screen instructions until the screen shown here is displayed, and then perform color correction again. Adjust Copy Image
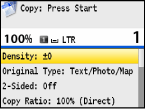 |
8
Confirm that the screen shown here is displayed.
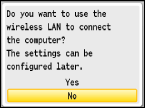
»
If you want to connect the machine to a computer, continue to Connecting to a Computer
»
If you do not want to connect the machine to a computer, use  /
/ to select <No>, and press
  , and then proceed to Configuring Initial Settings for Fax Functions
 /
/ to select <No>, and press
  , and then proceed to Configuring Initial Settings for Fax Functions