Sending I-Faxes
To send a fax to a computer or another I-Fax-compatible device, specify an e-mail address instead of a fax number as the destination. If you send an I-Fax to a computer, it is sent as an e-mail attachment in TIFF format. And in the same way as when you send e-mail to a computer, you can specify multiple destinations and specify Cc and Bcc destinations.
1
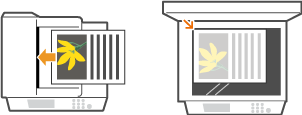
Place the document(s). Placing Documents
2
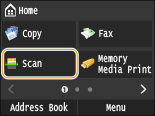
Press  and tap <Scan>.
 and tap <Scan>.
When the logon screen appears, use the numeric keys to enter the user name and password. Then select the authentication server and press  . Logging on to Authorized Send
 . Logging on to Authorized Send
3
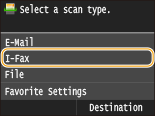
Tap <I-Fax>.
4
Enter the destination using the numeric keys, and tap <Apply>.
Tapping <A/a/12> toggles the input modes.
If you enter the wrong characters, press  . (Press to delete each character one by one; press and hold to delete all the input characters at once.)
 . (Press to delete each character one by one; press and hold to delete all the input characters at once.)
To make it easier to specify destinations by using other methods, such as the Address Book, see Sending Using Registered Destinations (E-mail/I-Fax/Shared Folder/FTP Server) (MF729Cx / MF628Cw).


If the screen above is not displayed
You can only send to your own e-mail address. To send to other destinations, you must configure the send function authentication settings so that e-mail transmission is not restricted. Contact your administrator for details. LDAP Server Authentication (MF729Cx / MF628Cw).
5
Specify multiple destinations, including Cc/Bcc destinations, as necessary.
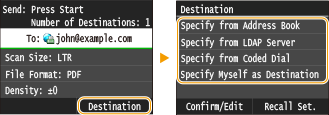
Tap <Destination>, select the method for specifying destinations and then specify the destination.
If you selected <Specify from LDAP Server> or <Specify Myself as Destination>, the destination is selected in the <To> field.
<Cc> and <Bcc> addresses can only be selected using <Specify from Address Book> or <Specify from Coded Dial>.
6
Specify the scanning settings as necessary.
Tap the item you want to set.
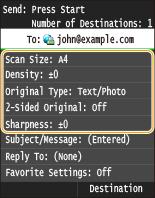
<Scan Size> Specifying a Scanning Size
<Density> Adjusting Density
<Original Type> Selecting Document Type
<Sharpness> Adjusting Sharpness

The file name of a scanned document is automatically assigned based on the following format: communication management number (four digits)_sent date and time_document number (three digits).tif.
Example of file names: To send only a one-page document on October 17, 2015 at 07:00:05 PM.
0045_151017190005_001.tif
You cannot specify file names yourself.
7
Specify the subject, body, and reply-to address for the e-mail as necessary.
The subject is set to "Attached Image" by default.
The body is not set by default. Enter it as necessary. Without the body text, only scanned documents are sent.
The reply-to address is not set by default. If you want to specify an e-mail reply-to address that is different than the machine's e-mail address, specify the address from among those registered in the Address Book. If no destination is registered in the Address Book, see Registering in the Address Book (MF729Cx / MF628Cw).
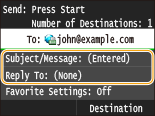
 To specify subject/body
|
1
|
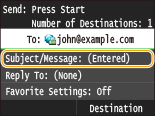
Tap <Subject/Message>.
 |
|
2
|
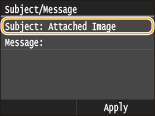
Tap <Subject>
 |
|
3
|
Enter the subject using the numeric keys, and tap <Apply>.
Tapping <A/a/12> toggles the input modes.
 |
|
4
|
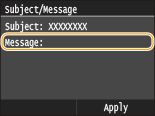
Tap <Message>.
 |
|
5
|
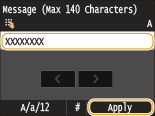
Enter the body using the numeric keys, and tap <Apply>.
Tapping <A/a/12> toggles the input modes.
 |
|
6
|
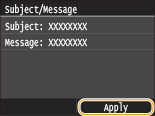
Tap <Apply>.
 |
 To specify reply-to address
|
1
|
Tap <Reply To>.
 |
|
2
|
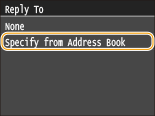
Tap <Specify from Address Book>.
 |
|
3
|
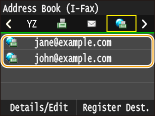
Select a reply-to address from the Address Book.
For instructions on how to use the Address Book, see Specifying from Address Book .
 |
8
Press  (B&W) to start sending.
 (B&W) to start sending.
Scanning starts.
When the SMTP authentication screen appears, use the numeric keys to enter the user name and password and then tap <Apply>.
If you want to cancel sending, tap <Cancel>  <Yes>.
 <Yes>.
 When placing documents in the feeder in step 1
When scanning is complete, the I-Fax is sent.
 When placing documents on the platen glass in step 1
When scanning is complete, follow the procedures below.
|
1
|
If there are additional pages of documents to be scanned, place the next document on the platen glass, and press
 (B&W). (B&W).Repeat this step until you finish scanning all of the pages.
When there is only one page to be scanned, proceed to the next step.
|
|
2
|
Tap <Start Sending>.
The I-Fax is sent.
|
If a Send Error Occurs
Error notifications are sometimes sent to the e-mail address set to the machine. You can clear the mailbox on the server from the Remote UI.
 To clear the mailbox
|
1
|
Start the Remote UI and log on in System Manager Mode.Starting Remote UI
|
|
2
|
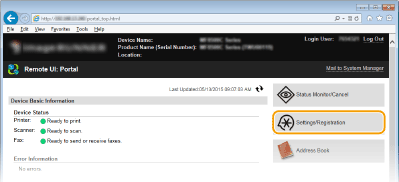
Click [Settings/Registration].
 |
|
3
|
Click [Network Settings]
 [E-Mail/I-Fax Settings]. [E-Mail/I-Fax Settings]. |
|
4
|
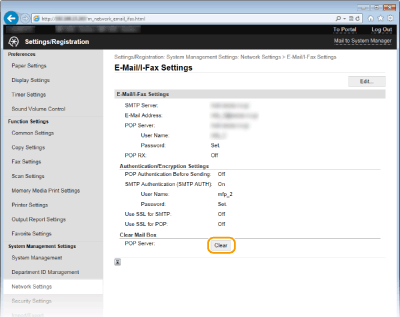
Click [Clear] in [Clear Mail Box].
 |
|
5
|
Read the message that is displayed, and click [OK].
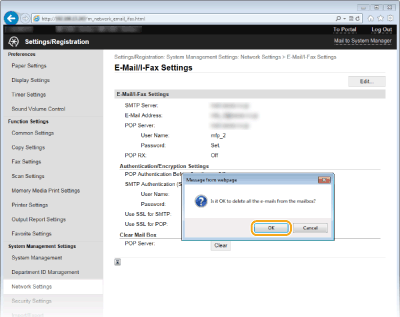 E-mail is deleted from the mailbox.
 When the mailbox is cleared
Once [OK] is clicked in the message window, all e-mail in the server mailbox is deleted. If the machine does not have a special e-mail account, you should first check whether any e-mail in the mailbox needs to be kept.
|
 |
|
If you always want to send using the same settings: Changing Default Settings
If you want to register a combination of settings to use when needed: Registering Frequently Used Scan Settings (E-mail/I-Fax/Shared Folder/FTP Server) (MF729Cx / MF628Cw)
If you want to specify the I-Fax sender name: Register Unit Name (E-Mail/I-Fax)
|