Erase Frame
This mode enables you to remove the shadows and lines that appear when scanning various types of originals. There are three types of Erase Frame mode: Erase Original Frame, Erase Book Frame, and Erase Binding.
As an example, the procedure for selecting memory media as the storage location is explained in this section.
|
IMPORTANT
|
|
Do not place originals with binding holes in the feeder, as this may damage the originals. Place your original on the platen glass.
|
Erase Original Frame
1.
Press [Scan and Store] → [Memory Media].

2.
Select the memory media → select the destination folder → press [Scan].

3.
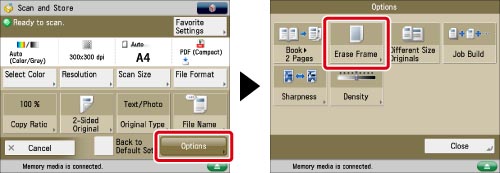
Press [Options] → [Erase Frame].
4.
Press [Erase Original Frame] → [Next].
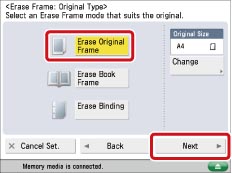
To specify the size of the original you have placed, press [Change] → select the original size → press [OK].
|
IMPORTANT
|
|
You can set the Erase Original Frame mode only for the original sizes shown on the touch panel display.
|
5.
Set the frame erase width.
If you want to set the same width for all four borders:
Press [-] or [+] to set the frame erase width.
If you want to set the top, left, right, and bottom widths independently:
Press [Adjust Independently].
Select the desired frame erase borders → press [-] or [+] to set their respective frame erase widths.
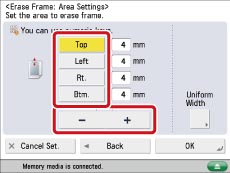
To return to the screen for setting the same width for all four borders, press [Uniform Width].
6.
Press [OK] → [Close].
Erase Book Frame
1.
Press [Scan and Store] → [Memory Media].

2.
Select the memory media → select the destination folder → press [Scan].

3.
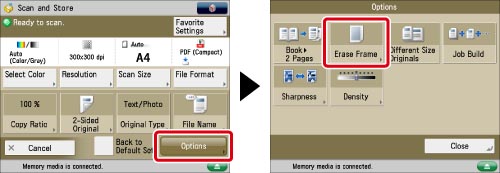
Press [Options] → [Erase Frame].
4.
Press [Erase Book Frame] → [Next].
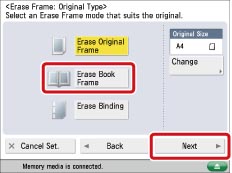
To specify the size of the original you have placed, press [Change] → select the original size → press [OK].
|
IMPORTANT
|
|
You can set the Erase Book Frame mode only for the original paper sizes shown on the touch panel display.
|
5.
Set the frame erase width.
If you want to set the same width for all four borders:
Press [Center] and [Sides] → press [-] or [+] to set their respective frame erase widths.
If you want to set the top, left, centre, right, and bottom widths independently:
Press [Adjust Independently].
Select the desired frame erase borders → press [-] or [+] to set their respective frame erase widths.
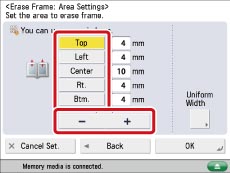
To return to the screen for setting the same width for all four borders, press [Uniform Width].
6.
Press [OK] → [Close].
Erase Binding
1.
Press [Scan and Store] → [Memory Media].

2.
Select the memory media → select the destination folder → press [Scan].

3.
Press [Options] → [Erase Frame].
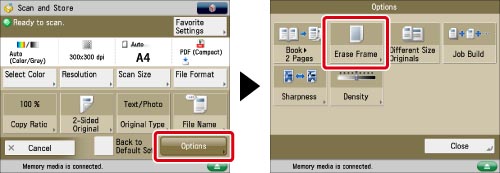
4.
Press [Erase Binding] → [Next].
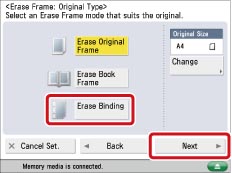
5.
Select the border where the binding holes are located → press [-] or [+] to set their respective frame erase width.
The border is where the binding holes are located on the original, if you visualize the original as being face up.
6.
Press [OK] → [Close].
|
IMPORTANT
|
|
For information on the modes which cannot be set in combination with this mode, see "Combination of Functions Chart."
When you use the Erase Binding mode, the borders you do not select are also erased by 4 mm.
|