Specifying Destinations by Entering an I-Fax Address
1.
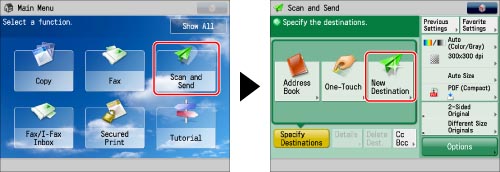
Press [Scan and Send] → [New Destination].
2.
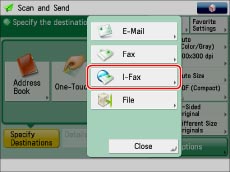
Press [I-Fax].
3.
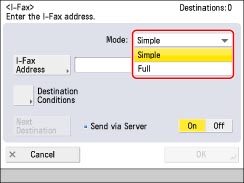
Press the drop-down list → select the desired mode.
|
[Simple]:
|
Sends scanned data as an image via the Internet.
|
|
[Full]:
|
Sends scanned data as an image via the Internet, and enables you to receive a delivery confirmation message telling you whether your I-fax was sent successfully.
|
|
NOTE
|
|
To send using the Full mode, it must be supported on the recipient's machine. If you send using the Full mode, you can confirm whether your I-fax was sent successfully.
If you send documents using the Full mode to a machine that does not support the Full mode, delivery confirmation cannot be carried out. In this case, the job concerned is not considered complete even if the actual sending of the document is successful. Such jobs appear as <Waiting for TX result...> on the Status screen until the time set for [Full Mode TX Timeout] in [E-Mail/I-Fax Settings] in [Send] in [Function Settings] (Settings/Registration) has lapsed. After the timeout, the job is moved to the log, and the result appears as <-> when delivery confirmation could not be verified. (See "Full Mode TX Timeout.")
|
4.
Press [I-Fax Address].
5.
Enter the I-fax address → press [OK].
|
NOTE
|
|
If you do not send documents via a server, and the recipient's IP address is not registered on a DNS server, use the following format to enter the domain name: (user)@(the recipient's IP address).
|
6.
Press [Destination Conditions].
7.
Set the destination conditions → press [OK].

|
<Paper Size>:
|
Set the paper size to send with. A5 is included in [A4/LTR].
|
|
<Compression Method>:
|
MH (Modified Huffman): This method scans and compresses extended areas of white and black dots.
MR (Modified Read): This method scans and compresses extended areas of white and black dots. Faster than MH.
MMR (Modified Modified Read): This method is an adaptation of Modified Read, originally for use in digital machines. Faster than MR.
|
|
<Resolution>:
|
Set the resolution that the recipient can receive.
|
|
<Divide Data>:
|
Select [On] if there is a function to combine divided data that is received, or [Off] if there is not.
If the size of the data being sent exceeds the value set for [Maximum Data Size for Sending], the data is divided when sent.
If the size of the data being sent exceeds the value set for [Maximum Data Size for Sending] when [Off] is selected, a sending error occurs.
For information on setting the maximum data size for sending, see "Maximum Data Size for Send."
|
|
IMPORTANT
|
|
Set the destination conditions according to the specifications of the recipient's machine. If you set conditions that the recipient's machine does not support, a transmission error may occur.
|
8.
Select one of the following for <Send via Server>.
|
[On]:
|
Sends documents via a server. This enables you to send documents to destinations via the Internet in the same way that you send an e-mail message.
|
|
[Off]:
|
Does not send your I-fax documents via a server. You can send large amounts of image data to a recipient within the same LAN (Local Area Network) environment without placing a burden on the mail server. This enables you to send documents quickly and directly to the recipient. To use this setting, it is necessary to set up an MX (Mail eXchange) record on the DNS server. Ask your System Manager whether this type of sending is possible before you set <Send via Server> to 'Off'.
|
To add another destination, press [Next Destination] → repeat steps 4 to 8.
|
IMPORTANT
|
|
To send documents via a server, it is necessary to set [Use Send via Server] to 'On'. If [Use Send via Server] is set to 'Off', <Send via Server> is grayed out and cannot be pressed. It is also recommended you set [Allow MDN Not Via Server] to 'On'. (See "Allow MDN Not Via Server.")
|
|
NOTE
|
|
Even if you set <Send via Server> to 'Off', delivery confirmation of documents sent using the Full mode is carried out via the server.
|
9.
Press [OK].