Scanning from the Machine
 |
|
The sequence of "scanning a document and saving it to a computer" can only be done when scanning from the machine. Before you can use this function, you need to complete some procedures.
|
Preparing for Scanning
Configure the settings on the machine and your computer by following the procedure below.
Configuring the Machine
1
Start the Remote UI and log on in System Manager Mode. Starting the Remote UI
2
Configure the settings on the [Edit WSD Settings] page.
To access the page, click [Settings/Registration]  [Network Settings]
  [TCP/IP Settings]
  [Edit...] in [WSD Settings].
 [Network Settings]
  [TCP/IP Settings]
  [Edit...] in [WSD Settings].
Enable the [Use WSD Scanning] and [Use Computer Scanning] settings. For more information, see Configuring Printing Protocols and WSD Functions.
3
Restart the machine.
Turn OFF the machine, wait for at least 10 seconds, and turn it back ON.
Configuring Your Computer
4
Open the printer folder. Displaying the Printer Folder
5
Click [Add a device] (or [Add a printer]) and follow the on-screen instructions.
Scanning a Document
1
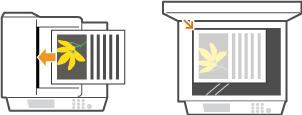
Place the document. Placing Documents

2
Press  .
.
 .
.If a logon screen appears, see Logging on to Authorized Send (imageRUNNER 1435iF Only).
3
Use  /
/ to select <Computer>, and press
  .
.
 /
/ to select <Computer>, and press
  .
.
4
Select the destination or type of scan, and press  .
.
 .
.
NOTE:
Only one computer that the machine first established communication with is displayed at a time.
5
Select <Scan>, and press  .
.
 .
.
Scanning starts.
If you want to cancel scanning, select <Cancel>  <Yes>
<Yes> 
 .
.
 <Yes>
<Yes> 
 .
.|
Other useful scanning functions
|
|
You can save scanned documents to a USB memory device or send them as e-mail attachments. The documents can also be saved to file servers. You can accomplish these functions directly from the machine.
|