Registering a File Server Address
1.
Press  (Settings/Registration).
(Settings/Registration). 2.
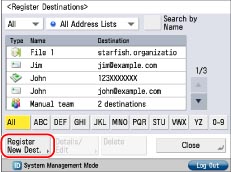
Press [Set Destination] → [Register Destinations] → [Register New Dest.].
3.
Press [File].
4.
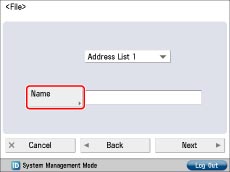
Select an address list from Address List 1 to 10.
Address lists are a convenient way to classify destinations.
The file server address that you enter will be stored in the address list that you select here.
5.
Press [Name].
6.
Enter a name for the file server → press [OK].
7.
Press [Next].
8.
Select the protocol from the <Protocol:> drop-down list.
|
NOTE
|
|
For more information on the available protocols, see "Specifying a File Server Using the Keyboard."
|
9.
Press [Host Name].
10.
Enter the host name → press [OK].
If [WebDAV] is selected for <Protocol:>, press [Next].
11.
Press [Folder Path].
12.
Enter the path to the folder → press [OK].
13.
Press [User Name].
14.
Enter the user name → press [OK].
15.
Press [Password].
16.
Enter the password → press [OK].
If you set [Confirm Before Sending] to 'On', a screen to enter the registered password appears when sending to the registered file server.
If you want to register a file server in a group address, set this setting to 'Off'. If you set it to 'On', you cannot send to the group address.
If you select [Windows (SMB)] as the server protocol, you can specify the file server by pressing [Browse]. For instructions on using the Browse key, see "Specifying a File Server Using the Search Host Key (Windows (SMB))."
If you select [Windows (SMB)] as the server protocol, you can specify the file server by pressing [Search Host]. For instructions on using the Search Host key, see "Specifying a File Server Using the Search Host Key (Windows (SMB))."
You can can press [Check Connection] to check the connection to the file server. If an error message is displayed, confirm the settings in steps 8 to 16.
|
NOTE
|
|
For instructions on specifying each of the settings for FTP, Windows (SMB), and WebDAV, see "Specifying a File Server Using the Keyboard."
If you specify the destination that you set to 'On' for [Confirm Before Sending] as the forwarding destination, the screen to enter the password does not appear. The registered password is used and forwarding is performed.
When checking a WebDAV connection, the HEAD method of HTTP is used to check the connection. The folder specified in [Folder Path] is accessed using the HEAD method. If access via the HEAD method is prohibited for the corresponding folder, an error occurs for the connection check. Examples of settings that prohibit access via the HEAD method are indicated below.
IIS7: Access cannot be performed via the HEAD method unless [Source] is selected in the access permissions for the WebDAV authoring rules of the target folder.
Apache: Access cannot be performed via the HEAD method unless HEAD is described using the <Limit> directive in httpd.conf.
AdvancedBox WebDAV server: Access via the HEAD method is always prohibited.
|
17.
Press [OK] → [Close].
If you are performing Access Number Management for the Address Book, perform the following operation.
Press [Next] → [Access No.] → [Access No.].
Enter the access number using  -
-  (numeric keys) → press [Confirm].
- (numeric keys) → press [Confirm].Enter the access number again for confirmation → press [OK] → [OK].
|
NOTE
|
|
For information on the settings for searching and browsing file server hosts, see "Setting Up a Computer as a File Server" for the SMB/CIFS network and "Setting Up a Computer as a File Server" for the TCP/IP network.
UPN can be used only if you are sending to a computer belonging to a domain operated with Active Directory.
|