When the Inner Finisher-G1 Is Attached
If a paper jam/staple jam occurs when manually stapling using the Inner Finisher-G1, remove the set of paper from the finisher. For more information, see "Clearing a Paper Jam/Staple Jam When Manually Stapling."
1.
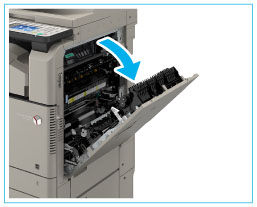
Open the right cover of the main unit.
2.
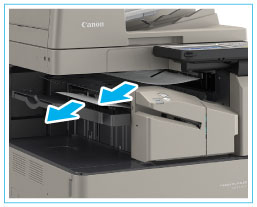
Remove any jammed paper from the output tray of the main unit.
|
NOTE
|
|
If a paper jam occurs when you are printing in the Staple mode, do not remove the output sheets that are waiting to be stapled. (Printing and stapling resume after you clear the paper jam.)
|
3.
Remove any jammed paper from the right side of the main unit.
4.
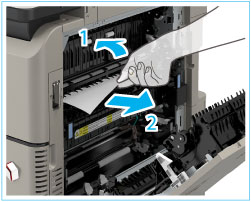
Remove any jammed paper from the finisher entrance guide.
 |
1. Lift up the finisher entrance guide, and remove any jammed paper. |
2. Lower the finisher entrance guide. |
5.
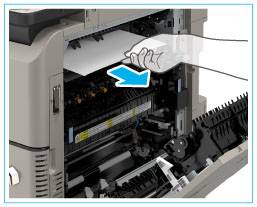
Remove any jammed paper from the upper part of the fixing unit.
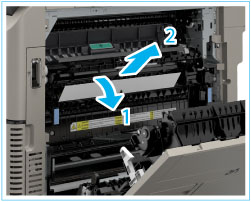 |
1. Open the upper cover of the fixing unit. |
2. Remove any jammed paper from the upper part of the fixing unit. |
6.
Remove any jammed paper from the lower part of the fixing unit.
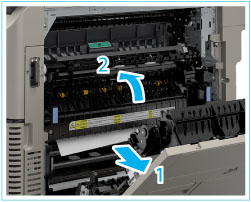 |
1. Remove any jammed paper from the lower part of the fixing unit. |
2. Close the upper cover of the fixing unit. |
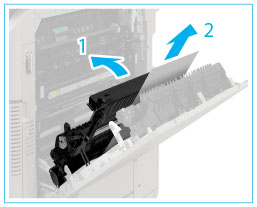
7.
Remove any jammed paper from the duplexing unit.
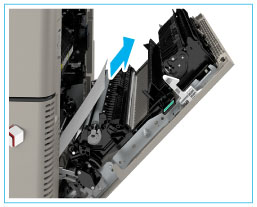
8.
Remove any jammed paper from the area near Paper Drawer 1.
9.
Securely close the right cover of the main unit.
|
IMPORTANT
|
||||
|
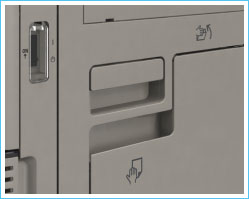
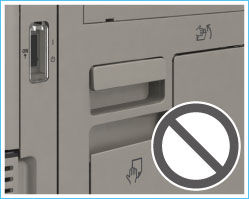
Confirm that the right cover of the main unit is completely closed by checking the angle of the lever.
|
Clearing a Paper Jam/Staple Jam When Manually Stapling
1.
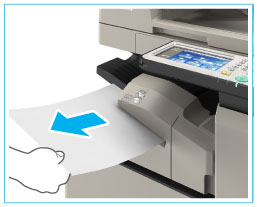
Remove the set of paper inserted in the slit of the Inner Finisher-G1.
2.
Follow the instructions on the screen.
|
NOTE
|
|
To continue clearing a staple jam, see "Clearing a Staple Jam in the Inner Finisher-G1 (Optional)."
|