Setting the Secure Printing Function
Secure Printing enables you to hold your print jobs until the appropriate password is entered at the machine. This way, confidential documents are not left lying on the machine’s output tray.
Set the timeout period (or hold time) for the secure print jobs so that they can be automatically discarded from the machine’s memory after the timeout period elapses. You can also set the machine to accept only the secure print jobs when documents are printed from a computer.
|
IMPORTANT
|
|
To make changes to the System Settings, enter the System Management mode. For details, see Operating the Machine in System Management Mode.
|
|
NOTE
|
|
The default settings are as follows:
Delete Timeout: 60 minutes
Only allow secure print jobs: Off
|
1
Press  (Additional Functions) → [System Settings].
 (Additional Functions) → [System Settings].
2
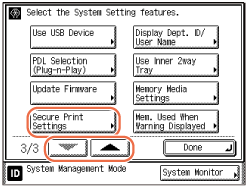
Press [ ] or [
 ] until [Secure Print Settings] appears → press [Secure Print Settings].
 ] or [
 ] until [Secure Print Settings] appears → press [Secure Print Settings].
3
Select the function.
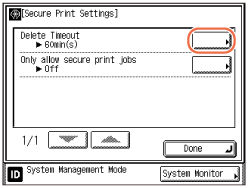
To change the timeout setting:
|
1
|
Press [Delete Timeout].
 |
|
2
|
Press [-] or [+] to enter the desired timeout period → press [OK].
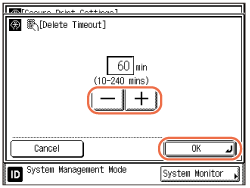 |
You can also enter values using  -
-  (numeric keys).
 -
-  (numeric keys).
The timeout period can be set from 10 to 240 minutes in one minute increments.
The selected mode is set.
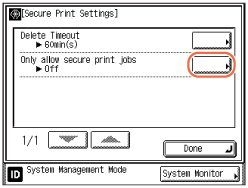
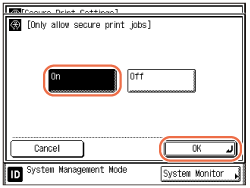
To set the machine to accept only the secure print jobs when documents are printed from a computer:
|
1
|
Press [Only allow secure print jobs].
 |
|
2
|
Press [On] → [OK]
 |
NOTE:
To disable the setting, press [Off] → [OK].
4
Press  (Reset) to return to the top screen.
 (Reset) to return to the top screen.
|
NOTE
|
|
For instructions on how to perform Secure Printing see Printing from a Computer.
|