Creating a Personal Space in the Advanced Space (Open to Public by WebDAV)
Advanced Space is a storage for sharing information. You can store scanned documents in the Advanced Space of this machine and view the file from a computer, enabling a paperless communication.
Benefits from Using the Advanced Space
Allowing/restricting the use of data according to its content
There are two types of storage in the Advanced Space; the Shared Space and the Personal Space. The files stored in the latter can be kept confidential by restricting access.
Document management using generic data formats
Also, not only can you scan the document with this machine and store it in a file format; such as PDF, JPEG, and TIFF, but you can also print the stored file on this machine at any time with your desired print setting.
Linking data with computers
By accessing the Advanced Space from a computer, you can store files inside the Advanced Space and inside the computer back and forth.
Opening the Advanced Space to the Public
The following two methods are available.
|
Type
|
Feature
|
|
By SMB
|
You can open the Advanced Space on the machine to public by using the shared file system of the SMB protocol.
|
|
By WebDAV
|
You can open the Advanced Space on the machine to public by using the file management system on the Web server. If you are using the imagePASS, you must use WebDAV when opening the Advanced Space to public.
|
|
Required Condition
|
|
Network settings are set.
The user is registered.
You are logged in as the administrator.
|
This section describes how to create a personal space on the Advanced Space. Since only the logged in user can access the personal space, this is best suited for storing files with high confidentiality.
The screens may differ, depending on the model of the machine and on attached optional products.
The screens may differ, depending on the operating system of your computer.
Follow the procedures below.
Registering User Information
Specifying the Settings to Open by WebDAV
Creating a Personal Space
Accessing the Advanced Space from a Computer
Registering User Information
Register the information of the user that will use the personal space.
1.
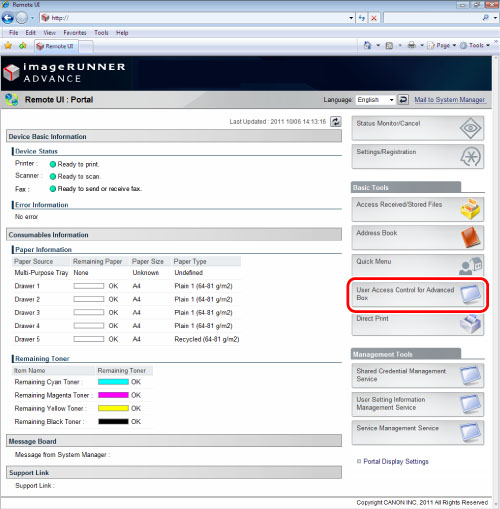
Start the Remote UI → enter the following URL on the Web browser → click [Administrator Login].
http://<IP address of this machine>/
2.
Click [User Access Control for Advanced Space] from the application on the portal screen.
3.
Enter the user name and password → click [Log In].
The default setting for user name is 'Administrator' and the password is 'password'.
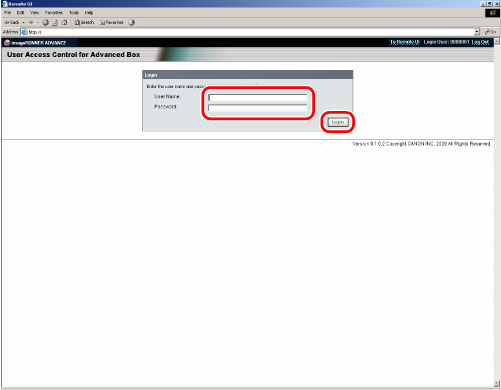
The [User Management] page is displayed.
4.
Click [Add User].
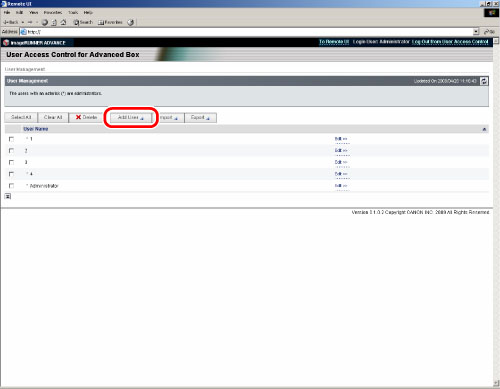
5.
Enter each item → click [Add].

The new user information is registered.
For information on registering/editing user information, see "Security."
Specifying the Settings to Open by WebDAV
Specify the personal space settings from the control panel of the machine.
1.
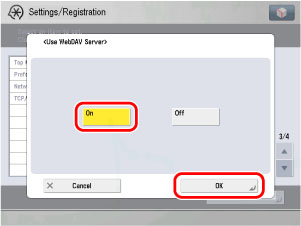
Follow the procedures below to set [Use WebDAV Server] to 'On'.
Press  (Settings/Registration) → [Preferences] → [Network] → [TCP/IP Settings] → [Use WebDAV Server].
(Settings/Registration) → [Preferences] → [Network] → [TCP/IP Settings] → [Use WebDAV Server].Select [On] → press [OK].
2.
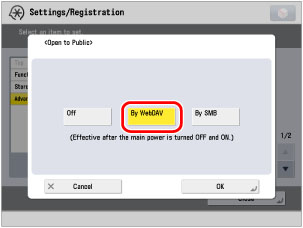
Follow the procedures below to open the Advanced Space to public by WebDAV.
Press (Settings/Registration) → [Function Settings] → [Store/Access Files] → [Advanced Box Settings] → [Open to Public].
(Settings/Registration) → [Function Settings] → [Store/Access Files] → [Advanced Box Settings] → [Open to Public].Select [By WebDAV] → press [OK].
3.
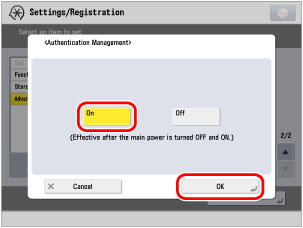
Follow the procedures below to set [Authentication Management] to 'On'.
Press (Settings/Registration) → [Function Settings] → [Store/Access Files] → [Advanced Box Settings] → [Authentication Management].
(Settings/Registration) → [Function Settings] → [Store/Access Files] → [Advanced Box Settings] → [Authentication Management].Select [On] → press [OK].
4.
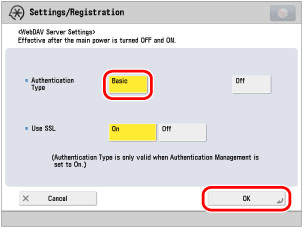
Follow the procedures below to set [Authentication Management] of the WebDAV Server settings to [Basic].
Press (Settings/Registration) → [Function Settings] → [Store/Access Files] → [Advanced Box Settings] → [WebDAV Server Settings].
(Settings/Registration) → [Function Settings] → [Store/Access Files] → [Advanced Box Settings] → [WebDAV Server Settings].Select [Basic] → press [OK].
5.
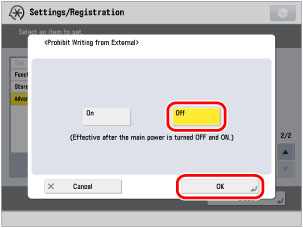
Follow the procedures below to check whether writing from external is prohibited.
Press (Settings/Registration) → [Function Settings] → [Store/Access Files] → [Advanced Box Settings] → [Prohibit Writing from External].
(Settings/Registration) → [Function Settings] → [Store/Access Files] → [Advanced Box Settings] → [Prohibit Writing from External].Select [Off] → press [OK].
Creating a Personal Space
1.
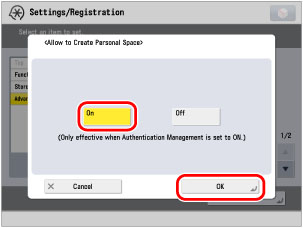
Follow the procedures below to allow personal space to be created in the Advanced Space.
Press (Settings/Registration) → [Function Settings] → [Store/Access Files] → [Advanced Box Settings] → [Allow to Create Personal Space].
(Settings/Registration) → [Function Settings] → [Store/Access Files] → [Advanced Box Settings] → [Allow to Create Personal Space].Select [On] → press [OK].
2.
Press [Scan and Store] or [Access Stored Files] on the Main Menu screen → press [Advanced Box].
The Log In screen is displayed.
3.
Enter the user name and password that were set in step 5 in "Registering User Information" → press [OK].

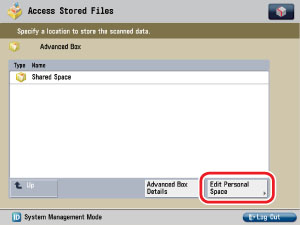
4.
Press [Edit Personal Space].
5.
Select [Create Personal Space] → press [OK].
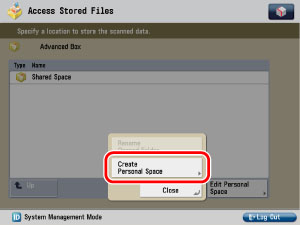
A personal space is created in the Advanced Space.
Accessing the Advanced Space from a Computer
1.
For Windows XP, click [My Network Places] → [Add a network place] → [Next] → [Next] → enter the following path for <Internet or network address:>. (Case sensitive.)
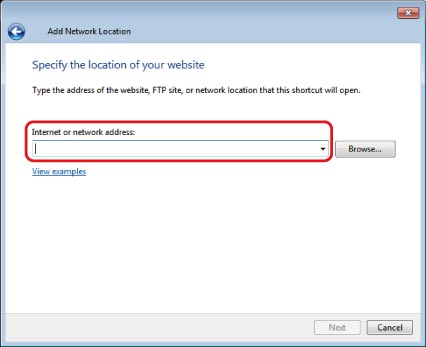
For Windows Vista/Windows 7, click [Computer] → right-click a blank area in the displayed folder → click [Add a Network Location] → [Next] → [Next] → enter the following path for <Internet or network address:>. (Case sensitive.)
For Windows Vista/Windows 7, click [Computer] → right-click a blank area in the displayed folder → click [Add a Network Location] → [Next] → [Next] → enter the following path for <Internet or network address:>. (Case sensitive.)
http://<IP address of this machine>/users
A Windows 7 screenshot is used.
To access the shared space, enter the following:
http://<IP address of this machine>/share
2.
Enter the user name and password that were set in step 5 in "Registering User Information" → click [OK].
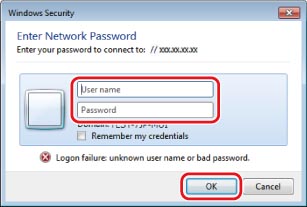
If you successfully log in, you can access the personal space in the Advanced Space.
Reference Information
Registering Shortcuts
By registering the personal space as a shortcut on your computer, you can use it as a scan folder.
Creating a Folder
You can create folders in the personal space and organize files.
Accessing by SSL
To encrypt the information when accessing the Advanced Space, press (Settings/Registration) → [Function Settings] → [Store/Access Files] → [Advanced Box Settings] → [WebDAV Server Settings] → [Use SSL] → [On]. If the SSL is valid, enter the following URL to access the machine.
(Settings/Registration) → [Function Settings] → [Store/Access Files] → [Advanced Box Settings] → [WebDAV Server Settings] → [Use SSL] → [On]. If the SSL is valid, enter the following URL to access the machine.http://<IP address of this machine>/users