Configuring Settings on the Computer for Printing
Configure the connection settings and install the printer driver on the computer so that printing can be performed with the machine from the computer via SMB network.
Connecting to the SMB Network
1
Display [Local Area Connection Properties]. Displaying [Local Area Connection Properties]
2
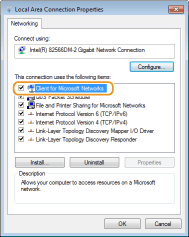
Select the [Client for Microsoft Networks] check box.

3
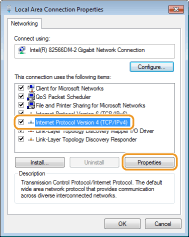
Select the [Internet Protocol Version 4 (TCP/IPv4)] or [Internet Protocol] check box and click [Properties].

4
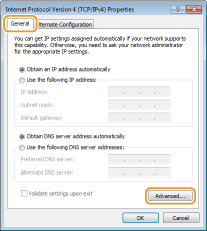
Click the [General] tab  [Advanced].
 [Advanced].
5
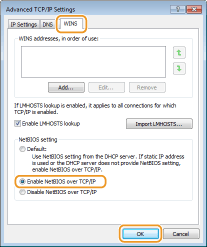
Click the [WINS] tab, select [Enable NetBIOS over TCP/IP], and then click [OK].

6
Click [OK] until all dialog boxes are closed.

Restart the computer if you are prompted to do so.
Installing the Printer Driver
Install the printer driver by following the procedure described in the "Printer Driver Installation Guide".
 |
||||||
When a port selection screen appears during installationFollow the procedure below.
|