Clearing Jams
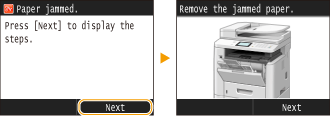
If a paper jams, <Paper jammed.> is displayed on the screen. Tap <Next> to display simple solutions*. If it is difficult to understand the procedures on the display, see the following sections to clear jams.
|
*
|
If the solution is not displayed, press
 and then select <Error Information/Notification> to display the solution. and then select <Error Information/Notification> to display the solution. |
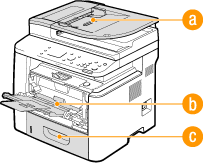
Paper Jam Locations
 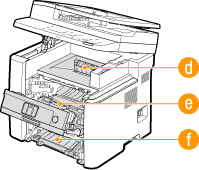 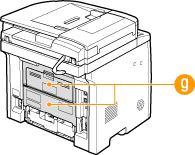 |
|
 Feeder Feeder |
|
|
 Multi-purpose tray Multi-purpose tray |
|
|
|
 Paper drawer Paper drawer |
|
|
|
 Output area Output area |
|
|
|
 Interior Interior |
|
|
|
 Duplex transport guide Duplex transport guide |
|
|
|
 Back side Back side |
 |
When removing the jammed paper, do not turn OFF the machineTurning OFF the machine deletes the data that is being printed. Be especially careful when receiving fax documents.
If paper tearsRemove all the paper fragments to prevent them from becoming jammed.
If paper jams repeatedlyTap the paper stack on a flat surface to even the edges of the paper before loading it into the machine.
Check that the paper is appropriate for the machine.
Paper Check that no jammed paper fragments remain in the machine.
Do not forcibly remove the jammed document or paper from the machineForcibly removing the paper may damage parts. If you are not able to remove the paper, contact your local authorized Canon dealer or the Canon help line. When a Problem Cannot Be Solved
|
Document Jams in the Feeder
If there are documents placed in the feeder, remove them first. Then, follow the procedure below. Do not forcibly remove jammed paper from the machine. If the jammed paper cannot be removed easily, proceed to the next step.
1
Remove the jammed document from the feeder cover.
|
1
|
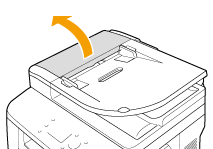
Open the feeder cover.
 |
|
2
|
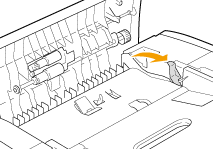
Move the lever to unlock.
 |
|
3
|
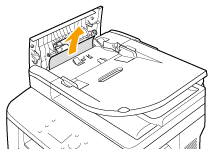
Gently pull out the document.
 |
2
Remove the jammed document from the inner cover inside the feeder.
|
1
|
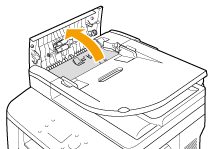
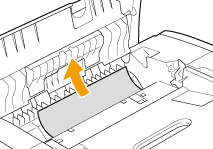
Hold the green knob, and open the inner cover.
 |
|
2
|
Gently pull out the document.
 |
|
3
|
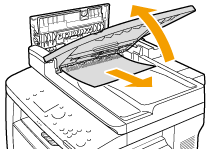
Lift the document tray, and gently pull out the document.
 |
|
4
|
Return the document tray back to position, and close the inner cover.
|
3
Return the lever back in place, and close the feeder cover.
4
Remove the jammed document from the underside of the feeder.
|
1
|
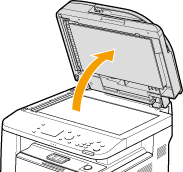
Open the feeder.
 |
|
2
|
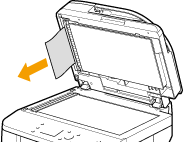
Gently pull out the document.
 |
|
3
|
Gently close the feeder.
|
Paper Jams in the Multi-Purpose Tray
If there is paper loaded in the tray, remove it first. If the jammed paper cannot be removed easily, do not forcibly pull it out, but follow the procedure for a different paper jam location indicated by the message.
1
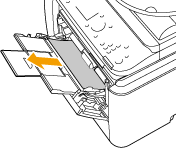
Gently pull out the paper.
2
Load the paper. Loading Paper in the Multi-Purpose Tray
3
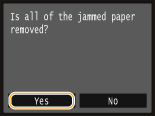
When the following message is displayed, tap <Yes>.
Paper Jams in the Paper Drawer
If the jammed paper cannot be removed easily, do not forcibly pull it out, but follow the procedure for a different paper jam location indicated by the message.
1
Pull out the paper drawer.


Make sure to hold the paper drawer with both hands, and pull it out gently. Otherwise, you may damage the paper drawer by dropping it, if it slides out too easily.
2
Gently pull out the paper.
When the optional paper feeder (drawer 2) is attached, gently pull out the paper in the same way.

3
Set the paper drawer.
When you insert the paper drawer with <Notify to Check Paper Settings> set to <On>, a confirmation screen is displayed. Notify to Check Paper Settings
4
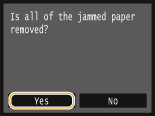
When the following message is displayed, tap <Yes>.
Paper Jams in the Output Area
If the jammed paper cannot be removed easily, do not forcibly pull it out, but follow the procedure for a different paper jam location indicated by the message.
1
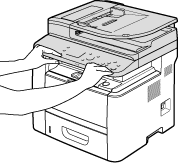
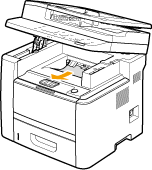
Lift the operation panel.
2
Gently pull out the paper.
3
Lower the operation panel.
4
When the following message is displayed, tap <Yes>.

Paper Jams inside the Machine
Do not forcibly remove jammed paper from the machine. If the jammed paper cannot be removed easily, proceed to the next step.
1
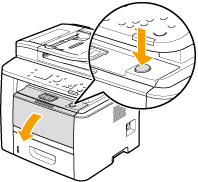
Open the front cover while holding down on the button.
2
Remove the toner cartridge.

3
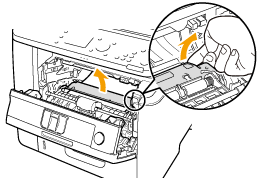
Hold the green knob and raise the transport guide.
Keep holding the transport guide until returning it back to position in step 5.
4
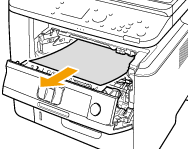
Gently pull out the paper.
Pull out the paper while holding it as horizontally as possible to prevent unfixed toner from falling.
5
Gently return the transport guide back to position.
6
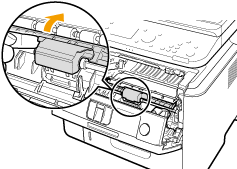
Hold the green knob, and open the roller cover.
7
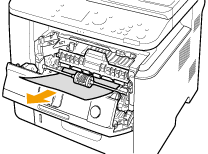
Gently pull out the paper.
8
Gently return the roller cover back to position.
9
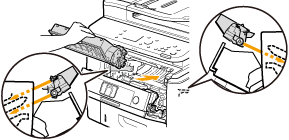
Install the toner cartridge.
Fully push it in until it cannot go any further.
10
Close the front cover.
Paper Jams at the Duplex Transport Guide
If the jammed paper cannot be removed easily, do not forcibly pull it out, but follow the procedure for a different paper jam location indicated by the message.
1
Pull out the paper drawer.


Make sure to hold the paper drawer with both hands, and pull it out gently. Otherwise, you may damage the paper drawer by dropping it, if it slides out too easily.
2
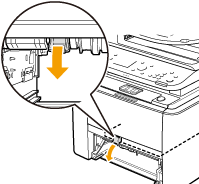
Hold the green knob and push down the duplex transport guide.
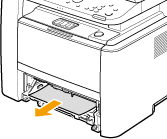
3
Gently pull out the paper.
4
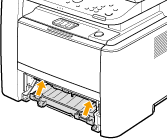
Holding the left and right side handles of the duplex transfer guide, return the guide back to position.
Fully close the guide until it clicks.
5
Set the paper drawer.
When you insert the paper drawer with <Notify to Check Paper Settings> set to <On>, a confirmation screen is displayed. Notify to Check Paper Settings
6
When the following message is displayed, tap <Yes>.

Paper Jams in the Back Side
Do not forcibly remove jammed paper from the machine. If the jammed paper cannot be removed easily, proceed to the next step.
1
Remove the jammed paper inside the upper rear cover.
|
1
|
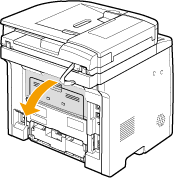
Open the upper rear cover.
 |
|
2
|
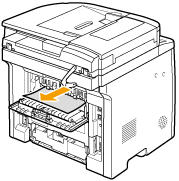
Gently pull out the paper.
 |
|
3
|
Close the upper rear cover.
|
2
Remove the jammed paper in the duplex unit.
|
1
|
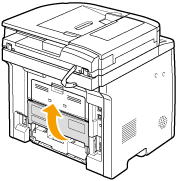
Open the lower rear cover.
 |
|
2
|
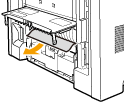
Gently pull out the paper.
 |
|
3
|
Close the lower rear cover.
|
3
When the following message is displayed, tap <Yes>.
