Timer Settings
 |
|
All the settings about the timer are listed with short descriptions. Default settings are marked with a dagger (
 ). ). |
 |
Asterisks (*)Settings marked with "*1" cannot be imported or exported.
Settings marked with "*2" may be unavailable or have different defaults depending on your country or region.
|
Date/Time Settings
Specify date and time settings, including the date format and the 12- or 24-hour clock display setting. The date and time that are printed on each fax document, report, and list are determined by these settings.
Date Format 
Select the date format (order of year, month, and day).
|
YYYY MM/DD
MM/DD/YYYY
DD/MM YYYY
 |
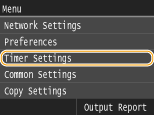
<Menu>  <Timer Settings>
  <Date/Time Settings>
  <Date Format>
  Select the date format

 <Timer Settings>
  <Date/Time Settings>
  <Date Format>
  Select the date format

Time Format
Select the 12- or 24-hour clock display setting.
|
12 Hour (AM/PM)
 24 Hour
|
<Menu>  <Timer Settings>
  <Date/Time Settings>
  <Time Format>
  Select the display setting

 <Timer Settings>
  <Date/Time Settings>
  <Time Format>
  Select the display setting

Current Date/Time Settings *1
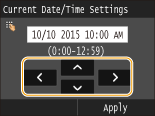
Set the current date and time. Tap  /
/ to move the cursor, and
  /
/ to specify the date and time or switch between <AM>/<PM>.
 /
/ to move the cursor, and
  /
/ to specify the date and time or switch between <AM>/<PM>.
<Menu>  <Timer Settings>
  <Date/Time Settings>
  <Current Date/Time Settings>
  Set the date and time
  <Apply>

 <Timer Settings>
  <Date/Time Settings>
  <Current Date/Time Settings>
  Set the date and time
  <Apply>

 |
|
Set <Time Zone> before setting the current date and time. If the <Time Zone> setting is changed, the current date and time are also changed accordingly.
|
 |
|
The current date and time cannot be changed for 1 hour after daylight saving time is in effect.
|
Time Zone 
Select the time zone. If the time zone setting is changed, the values set in <Current Date/Time Settings> are also changed accordingly.
|
(UTC-12:00) International Date Line West
to
(UTC) Coordinated Universal Time
 to
(UTC+14:00) Christmas Island
|
<Menu>  <Timer Settings>
  <Date/Time Settings>
  <Time Zone>
  Select a time zone

 <Timer Settings>
  <Date/Time Settings>
  <Time Zone>
  Select a time zone

 |
UTCCoordinated Universal Time (UTC) is the primary time standard by which the world regulates clocks and time. The correct UTC time zone setting is required for Internet communications.
|
Daylight Saving Time Settings *2
Enable or disable daylight saving time. If daylight saving time is enabled, specify the dates from which and to which daylight saving time is in effect.
|
Off
On
 Start: Month, Week, Day
End: Month, Week, Day
|
<Menu>  <Timer Settings>
  <Date/Time Settings>
  <Daylight Saving Time Settings>
  Select a month and day
  <Apply>

 <Timer Settings>
  <Date/Time Settings>
  <Daylight Saving Time Settings>
  Select a month and day
  <Apply>

Auto Reset Time
|
If a key is not pressed for a specified period of time, the screen and the settings are initialized to display the default screen (Auto Reset). Specify the interval at which the Auto Reset is performed. Select <0> to disable the Auto Reset function. The Auto Reset is not performed in the following cases:
The setting menu is displayed.
The machine is processing data, such as when printing documents or sending or receiving faxes.
An error message is displayed and the [Error] indicator is blinking (However, Auto Reset is performed when the error does not prevent the user from continuing to use a function.)
|
|
0 (Auto Reset is disabled.)
1 to 2
 to 9 (min.) to 9 (min.) |
<Menu>  <Timer Settings>
  <Auto Reset Time>
  Set the Auto Reset time
  <Apply>

 <Timer Settings>
  <Auto Reset Time>
  Set the Auto Reset time
  <Apply>

 |
|
The screen displayed after the Auto Reset is performed can be selected in <Function After Auto Reset>.
|
Function After Auto Reset
Select whether to return the display to the default screen after the Auto Reset is performed. If <Default Function> is selected, the main screen of the function selected in <Default Screen after Startup/Restoration> is displayed (Default Screen after Startup/Restoration). If <Selected Function> is selected, the display returns to the main screen of the function that was selected.
|
Default Function
 Selected Function
|
<Menu>  <Timer Settings>
  <Function After Auto Reset>
  Select <Default Function> or <Selected Function>

 <Timer Settings>
  <Function After Auto Reset>
  Select <Default Function> or <Selected Function>

Auto Sleep Time
If the machine has not been operated or has had no data to process for a specified period of time, the machine enters sleep mode to save energy consumption (Auto Sleep). Specify the period of time after which auto sleep is performed. Auto Sleep is not performed when the setting menu is displayed. We recommend using the factory default settings to save the most power. Entering Sleep Mode
|
3
 to 240 (min.) to 240 (min.) |
Auto Offline Time
|
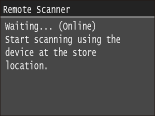
If scan is not performed within a specified period of time after the screen below is displayed (the machine is set online for scanning), the machine automatically becomes offline. Specify the time period at which the machine becomes offline. You can also set the machine to remain online.
 |
|
0 (The machine remains online.)
1 to 5
 to 60 (min.) to 60 (min.) |
<Menu>  <Timer Settings>
  <Auto Offline Time>
  Set the time period
  <Apply>

 <Timer Settings>
  <Auto Offline Time>
  Set the time period
  <Apply>
