Starting and Exiting the Mail Merge Print Settings Mode
This section describes how to start and exit the Mail Merge Print Settings Mode of Desktop Editor.
Starting
This section describes how to start the Mail Merge Print Settings Mode.
|
IMPORTANT
|
|
When opening an IWB document in which information for connecting to a database is stored, starting the Mail Merge Print Settings Mode causes the database to be automatically connected to and the Mail Merge data to be updated.
If the connection to the database is severed, data is not displayed until the connection is reestablished.
|
|
NOTE
|
|
A single Mail Merge Print Settings Mode screen enables you to edit only a single document.
For information on the screen transition of Desktop Editor, see the following.
|
1.
Click [Mail Merge Print Settings] on the ribbon.
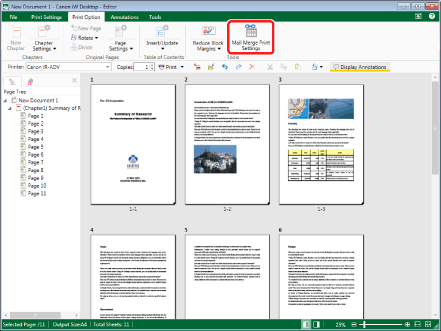
[Specify Database] is displayed.
If a database is already registered, the Mail Merge Print Settings Mode starts and the [Mail Merge Print] tab is displayed on the ribbon.
|
NOTE
|
|
This operation can also be performed with the tool buttons. If tool buttons are not displayed on the toolbar of Desktop Editor, see the following to display them.
While the Mail Merge Print Settings Mode is running, tabs other than the [Mail Merge Print] tab are not displayed on the ribbon.
|
2.
Select [Specify database file] and click [OK].
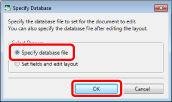
The Mail Merge Print Settings Mode starts and the [Mail Merge Print] tab is displayed on the ribbon.
[Database Connection/Settings] is displayed.
|
NOTE
|
|
To only create the layout and import the database later, select [Set fields and edit layout] and click [OK]. The Mail Merge Print Settings Mode starts and the [Mail Merge Print] tab is displayed on the ribbon.
|
3.
Click [Browse] in [Database Path].
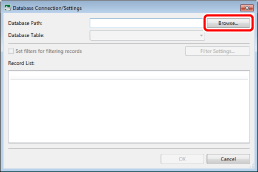
[Select File] is displayed.
4.
Select the file, and click [Open].
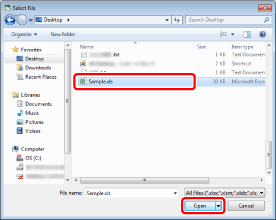
[Database Connection/Settings] is displayed again.
The record that will be used is displayed in [Database Connection/Settings].
|
NOTE
|
|
The files that can be used as [Database Path] are as follows:
txt (*.txt)
csv (*.csv)
Excel (*.xls/*.xlsx/*.xlsb/*.xlsm)
When setting an Excel file with multiple sheets as a connection destination, you can select a sheet to use as a database in [Database Table].
|
5.
Filter the records as necessary.
For information on the filter settings, see the following.
6.
Click [OK].
|
NOTE
|
|
When you connect to the database, the name of the connected database file is displayed on the status bar.
|
Exiting
This section describes how to exit the Mail Merge Print Settings Mode.
1.
Click [Exit Settings] on the ribbon.
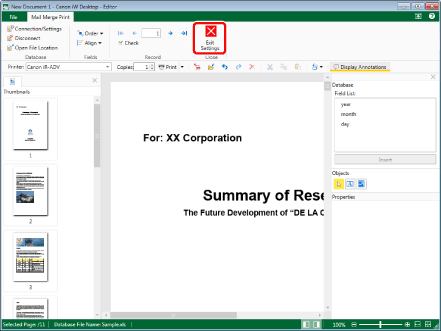
The [Mail Merge Print] tab is closed, and the Mail Merge Print Settings Mode ends.
|
NOTE
|
|
To save Mail Merge print settings in a document, save the document in the IWB format (*.iwb). For more information, see the following.
|