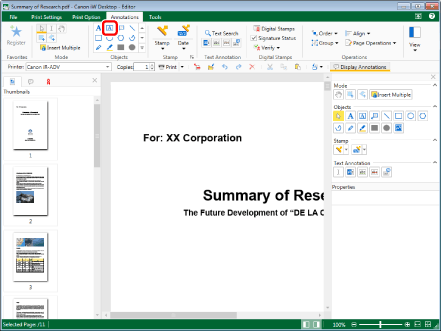
Inserting Text Boxes
With Desktop Editor, you can insert a text box (framed text) into a document as an annotation.
|
NOTE
|
|
When [Line Style] of a text box (framed text) is specified as [No Line], only text strings (frameless text) can be inserted. Alternatively, [Text] can be used to insert only text strings (frameless text).
When inserting fixed text, use [Stamp].
|
Inserting New Text Boxes
This section describes how to insert a text box into a document as a new annotation.
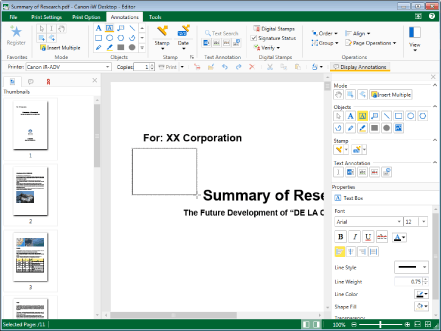
1.
Click  (Text Box) on the ribbon.
(Text Box) on the ribbon.Or, click  (Text Box) on the Details Window.
The properties of the text box are displayed on the Details Window.
|
NOTE
|
|
If the Details Window is not displayed, see the following.
This operation can also be performed with the tool buttons. If tool buttons are not displayed on the toolbar of Desktop Editor, see the following to display them.
You can also insert text boxes multiple times. For more information, see the following.
|
2.
Move the mouse pointer to the Work Window.
The shape of the mouse pointer changes to  .
.
|
NOTE
|
|
To cancel the insertion process, do one of the following.
Click
 (Select Object) on the ribbon (Select Object) on the ribbonClick
 (Select Text) on the ribbon (Select Text) on the ribbonClick
 (Grab Mode) on the ribbon (Grab Mode) on the ribbonClick the command selected on the ribbon again
Click
Click
Click
Click the selected button on the Details Window again
Press the [Esc] key on the keyboard
|
3.
Drag the mouse pointer from the starting vertex to the ending vertex of the text box (frame).
|
NOTE
|
|
You can insert a square text box by dragging the mouse pointer while holding down the [Shift] key on the keyboard.
|
4.
Enter text.
5.
Select the range of text to set the properties for.
|
NOTE
|
|
To change the properties of the entire text box, select the annotation. For more information on how to select an annotation, see the following.
|
6.
Configure the properties of the text box.

|
[Font]
|
Configure the font of text boxes.
|
|
[Font]
|
Select the font to use from the list displayed when you click ▼. The list displays the fonts installed in your computer.
|
|
[Font Size]
|
Select the font size to use from the list displayed when you click ▼. You can also enter the font size directly. Font sizes that can be configured are between 3.0 points and 72.0 points. If it is entered directly, you can enter up to a single decimal place.
|
|
[Bold]
|
Makes the string bold.
|
|
[Italic]
|
Makes the string italic.
|
|
[Underline]
|
Underlines the string.
|
|
[Strikethrough]
|
Adds a strikethrough to the string.
|
|
[Font Color]
|
Select the font color you want to use from the list displayed when you click
|
|
[Left]
|
Aligns the text to the left.
|
|
[Center]
|
Aligns the text in the center.
|
|
[Right]
|
Aligns the text to the right.
|
|
[Justify]
|
Justifies the text.
|
|
[Line Style]
|
Select the line style you want to use from the list displayed when you click ▼.
|
|
[Line Weight]
|
Set the line thickness. You can specify a line thickness from 0.25 point to 12.00 point. You can also use
|
|
[Line Color]
|
Select the line color you want to use from the list displayed when you click
|
|
[Shape Fill]
|
Select the color you want to use to fill from the list displayed when you click
|
|
[Transparency]
|
The slider position and the numeric value indicate the degree of transparency of the text boxes in the annotation. To change the degree of transparency, move the slider to the left or right, or enter a numeric value. You can also use
|
|
NOTE
|
|
If you select [More Colors] in [Font Color], [Line Color], or [Shape Fill], [Color] is displayed and you can set a color that is not listed in [Font Color], [Line Color], or [Shape Fill].
The settings in [Font] are only applied to the selected text. However, the following settings are applied on a line by line basis. They are applied to the line that includes the selected text or the line where the caret is displayed.
[Left]
[Center]
[Right]
[Justify]
Settings other than those in [Font] are applied to the entire annotation.
Properties can also be set from ribbon commands or tool buttons. For information on the commands and tool buttons that can set properties, see the following.
|
7.
Click on the Work Window outside the text box you inserted to deselect the text box.
|
NOTE
|
|
To enter a line break, press the [Enter] key on the keyboard.
If the text string is too long to fit in the text box, a line break is automatically inserted.
If there are too many lines of text to fin in the text box, the text is scrolled within the text box, and the last line of the text is always displayed.
|
Changing Text Box Content
This section describes how to edit the content of a text box inserted into a document.
1.
Select the target text box in the Work Window.
|
NOTE
|
|
For more information on how to select an annotation, see the following.
|
2.
Click the text in the text box to change the content.
The shape of the mouse pointer changes to  .
.
3.
Change the text.
|
NOTE
|
|
To enter a line break, press the [Enter] key on the keyboard.
If the text string is too long to fit in the text box, a line break is automatically inserted.
If there are too many lines of text to fin in the text box, the text is scrolled within the text box, and the last line of the text is always displayed.
|
4.
Click on the Work Window outside the text box you edited to deselect the text box.
|
NOTE
|
|
For details on how to copy text box content, see the following.
|