
Document Insertion Unit-N
0UUY-0LS 0X7F-0SW 0X6E-0SW 0X7C-0SW 0WXY-0UA 0WR6-0UH 0WR5-0UH 0YWE-0SW
If the "Document Insertion Unit-N" is attached to the"Staple Finisher-W PRO" or "Booklet Finisher-W PRO," you can use paper different than the main document pages for a cover or sheet insertion.
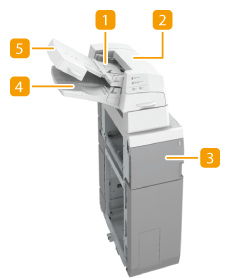
 Upper tray
You can load paper you want to use as a cover, sheet insertion, or job separator, etc. Loading Paper into the Document Insertion Unit-N
 Upper cover
Open to remove jammed paper. Paper Jams in the Document Insertion Unit-N
 Front cover
Open to remove jammed paper. Paper Jams in the Document Insertion Unit-N
 Lower tray
You can load paper you want to use as a cover, sheet insertion, or job separator, etc. Loading Paper into the Document Insertion Unit-N
 Tray cover
Lift to load paper in the lower tray.
Loading Paper into the Document Insertion Unit-N
 |
For information on the paper sizes that can be loaded into the Document Insertion Unit-N, see Available Paper. If you are loading preprinted paper to use as the cover page into the document insertion unit, you must load the paper face up. |
1
Adjust the slide guides to fit the paper size.
 To load paper in the upper tray:
1 | Adjust the slide guide. 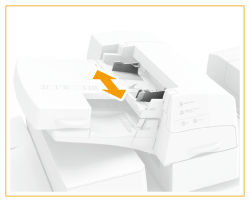 |
 To load paper in the lower tray:
1 | Open the tray cover. 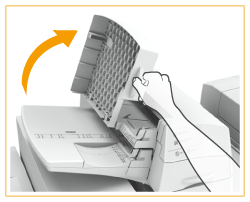 |
2 | Adjust the slide guide. 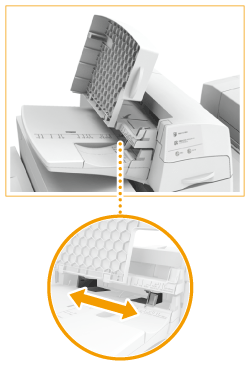 |
2
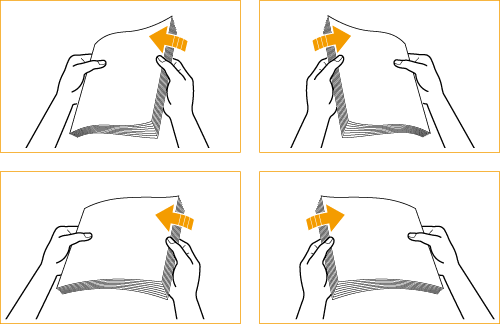
Prepare the paper to load.
Fan the sheets several times and align the edges to facilitate feeding.
3
Load the paper stack into the Document Insertion Unit-N.
 If you want to load paper into the upper tray:
1 | Load the paper face up. 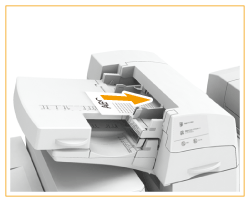 |
 If you want to load paper into the lower tray:
1 | Load the paper face up. 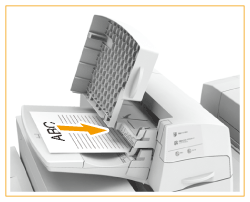 |
2 | Close the tray cover.  When you load tab paper, load it in reverse tab order and face down with the tabs on the opposite side of the feeding direction. 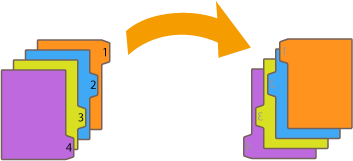 |
4
Select the paper size and press <Next>.

Select the same paper size that is loaded in the Document Insertion Unit-N.
5
Select the paper type and press <OK>.
 |
Make sure that the height of the paper stack does not exceed the loading limit mark (  ). ). |
 |
You cannot make copies or print on paper that is loaded in the Document Insertion Unit-N. |