
Loading Tab Paper
0YRY-029 1100-029 10XJ-029 1106-029 10YY-029 10H3-029 108A-029 1116-029 10H4-029
This section describes how to load tab paper in the paper drawer 2 using the Tab Feeding Attachment-F. The Tab Feeding Attachment-F is optional. Optional Equipment.
 |
Tab paper can also be loaded in the multi-purpose tray. The optional Tab Feeding Attachment-F is required to load tab paper in paper drawer 2. |
Tab Paper Type
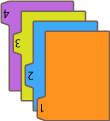
There are two kinds of tab paper: right order tab paper and reverse order tab paper.
Right order tab paper | Reverse order tab paper |
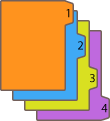 |  |
When you load tab paper into the paper drawer 2, load right order tab paper face up with the tabs on the left side.
For the reverse order tab paper, load face up with the tabs on the left side in the same printing order as the right order tab paper.
For the reverse order tab paper, load face up with the tabs on the left side in the same printing order as the right order tab paper.
Loading Tab Paper in the Paper Drawer 2
1
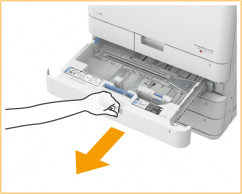
Hold the handle of the paper drawer 2 and pull it out until it stops.
2
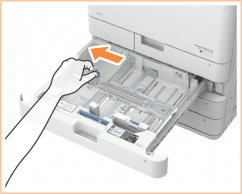
Adjust the position of the paper guides.
While pressing the top part of the left guide, slide it to the left edge.
3
Prepare the Tab Feeding Attachment-F.
4
Attach the Tab Feeding Attachment-F aligning the mark for LTR.
 | Place the Tab Feeding Attachment-F so that it is aligned with the mark for LTR. 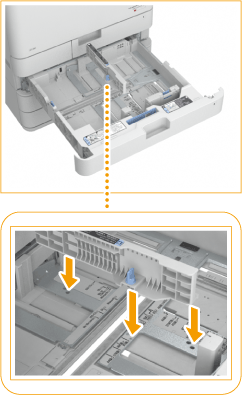 |
 | Turn the knob to secure the Tab Feeding Attachment-F. 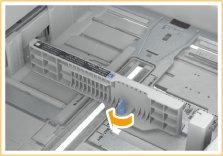 |
5
Load the tab paper.
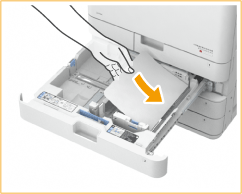
Load the tab paper with the tabs on the left side.

Do not exceed the load limit line when loading paper
Make sure that the paper stack does not exceed the load limit line ( ). Loading too much paper can cause paper jams.
 ). Loading too much paper can cause paper jams.
6
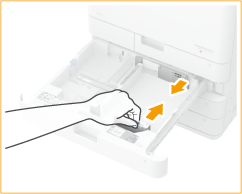
While pressing the top part of the front guide, slide it until it is aligned with the tab paper.
7
Gently insert the paper drawer into the machine.
8
Specify the paper size and type.
For details about how to specify the paper size and type, see Specifying Paper Size and Type in the Paper Drawer. If you do not change the settings, the machine cannot print properly.