Adjusting the Saddle Stitch Fold Position and Staple Position
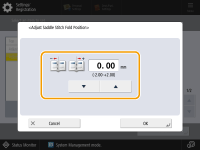
Adjust the saddle stitch fold position and staple position so that they are at the center of the paper. Print a test page, check the current state of the fold position and the shift width on the test page, and then perform adjustment.

1
Press  (Settings/Registration)
  <Adjustment/Maintenance>
  <Adjust Action>
  <Adjust Saddle Stitch Fold Position/Stitch Position>.
 (Settings/Registration)
  <Adjustment/Maintenance>
  <Adjust Action>
  <Adjust Saddle Stitch Fold Position/Stitch Position>.
2
Check the displayed instructions, and press <Next>.

If the test page has already been printed, press <Do Not Print Test Page> to select it, and then press <Next>.
3
Select the paper source with the loaded usable paper, and press <Start Printing>.
A test page is printed.
4
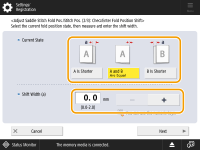
Select the current state of the fold position and set the shift width.

Check the current state of the fold position and the shift width on the test page.
5
Press <Next>.
6
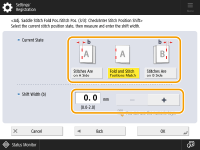
Select the current state of the staple position and set the shift width.

Check the current state of the staple position and the shift width on the test page.
7
Press <OK>.
8
Check the test page, and if there are no problems, press <Done>.
The settings are applied.
9
Press <Done>.
If further adjustment is needed, press <Re-Adjust> and repeat Steps 4 to 8.