Enhancing the Security of Electronic Files
 | Electronic files are vulnerable to security threats, such as those of files being viewed easily and tampered without leaving any traces. When scanning important papers, you can enhance the security of the files by encrypting or adding a digital signature to them. |
 |
Only PDF files can be encrypted. PDF and XPS files can have digital signatures. For PDF files, you can also use the encryption and digital signature functions together. |
Performing Encryption
Setting a password when scanning an original enables PDF files to be encrypted for sending/saving. This helps reduce the risk of the files being viewed or edited by others.
1
Place the original. Placing Originals
2
Press <Scan and Send>. <Home> Screen
3
Specify the destination on the Scan Basic Features screen. Scan Basic Features Screen
4
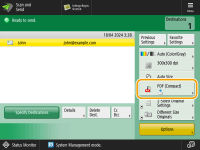
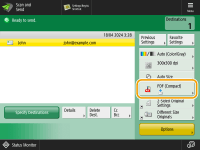
Press the setting button for file format.

5
Press <PDF>  <Encrypt>.
 <Encrypt>.
To perform encryption, it is necessary to disable <Format to PDF/A>.
You cannot set the Encrypted PDF mode when <Auto (OCR)> is set for <File Name>.
This mode can be used only if an e-mail address or file server is specified as the destination.
6
Set the password and press <OK>.

 <Encryption Level>
Select the encryption level. If you want to use <Acrobat 9.0 or Equivalent/256-bit AES> rather than <Acrobat 10.0 or Equivalent/256-bit AES> as the encryption level, use this setting to change the selections you can make. <256-bit AES Settings for Encrypted PDF>
 <Password Required to Open Document>
Enables you to set the password that is required when opening the file. Press <Password Required to Open Document>  <Password to Open Doc.> to enter the password.
 <Password to Open Doc.> to enter the password.
 <Password Required to Change Permission>
Enables you to set the password that is required when printing the file or editing the file, such as deleting pages, as well as to specify the operations that are allowed. Press <Password Required to Change Permission>  <Permission Password> to enter the password, and then specify the operations to be permitted.
 <Permission Password> to enter the password, and then specify the operations to be permitted.
<Allow Printing>
<Do Not Allow>: Printing is not allowed.
(Even if you select <Do Not Allow>, the document can be printed if it is opened with the permission password in Adobe Acrobat 5 or earlier.)
(Even if you select <Do Not Allow>, the document can be printed if it is opened with the permission password in Adobe Acrobat 5 or earlier.)
<Allow (Low Resolution Only)>: Only low-resolution printing is allowed.
(Appears only if you select <Acrobat 6.0 or Later/128-bit RC4>, <Acrobat 7.0 or Later/128-bit AES>, <Acrobat 9.0 or Equivalent/256-bit AES>, or <Acrobat 10.0 or Equivalent/256-bit AES>.)
(Appears only if you select <Acrobat 6.0 or Later/128-bit RC4>, <Acrobat 7.0 or Later/128-bit AES>, <Acrobat 9.0 or Equivalent/256-bit AES>, or <Acrobat 10.0 or Equivalent/256-bit AES>.)
<Allow>: Printing is allowed.
<Allow Changes>
<Do Not Allow>: Changing of files is not allowed.
<Insert, Delete, or Rotate Pages>: Inserting, deleting, and rotating pages are allowed. (Appears only if you select <Acrobat 6.0 or Later/128-bit RC4>, <Acrobat 7.0 or Later/128-bit AES>, <Acrobat 9.0 or Equivalent/256-bit AES>, or <Acrobat 10.0 or Equivalent/256-bit AES>.)
<Signature Field Signing>: If there is already a signature field in the PDF, adding a digital signature to that signature field is allowed. (Appears only if you select <Acrobat 6.0 or Later/128-bit RC4>, <Acrobat 7.0 or Later/128-bit AES>, <Acrobat 9.0 or Equivalent/256-bit AES>, or <Acrobat 10.0 or Equivalent/256-bit AES>.)
<Commenting and Signature Field Signing>: Adding comments, and adding a digital signature to a signature field (if there is already a signature field in the PDF) are allowed.
<Changes but Add Comments/Extract Pages>: Changes to the document are allowed, except for adding comments and extracting pages. (Appears only if you select <Acrobat 3.0 or Later/40-bit RC4>.)
<Changes but Extract Pages>: Changing of files except for extracting pages is allowed.
<Enable Copying and Extraction of Images/Text>
Appears only if you select an item other than <Acrobat 3.0 or Later/40-bit RC4> for <Encryption Level>. If you select this item, you can copy or extract image/text from the scanned file.
<Enable Access for the Visually Impaired>
Appears only if you select an item other than <Acrobat 3.0 or Later/40-bit RC4> for <Encryption Level>. Selecting this item enables functions for reading aloud the text inside a file for the visually impaired.
<Enable Accessibility, Copy, Extraction of Image/Text>
Appears only if you select <Acrobat 3.0 or Later/40-bit RC4> for <Encryption Level>. Selecting this key sets both <Enable Copying and Extraction of Images/Text> and <Enable Access for the Visually Impaired> at the same time.
 |
If you are logging in to the machine with personal authentication management (Managing Users), the <Store Password> button is displayed. Pressing this button saves the passwords you entered so that you can eliminate the need to enter passwords for the next setting. One password can be stored for each user. If you enter a new password when a password is already stored, the existing password is overwritten (the password is deleted if it is left blank). You cannot set the same password for both <Password to Open Document> and <Permission Password>. If you leave <Password to Open Document> or <Permission Password> empty, the stored password is erased. If you log in using User Authentication when all of the following conditions are true, multiple passwords may exist. In this case, a message confirming whether or not to use the password stored in <Store Password> may appear. Press <Yes> to use the password stored in <Store Password>. Press <No> to use the password registered in Favorite Settings. A password is stored in <Store Password> An encrypted PDF file is stored in Favorite Settings The encrypted PDF file is recalled and sent from Favorite Settings To set digital signatures when <Password Required to Change Permission> is set, set <Allow Changes> to <Changes but Extract Pages>. Even if you set restrictions for a PDF file with <Permission Password>, some of the restrictions may be ignored if the reader opens the PDF with certain software. |
7
Press  (Start).
 (Start).
Originals are scanned and sending/saving starts.
Adding a Digital Signature
You can convert scanned originals into PDF/XPS files with a digital signature. A digital signature is similar to the act of signing and sealing papers, which enables you to check who created the file and if the file was tampered or forged after it was signed. For detailed information about a digital signature and its settings, see Adding a Digital Signature to Sent Files.
1
Place the original. Placing Originals
2
Press <Scan and Send>. <Home> Screen
3
Specify the destination on the Scan Basic Features screen. Scan Basic Features Screen
4
Press the setting button for file format.

5
Press <PDF> or <XPS>  <Add Digital Signatures>.
 <Add Digital Signatures>.
If you do not log in to the machine with personal authentication management and select <XPS>, press <Add Device Signature>.
6
Select the digital signature and press <OK>.

 <Device Signature>
The name of the machine is added to the file as a signature. The reader can verify that the file is scanned from the machine.
 <User Signature>
The name of the user who logs in to the machine with personal authentication management is added to the file as a signature. The reader can verify that the file is scanned by the user.
7
Press  (Start).
 (Start).
Originals are scanned and sending/saving starts.
 |
Making a digital signature recognized at a glance by the reader (visible signature) (only for a PDF file)Pressing <Visible Signatures> makes the signature appear on the first page of the file, enabling the reader to check at a glance who created the file. When using together with PDF file encryptionIf you want to set a password for <Password Required to Change Permission> when encrypting a PDF file, select <Changes but Extract Pages> for <Allow Changes>. Performing Encryption Setting S/MIME enables you to send an e-mail with a digital signature as well as encryption. <S/MIME Settings> |